Want to create dreamlike images that stop viewers mid-scroll? This Photoshop tutorial walks you through building a surreal scene from scratch.
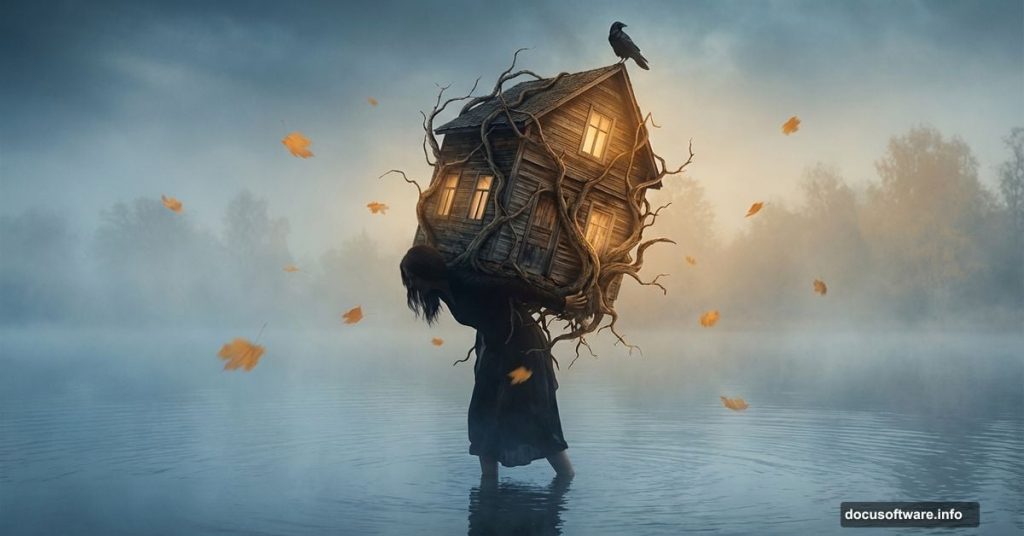
We’ll combine multiple elements into one cohesive piece. A woman stands in a misty lake, carrying an entire house on her back. Dead branches twist around the structure. A crow perches ominously. Leaves drift through the air.
Sound complex? It’s actually straightforward once you break it down into steps. Plus, you’ll learn techniques you can apply to countless other projects.
What You’ll Need Before Starting
Gather these resources first. Having everything ready makes the process smoother.
Stock Images Required:
- Lake background with trees
- Full-body model photo
- Close-up foot image (for perspective correction)
- House photograph
- Dead tree branches
- Crow image
- Falling leaf textures
Photoshop Version:
Any recent version works. Most tools we’ll use have existed for years. However, newer versions offer Smart Objects and better masking tools that make life easier.
Skill Level:
Intermediate works best. You should know basic selection tools, layers, and masks. But I’ll explain each step clearly. So even beginners can follow along with patience.

Setting Up Your Canvas
Create a new document at 2674×2000 pixels. That’s a good size for detailed work without overwhelming your computer.
Fill the background with white. This gives you a clean slate. Plus, white makes it easier to spot edge issues when composing elements.
Now drag in your lake image. Use the Move Tool (V shortcut) to position it. Then press Ctrl+T to activate Free Transform. Scale the image to fill your canvas completely.
Creating Atmospheric Depth
Real scenes have depth. Distant objects look softer and hazier. Let’s replicate that effect.
Soften Background Trees:
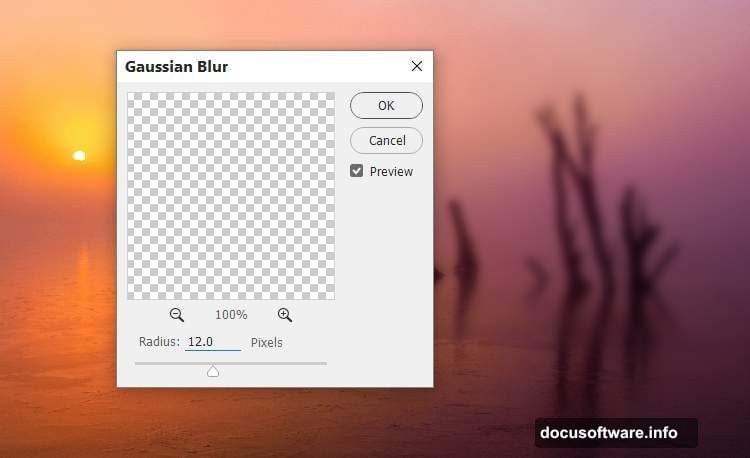
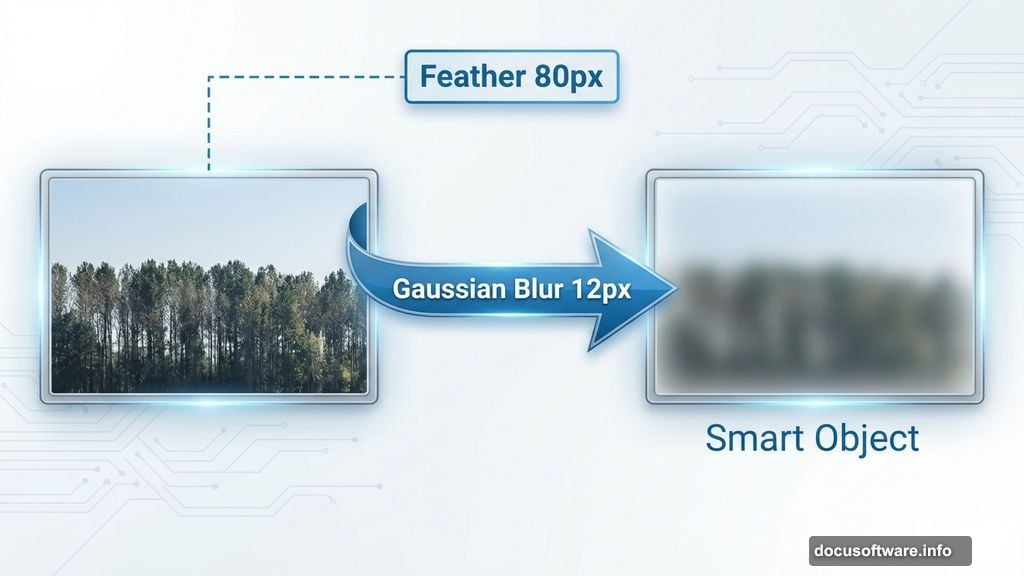
Select the Lasso Tool (L). Draw around the distant trees. Set feather radius to 80 pixels before making the selection. This creates a soft edge transition.
Hit Ctrl+J to duplicate just that selection onto a new layer. Right-click and convert to a Smart Object. This lets you adjust the blur later if needed.
Go to Filter > Blur > Gaussian Blur. Set radius to 12 pixels. The trees now recede into atmospheric haze. Much more realistic.
Color Correction:
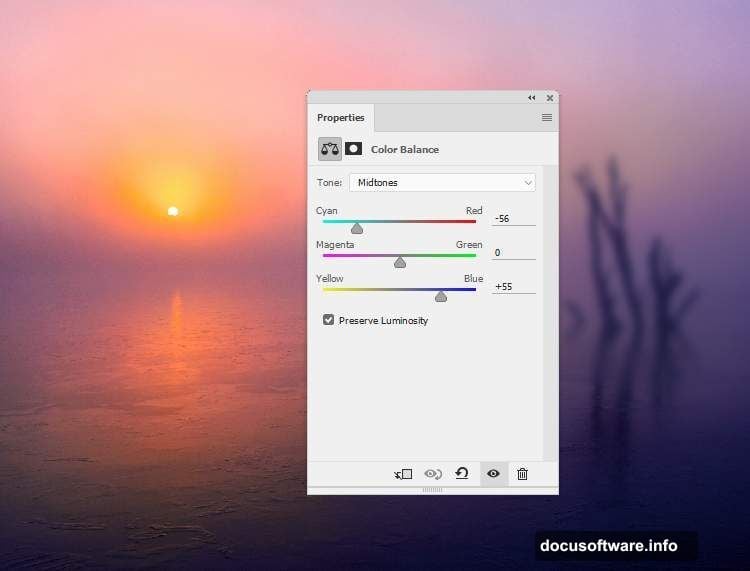
Add a Curves adjustment layer. Clip it to your blurred trees layer. Tweak the curve slightly to match the overall scene lighting.
Then create a Color Balance adjustment layer above everything. Adjust the Midtones. Push toward cooler tones for that misty, otherworldly feel.
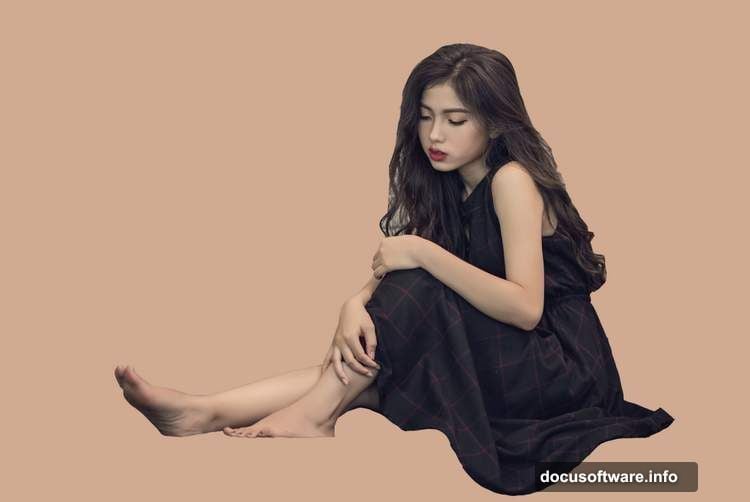
Extracting and Positioning Your Model
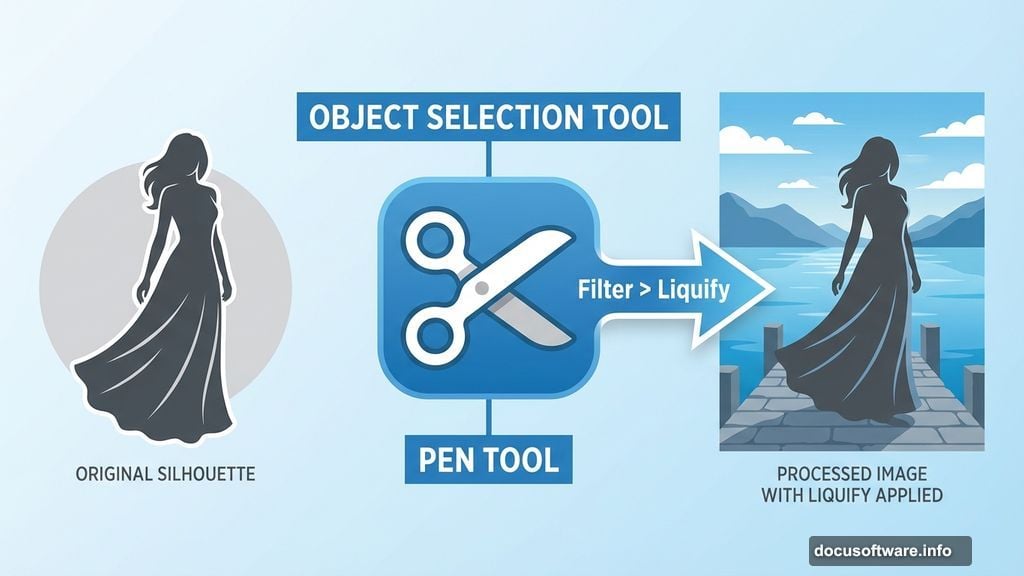
Remove the model from her original background. Photoshop’s Object Selection Tool makes this quick. Or use the Pen Tool for maximum precision.
Paste her onto your lake scene. But here’s where beginners often mess up. The perspective doesn’t match yet.
Fix Dress Perspective:
Go to Filter > Liquify. Select the Forward Warp Tool (W). Gently push the bottom of the dress to follow the ground’s angle. Small adjustments work better than dramatic pushes.
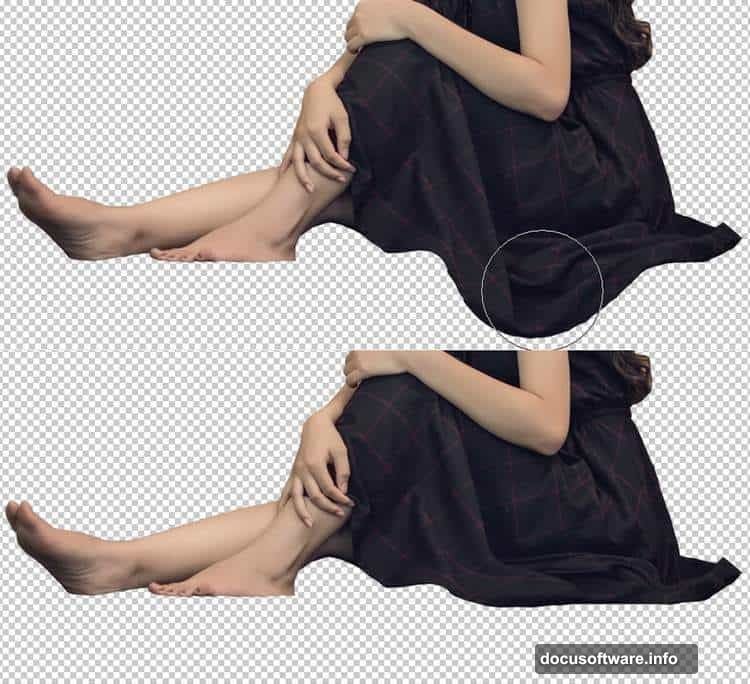
Add a layer mask. Use a hard black brush to remove stray hair, dress fragments, and the original foot. We’ll replace that foot next.
Replacing the Foot for Better Perspective
The model’s original foot probably doesn’t match the ground angle. Let’s fix that.
Open your foot reference image. Select just the right foot. Copy it to your main document.
Flip it horizontally (Edit > Transform > Flip Horizontal). Position it where the left foot should be. Use Ctrl+T to rotate slightly until the angle looks natural.
Add a mask. Use a soft black brush around 40% opacity. Blend the new foot into the existing leg. Build up the blending gradually. This prevents harsh visible seams.
Match the Color:
Create a Hue/Saturation adjustment layer. Clip it to the foot layer. Reduce saturation slightly to match the overall scene’s muted tones.
Adding the House Element
This is the surreal centerpiece. Import your house photograph.
Scale it appropriately. The house should look heavy but not overwhelmingly large. Think about real proportions. How big would a house need to be for someone to carry it?
Position it on the model’s back and shoulders. Adjust the angle so it appears to rest there naturally. Gravity matters even in surreal art.
Masking the House:
Add a layer mask to the house. Paint away portions that would be hidden behind the model’s body. This sells the illusion that she’s actually carrying the structure.
Use a soft brush where the house meets the body. Harder edges work for architectural details against the sky.
Decorating With Dead Branches
Dead branches add ominous atmosphere. They break up the house’s clean lines.
Import your branch images. Arrange them around and through the house structure. Some should appear in front, others behind.
Creating Depth:
Place branches on multiple layers. Apply slight Gaussian Blur to some layers. This creates foreground, middle ground, and background elements.
Branches in the foreground should be slightly blurred. This mimics how your eye naturally focuses. It makes the composition feel more photographic.
Adding the Crow
A crow perched on the house adds narrative. It suggests abandonment, mystery, or transformation.
Place the crow on a structural element. The roof peak works well. Or perhaps a windowsill.
Matching the Lighting:
Create a Curves adjustment layer for the crow. Clip it to the bird layer. Adjust shadows and highlights to match your main scene’s lighting direction.
Add a subtle drop shadow. Keep it soft and transparent. Too heavy looks fake. Just a hint grounds the bird in the scene.
Scatter Falling Leaves
Falling leaves suggest movement and passage of time. They add visual interest across the composition.
Import your leaf textures. Duplicate them across multiple layers. Vary the size, rotation, and position.
Creating Motion Blur:
Select some leaf layers. Apply Filter > Blur > Motion Blur. Adjust the angle to suggest downward diagonal movement. Vary the blur intensity. Some leaves fall faster than others.
Depth Through Blur:
Leaves closer to the camera should be sharper. Background leaves get more blur. This reinforces depth perception throughout your scene.
Final Color Grading
Now unify everything with consistent color treatment.
Global Adjustments:
Create a Color Lookup adjustment layer at the top of your stack. Try different LUTs until you find one that enhances the mood. Or build custom color grades with multiple adjustment layers.
Add a Curves adjustment layer. Create an S-curve for contrast. Push shadows darker and highlights brighter. But keep it subtle.
Selective Color Adjustments:
Use Color Balance to shift specific tonal ranges. Push shadows toward cool blues. Move midtones slightly warmer. This creates visual tension that draws the eye.
Create a Selective Color adjustment layer. Tweak individual color channels. Reduce yellow in greens for a more muted, aged look. Boost cyan in blues for that otherworldly atmosphere.
Adding Final Atmospheric Effects
These finishing touches make everything cohesive.
Subtle Vignette:
Create a new layer. Fill it with white. Set blend mode to Multiply. Add a layer mask. Use a large, soft black brush at low opacity. Paint from the edges toward the center. This darkens corners subtly.
Light Rays:
Create a new layer. Set blend mode to Screen. Use the Gradient Tool with white-to-transparent. Draw diagonal gradients suggesting light breaking through mist. Reduce opacity to taste.
Final Sharpening:
Flatten a copy of your image (Ctrl+Alt+Shift+E). Apply Filter > Sharpen > Smart Sharpen. Use Amount 50-80%, Radius 0.5-1.0 pixels. This brings back detail without creating artifacts.
Add a mask to this sharpened layer. Paint away sharpening from any areas that should stay soft, like background elements or motion-blurred leaves.
Common Mistakes to Avoid
Watch out for these issues that break immersion.
Inconsistent Lighting:
Every element must share the same light direction. If the model is lit from the left but the house shows right-side lighting, viewers notice immediately. Match shadow directions across all elements.
Scale Problems:
Objects must maintain realistic relative sizes. A tiny house on someone’s back reads as miniature, not surreal. Keep proportions believable within the fantasy context.
Over-Sharpening:
Too much sharpening creates harsh halos and artifacts. Apply sharpening selectively. Soft, atmospheric elements should stay soft.
Flat Composition:
Use overlapping elements, varied blur, and atmospheric haze. These create depth. Without depth cues, everything looks pasted together.
Why This Technique Matters
Surreal photo manipulation teaches fundamental compositing skills. You learn to blend disparate elements convincingly.
These skills transfer to commercial work. Product photography, advertising, concept art—all use similar techniques. Master this and you’ve got marketable abilities.
Plus, surreal imagery stands out. In a world of filtered selfies and generic stock photos, unique compositions grab attention. That matters whether you’re building a portfolio or a social media presence.
Taking It Further
Once you’ve completed this piece, try variations.
Replace the house with different objects. A clock tower. A ship. A mountain. The same core techniques apply.
Change the model’s pose or expression. Swap the crow for different animals. Each choice shifts the narrative and mood.
Experiment with different color grades. Cool blues suggest melancholy. Warm oranges imply sunset optimism. Color dramatically affects emotional impact.
Most importantly, analyze what works and why. Study the relationships between elements. Notice how small adjustments to blur, color, or positioning change the entire feel. That awareness makes you a better artist.
Your surreal vision deserves skillful execution. Now you’ve got the tools to make it happen.