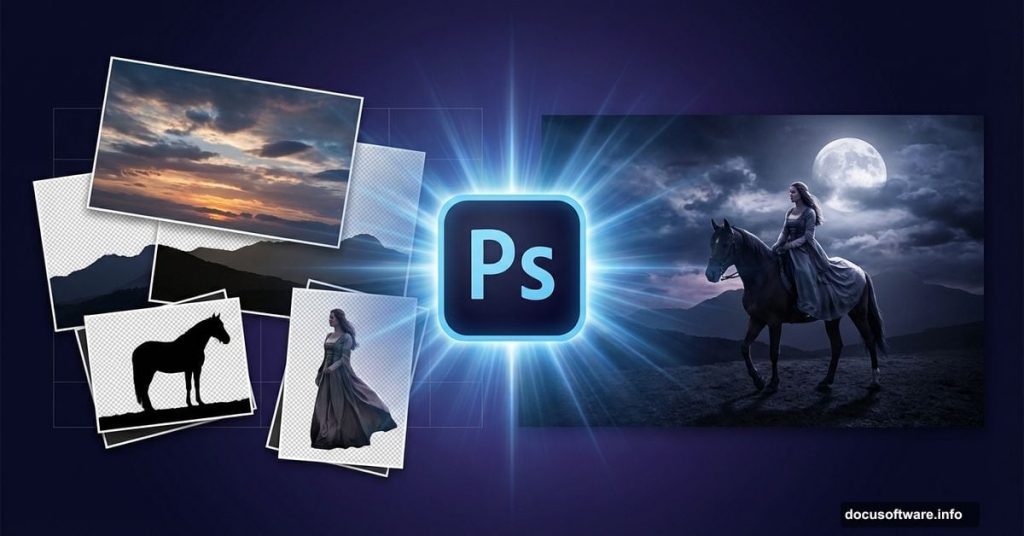
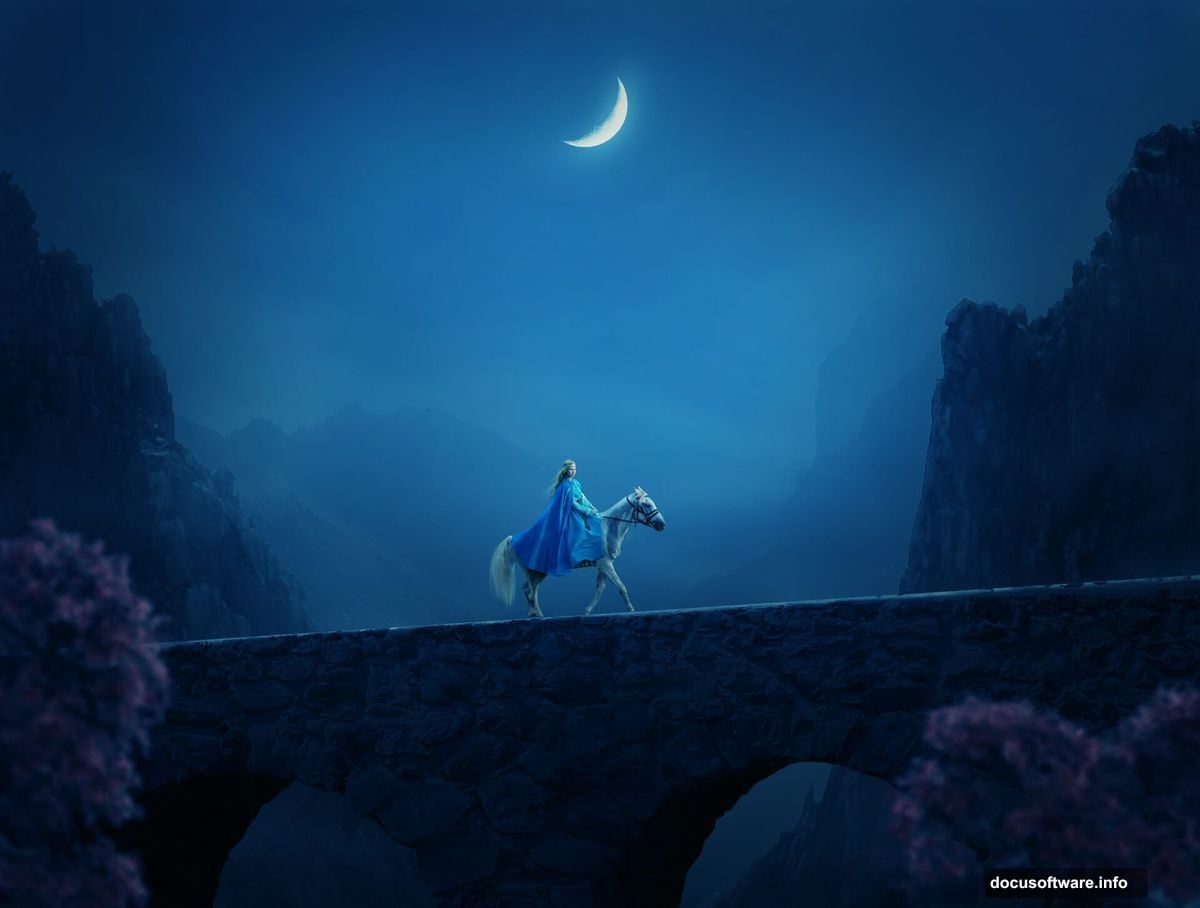
Want to create dramatic fantasy photo manipulation? This tutorial walks you through building a complete medieval night scene with a woman on horseback.
The technique combines multiple stock photos into one atmospheric composition. You’ll learn to blend landscapes, adjust lighting for nighttime ambiance, and integrate foreground elements seamlessly. Plus, the methods work for any moody fantasy scene you want to create.
Let’s build something dramatic.
Set Up Your Canvas and Sky Foundation
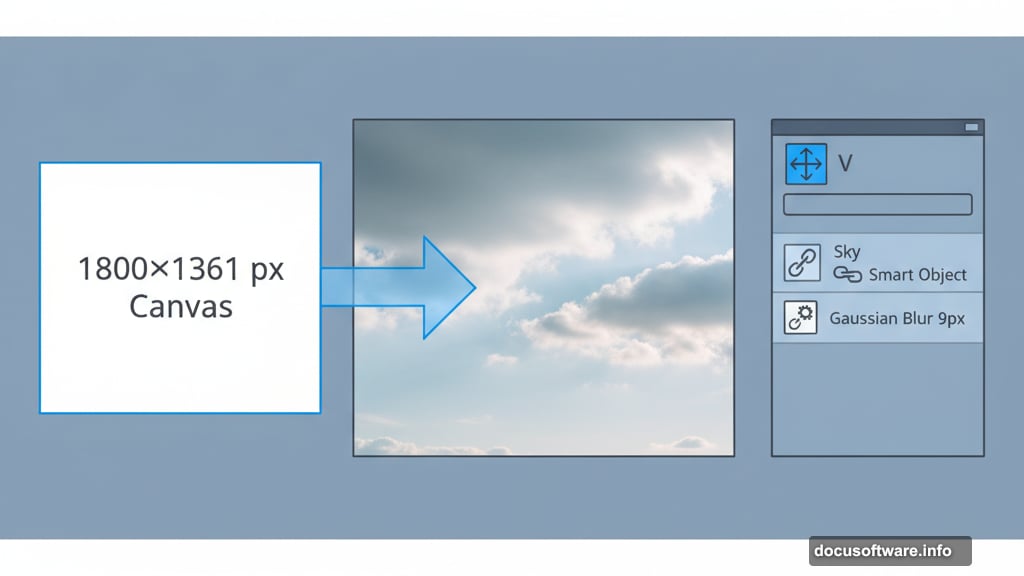
Start with a 1800×1361 px document in Photoshop. Fill it white for now.
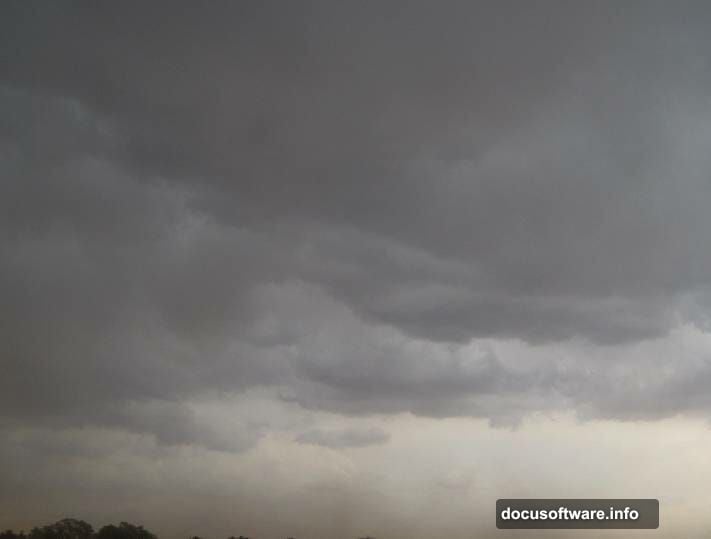
Open your sky stock image. Grab the Rectangular Marquee Tool (M) and select just the sky portion. Drag it onto your white canvas with the Move Tool (V). Right-click the layer and convert it to a Smart Object. This keeps your original quality intact for later adjustments.
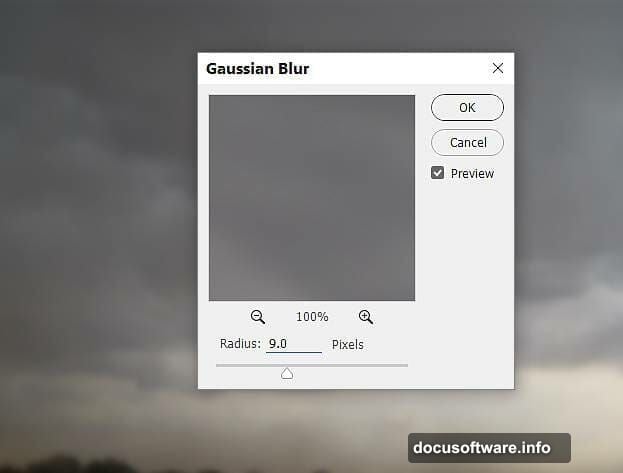
Now soften that sky. Go to Filter > Blur > Gaussian Blur and set radius to 9 px. This creates depth and makes the sky feel distant.
Balance Your Sky Lighting
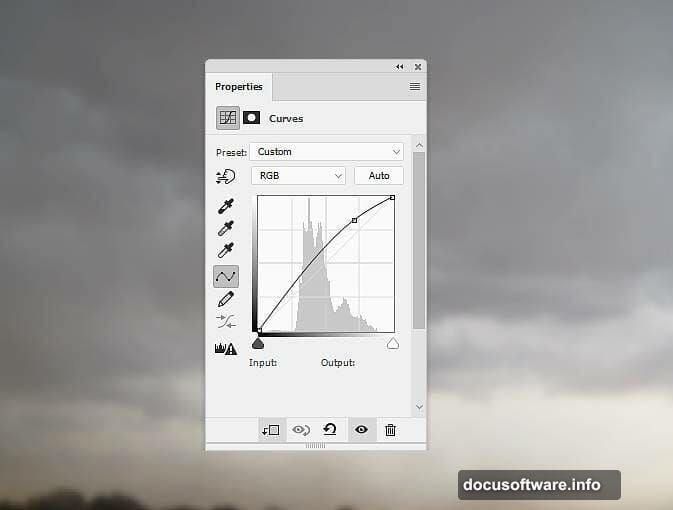
Create a Curves adjustment layer. Right-click and set it as a Clipping Mask so it only affects your sky layer. Drag the curve upward to brighten the upper atmosphere. This mimics how night skies glow near the horizon.
Next, add another Curves adjustment layer as a Clipping Mask. This time, drag the curve down to darken everything. But here’s the trick. Click the layer mask and select a soft round brush (B) with black color. Paint over the upper sky area to remove the darkening there. You want darkness only in the lower portion where earth meets sky.
This creates natural gradation from lighter sky to darker foreground.
Add Color Temperature for Night
Make a Color Balance adjustment layer. Focus on the Midtones settings. Shift the sliders toward blue and cyan. Night scenes need cool color temperatures to feel authentic.
Avoid going too heavy. Subtle shifts work better than obvious blue tints. You’re suggesting moonlight, not painting everything blue.
Build Your Landscape Base
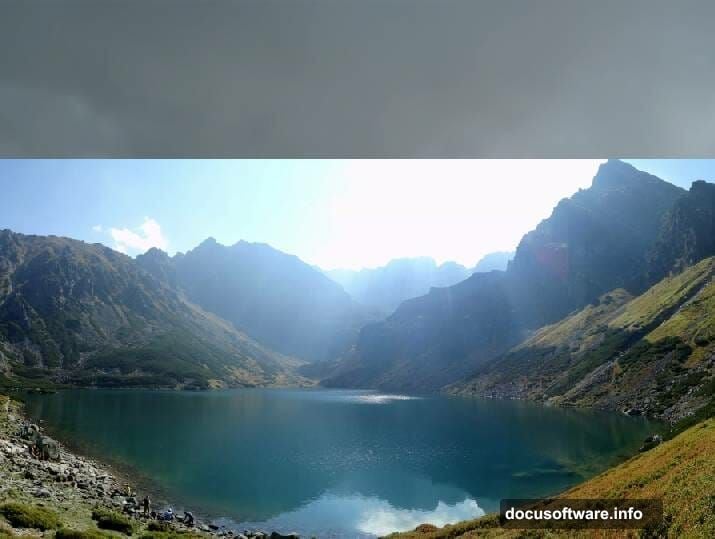
Open your landscape stock image. Drag it into your main document with the Move Tool. Position it along the bottom of your canvas.
Click the mask icon at the bottom of the Layers panel. This adds a layer mask. Select a soft black brush and paint along the edges to blend the landscape naturally into your sky. Remove the lake portion entirely if your stock includes water. You want dry land for this scene.
Now darken that landscape to match nighttime. Create a Curves adjustment layer set as Clipping Mask. Pull the curve down to reduce brightness significantly. But don’t go overboard on the mountains in the middle distance.
Switch to your layer mask. Use a soft black brush at 10% opacity. Gently paint over those middle mountains to restore some of their original brightness. This creates atmospheric perspective where distant elements appear lighter.
Desaturate for Nighttime Reality
Add a Hue/Saturation adjustment layer. Drag the Saturation slider down to -73. Night kills color intensity. This step makes your scene feel authentically dark.
Your landscape should now look moody and desaturated. Perfect for medieval atmosphere.
Add Foreground Rocks
Open your first rock stock image. Use the Magnetic Lasso Tool (L) to isolate the left rock from its background. Select carefully around edges for clean extraction.
Copy that rock and paste it onto your main canvas. Position it in the right foreground. Press Ctrl+T to activate Free Transform. Scale and adjust as needed.
Then go to Edit > Transform > Flip Horizontal. This reverses the rock so lighting matches your scene direction. Flipping stock elements often helps them integrate better.
Create Depth with Additional Rocks
Repeat the process with your second rock image. Extract it with the Magnetic Lasso Tool. Place it in your foreground, but position it differently than the first rock. Vary the sizes and angles.
These foreground rocks create depth and frame your composition. They also give the viewer’s eye a path into the scene. Strategic placement matters more than perfection here.
Build the Medieval Bridge Structure
Open your bridge stock image. You’ll likely need to extract it from its original background. Use whatever selection tool works best for the complexity. The Pen Tool (P) gives cleanest results for architectural elements.
Place the bridge in your mid-ground. It should span across part of your landscape, creating a focal point. Scale it with Free Transform until proportions feel right.
Add a layer mask and blend the bridge base into your landscape. Use a soft brush to fade the bottom where bridge meets ground. This sells the integration.
Darken the bridge with a Curves adjustment layer. Nighttime shadows should obscure details. But leave some highlights where moonlight might catch stone surfaces.
Add the Moon for Dramatic Light
Drop in your moon stock image. Position it in your sky where it creates the best composition. Upper left or upper right typically works well. Avoid dead center.
The moon acts as your primary light source. Everything else should respond to its position. Shadows fall away from the moon. Highlights face toward it.
Change the moon layer’s blend mode to Screen or Lighten. This removes the black background naturally. Adjust opacity until the moon looks appropriately bright but not blown out.
Add a subtle glow around the moon. Create a new layer beneath your moon. Use a large soft brush with pale yellow or white. Click once where the moon sits. Set this glow layer to 20-30% opacity. This mimics atmospheric diffusion of moonlight.
Position Your Medieval Model
Open your model stock image. The woman should already be on horseback. Extract both rider and horse from the original background. Take your time with this selection. Hair and horse details need clean edges.
Place the model in your scene. She should ride across the bridge or along the landscape path. Position creates your story. Is she arriving? Departing? Patrolling?
Scale the model appropriately. She needs to feel part of the environment, not pasted on top. Use surrounding elements as size references.
Flip the model horizontally if needed to match lighting direction. Your moon establishes light source. The model’s highlights should face that direction.
Match Model Lighting to Scene
Create a Curves adjustment layer for your model. Set it as Clipping Mask. Darken significantly to match the nighttime environment. But don’t crush all details.
Add another Curves adjustment layer. This time, slightly brighten areas facing your moon. Use the layer mask with a white brush to paint highlights on the model’s face, shoulders, and the horse’s body where moonlight would strike.
This directional lighting sells the integration. Without it, your model floats disconnected from the environment.
Desaturate the Model
Make a Hue/Saturation adjustment layer for your model. Reduce saturation significantly, but not completely. Remember, you already desaturated the landscape. Everything needs consistent color intensity.
Slight color differences between elements scream “composite.” Match your saturation levels across all components.
Add the Final Tree Element
Import your tree stock image. Position it in the foreground, either left or right edge. Trees in the immediate foreground create framing and depth.
The tree should be quite dark since it’s closest to the viewer and farthest from your moon light source. Use Curves to darken it heavily. Leave just enough detail visible to read as a tree.
Blend the tree roots into your landscape with a layer mask. Trees should feel planted, not floating above ground.
Final Adjustments for Cohesion
Create a Curves adjustment layer that affects your entire composition. Not set as Clipping Mask this time. Fine-tune the overall contrast and brightness. Night scenes often need that final darkening pass.
Make a Color Balance adjustment layer for the complete image. Add subtle blue to shadows. This unifies all elements under the same color temperature.
Consider adding a Photo Filter adjustment layer. Choose a cooling filter like #82 at 10-15% density. This adds that final nighttime atmosphere wash.
Add Atmospheric Effects
Create a new layer at the top of your stack. Fill it with black. Go to Filter > Render > Clouds. Set this layer to Screen blend mode at 5-10% opacity. This adds subtle atmospheric haze.
For more drama, add light rays. Create another new layer. Use a white brush to paint streaks from your moon downward. Set to Overlay blend mode at 20% opacity. This simulates moonbeams breaking through atmosphere.
The Integration Details That Matter
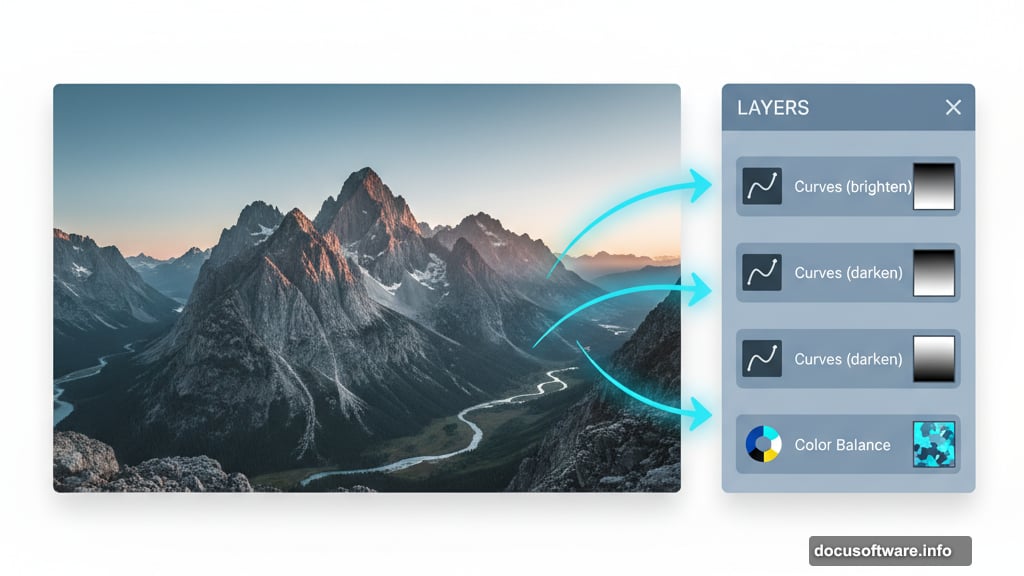
Photo manipulation lives or dies on details. Successful composites share consistent lighting direction, matched color temperatures, and appropriate depth of field.
Your background should be softer than mid-ground. Mid-ground softer than foreground. This mimics how cameras and eyes perceive depth. Add subtle blur to distant elements if needed.
Check your shadows. They should all point away from your moon. Inconsistent shadow direction destroys believability immediately. Add painted shadows beneath your model and foreground rocks if the stock images don’t include them.
Color temperature consistency matters most. Everything should feel lit by the same light source. Cool moonlight creates blue shadows and pale highlights. Warm sunset creates orange shadows and golden highlights. Pick one and commit.
Why This Technique Works Beyond This Scene
These methods apply to any fantasy photo manipulation. The principles stay constant even when subject matter changes. You’re always building depth, matching lighting, and unifying color.
Master these fundamentals and you can create anything. Forest fairy scenes. Urban superhero composites. Sci-fi landscapes. The technique scales to whatever your imagination produces.
The real skill isn’t following specific steps. It’s understanding why each adjustment exists. Light behaves consistently. Color temperature follows rules. Atmospheric perspective never changes. Learn those principles and you stop needing tutorials.
Start experimenting with different stock combinations. Try various lighting scenarios. Push your color grading in unexpected directions. That’s how you develop your own style instead of copying tutorials forever.