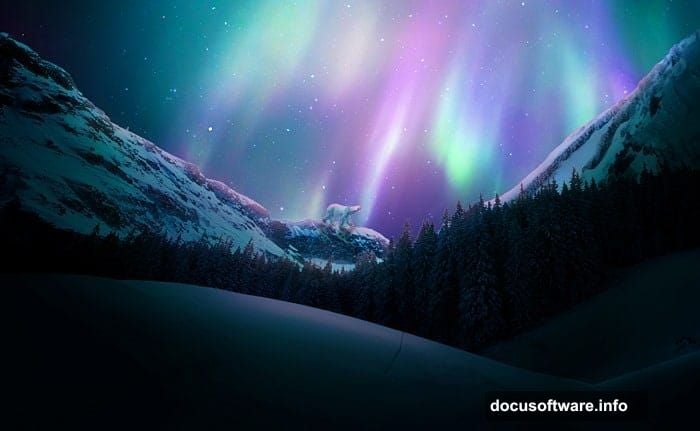
Want to create a stunning aurora scene in Photoshop? This complete walkthrough shows you how to blend multiple images into a cohesive winter night landscape.
You’ll learn photo manipulation techniques that work for any composite project. Plus, the methods here apply beyond just aurora scenes. Master these skills once and use them everywhere.
What You’ll Learn
This tutorial covers essential photo manipulation skills. You’ll combine sky elements, adjust lighting, and create atmospheric effects.
The techniques focus on proper blending. That’s what separates amateur composites from professional-looking work. You’ll also discover how layer groups and adjustment layers streamline complex projects.
Most importantly? You’ll understand why each step matters. So you can adapt these methods to your own creative projects.
Gather Your Source Images
Before starting, collect your stock images. You’ll need a starry sky, aurora background, foreground elements like trees and mountains, and a subject (the tutorial uses a polar bear).
Free stock sites work fine. But make sure images match in resolution. Mismatched quality creates obvious composites that scream “fake.”
Also, consider lighting direction. All source images should have consistent light sources. Otherwise, your final composite won’t hold together visually.
Build Your Canvas Foundation
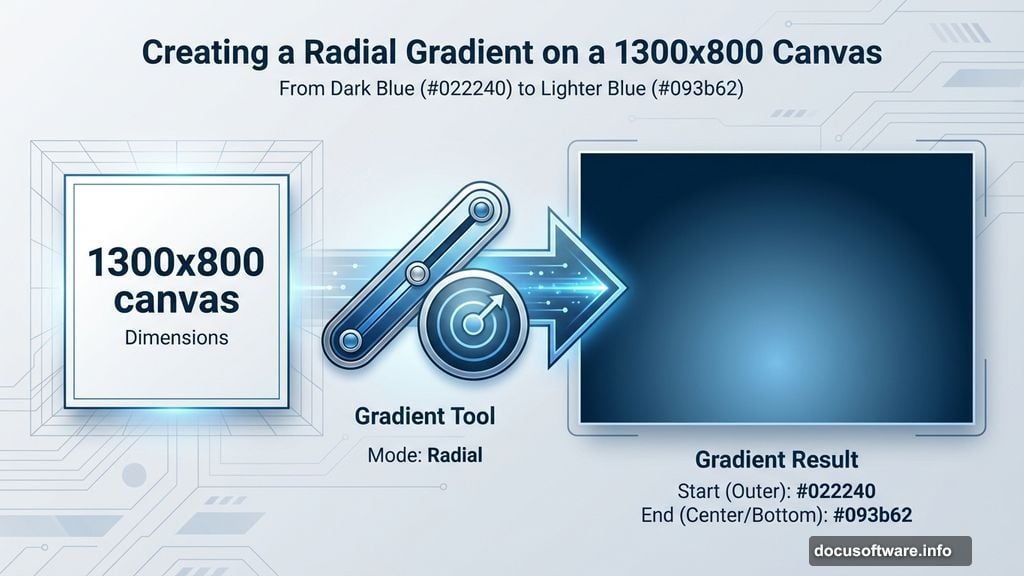
Create a new 1300×800 pixel document. White background works as a starting point.
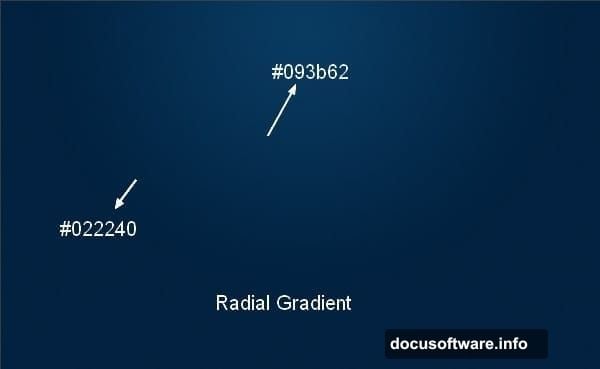
Next, add a new layer for your gradient base. Select the Gradient Tool and choose Radial Gradient mode. Use colors #022240 and #093b62 for a deep night sky effect.
Drag from top to bottom. This creates atmospheric depth immediately. Your eye naturally reads darker tones as distance, so this gradient establishes spatial relationships from the start.
Add the Starfield Layer
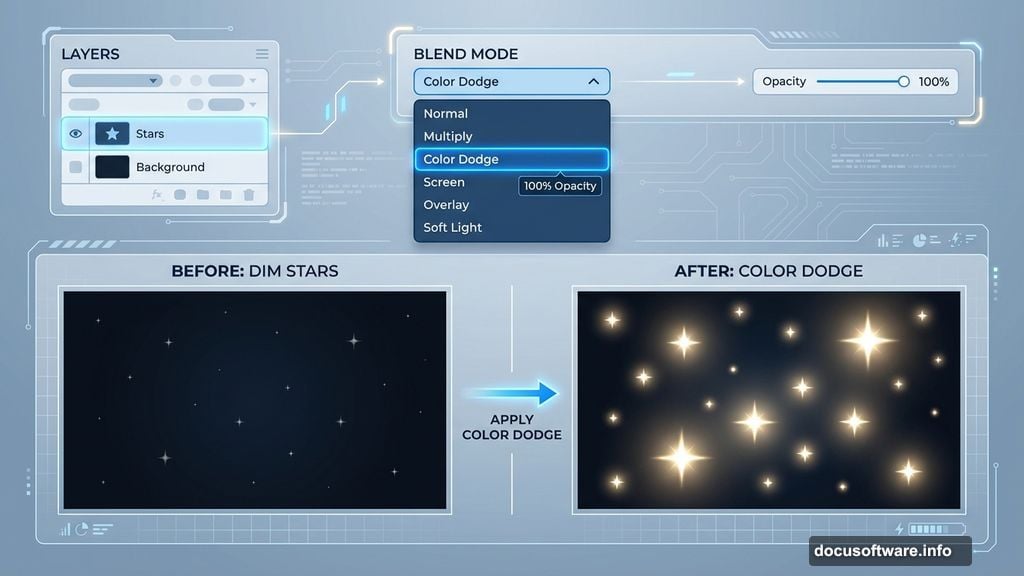
Import your starry sky image. Place it above the gradient layer.
Change the blend mode to Color Dodge at 100% opacity. This makes stars pop against the dark background. Color Dodge intensifies bright pixels while keeping dark areas transparent.
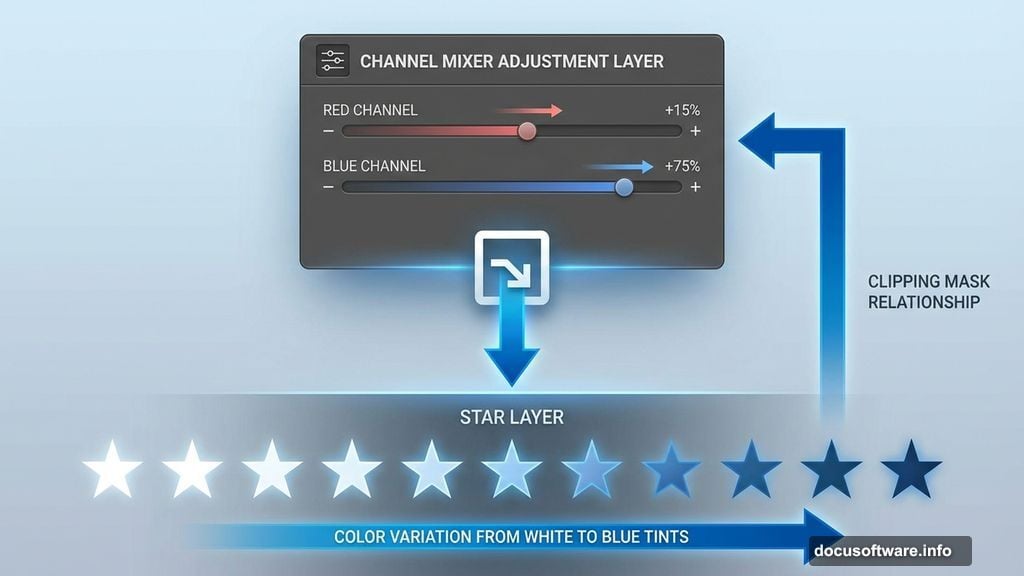
But some stars might look too uniform. Fix that with a Channel Mixer adjustment layer. Set it as a Clipping Mask so it only affects the star layer. Adjust red and blue channels to create color variation in your stars.
Position the Aurora Effect
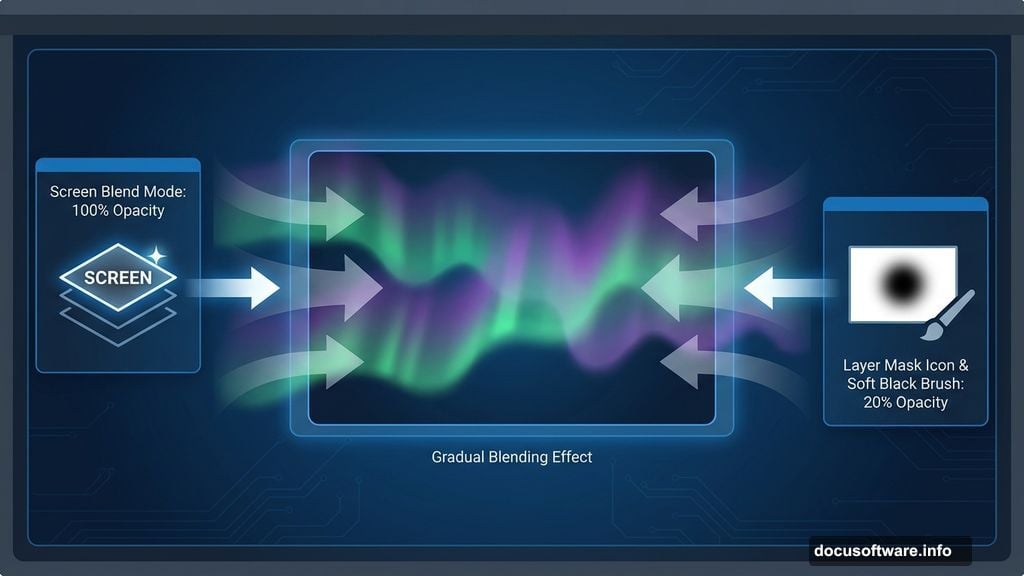
Place your aurora image above the stars. Change its blend mode to Screen at 100%.
Screen mode blends light elements beautifully. It adds luminosity without completely replacing underlying layers. Perfect for glowing effects like northern lights.
Add a layer mask. Use a soft black brush at 20% opacity to gently fade harsh edges. This prevents the aurora from looking pasted on. Real atmospheric phenomena blend gradually with surrounding sky.
Duplicate and Flip for Balance
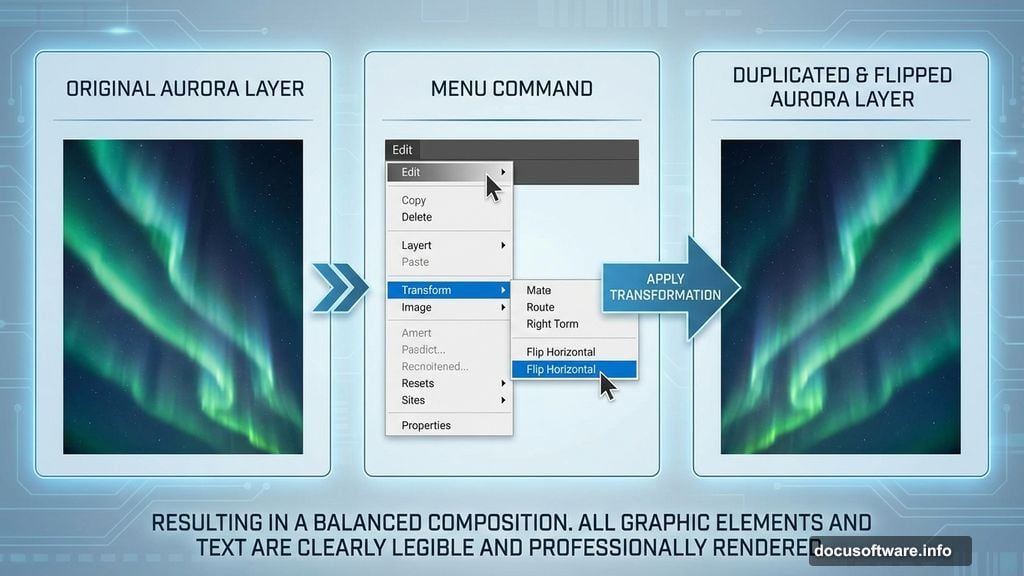
Duplicate your aurora layer. Flip it horizontally using Edit > Transform > Flip Horizontal.
Move this copy to the opposite side of your canvas. This creates visual balance without looking perfectly symmetrical. Nature isn’t perfectly symmetrical, so neither should your composition be.
Use layer masking again to blend edges. Remove any obvious repetition. The goal is variety that still feels cohesive.
Group Layers for Better Control
Select all aurora layers. Press Cmd/Ctrl+G to group them together.
Here’s the critical part: Change the group’s blend mode from Pass Through to Screen 100%. This matters because adjustment layers inside groups behave differently depending on group blend mode.
Add a Curves adjustment layer inside this group. Now you can adjust all aurora elements simultaneously. This saves time and ensures consistent color grading across all aurora layers.
Create Atmospheric Glow
Make a new layer above your sky elements. Use the Rectangular Marquee Tool to select the sky portion.
Paint soft strokes along selection edges using colors #f79ead and #acbbc5. These pinkish and blue-grey tones enhance aurora atmosphere.
Convert this layer to a Smart Object. Then apply Filter > Blur > Motion Blur. This stretches the glow naturally, mimicking how atmospheric light diffuses.
Add Landscape Elements
Import your foreground, mountain, and tree images. Stack them logically: distant mountains behind, mid-ground trees next, foreground elements closest.
Each landscape layer needs proper integration. Use layer masks to blend bases into the scene. Paint shadows where elements meet the ground. This anchors objects in your environment instead of floating awkwardly.
Also adjust brightness. Distant elements should be slightly dimmer and bluer (atmospheric perspective). Closer objects remain sharper and more saturated.
Place Your Subject
Drop in your main subject—in this case, a polar bear. Position it in the foreground for dramatic scale.
Yes, the bear looks enormous compared to distant mountains. That’s intentional. It creates visual impact and draws viewer attention immediately.
Add a subtle shadow beneath your subject. Even in dim lighting, subjects need some ground contact. Paint a soft shadow using a dark blue (not black—nothing in nature is pure black). Set that layer to Multiply at 30-40% opacity.
Refine Overall Color Grading
Create adjustment layers that affect your entire composition. Curves and Color Balance work best for this.
Use Curves to establish contrast. Lift highlights slightly, drop shadows for depth. This creates the “pop” that separates flat images from dimensional scenes.
Color Balance adds finishing touches. Push shadows toward blue (for coldness). Add slight warmth to highlights (aurora glow reflection). Midtones can go either direction depending on your preference.
Add Final Light Effects
Light sells the illusion. Create a new layer set to Screen or Linear Dodge mode.
Use a soft brush with aurora colors (#f79ead, #acbbc5) to paint light hitting your subject and foreground. Think about how northern lights would illuminate the scene. Top surfaces catch more glow, shadowed areas stay dark.
This lighting pass ties everything together. It makes all elements feel like they exist in the same environment with the same light source.
Polish with Selective Sharpening
Don’t sharpen everything equally. Your focal point (the bear) should be sharpest. Mid-ground slightly softer. Background even softer.
Use the Sharpen Tool or High Pass filter on separate layers. Apply sharpening selectively using layer masks. This creates depth through selective focus, mimicking how our eyes actually perceive scenes.
Also, add slight noise to your subject if needed. Perfectly clean subjects look fake against textured backgrounds. A touch of noise (Filter > Noise > Add Noise at 1-2%) helps integration.
Common Mistakes to Avoid
Beginners often use blend modes at 100% opacity without adjustment. That’s too aggressive. Lower opacity on effect layers for subtlety.
Another issue: ignoring layer order. Atmospheric elements like aurora need to sit behind foreground objects. Stack layers logically based on spatial relationships.
Finally, over-processing kills realism. Step away from your project periodically. Fresh eyes catch problems you stopped noticing after hours of work.
Why Layer Groups Matter
Groups transform how you work with complex composites. Instead of adjusting ten layers individually, group them and adjust once.
Plus, group blend modes unlock advanced techniques. That Screen mode group trick for the aurora? That’s professional-level efficiency. It maintains effect integrity while allowing batch adjustments.
Learn to think in groups. Organize by scene element: sky group, landscape group, subject group, effects group. Your projects become manageable instead of overwhelming.
Adapting This Technique
This tutorial creates an aurora scene. But the methods apply universally.
Want to create a sunset landscape? Same process, different colors. Fantasy environment? Identical technique, alternate source images. The fundamentals of blending, masking, and lighting never change.
Master photo manipulation principles rather than memorizing specific steps. That’s how you develop versatile skills that work across any project.
The secret isn’t knowing which buttons to press. It’s understanding why you press them. Once you grasp that, you can create anything.