
There’s something deeply satisfying about creating atmosphere from scratch in Photoshop. Rain-streaked windows, soft light bleeding through glass, flowers sitting quietly on a sill — this tutorial walks you through building exactly that kind of scene, layer by layer.
We’ll tackle the window construction first, then paint the background, add raindrops, and bring in natural elements like a leaf, vase, and flowers. Finally, adjustment layers tie everything together into one cohesive, moody image.
Here’s what you’ll need before we start: a window photo, a leaf image, a vase, and some flowers. All resources are linked in the tutorial.

Setting Up Your Canvas and Base Color
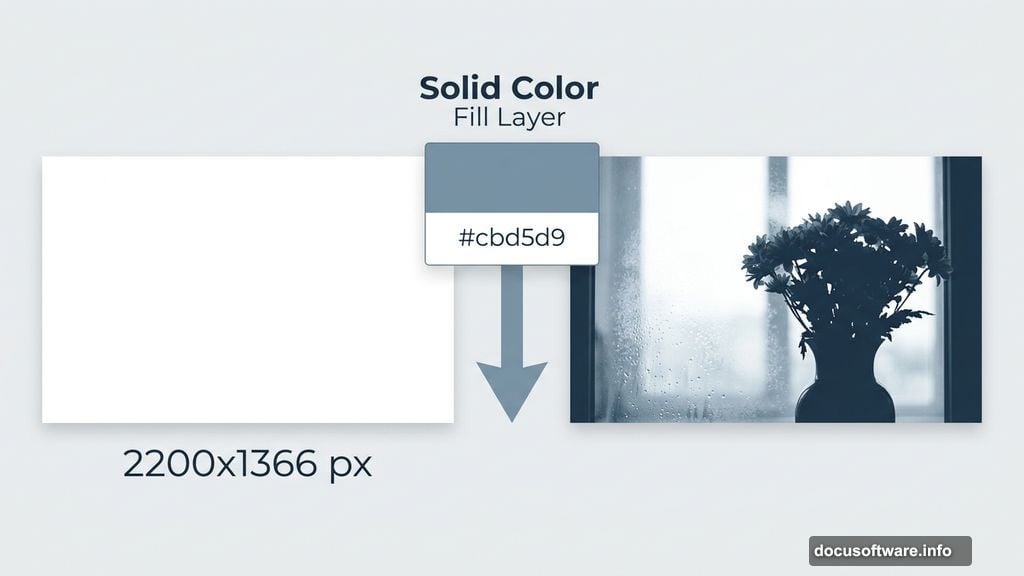
Start by creating a new document in Photoshop. Set the dimensions to 2200 x 1366 px and fill the background with white.
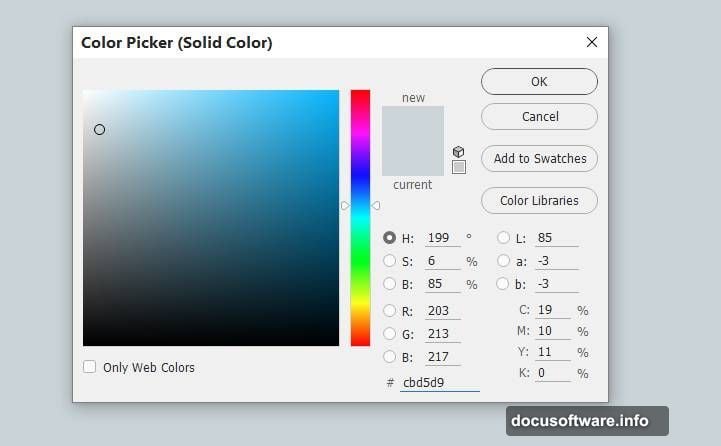
Next, go to Layer > New Fill Layer > Solid Color and choose the hex color #cbd5d9. This cool, muted blue-gray sets the perfect wintry mood for the whole scene. Think of it as the emotional foundation everything else builds on.
Building the Window Frame
Open your window image and grab the Polygonal Lasso Tool (L). Select the frame sections on both sides of the window. Then use the Move Tool (V) to drag these pieces onto your main canvas.
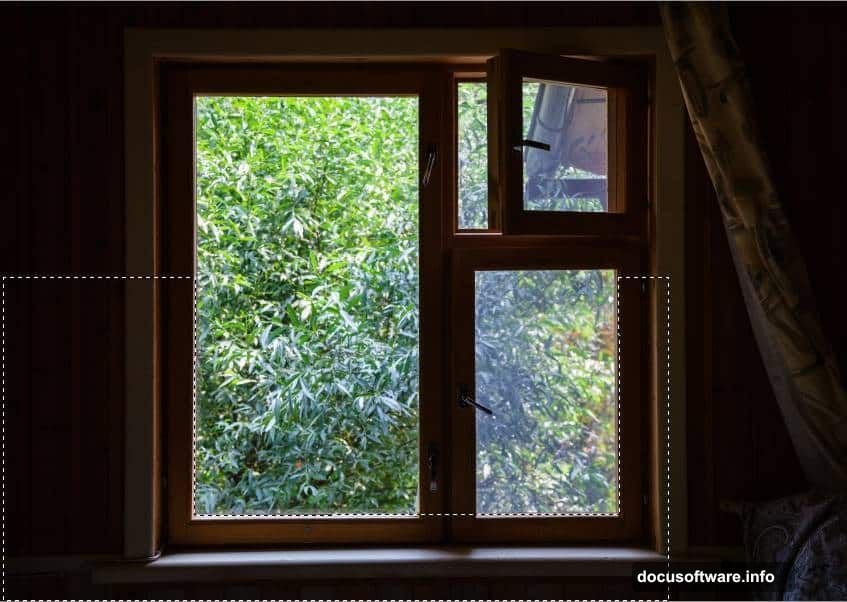
For now, show only the left and lower frame parts. You’ll build outward from here.
Adding Window Rails and Details
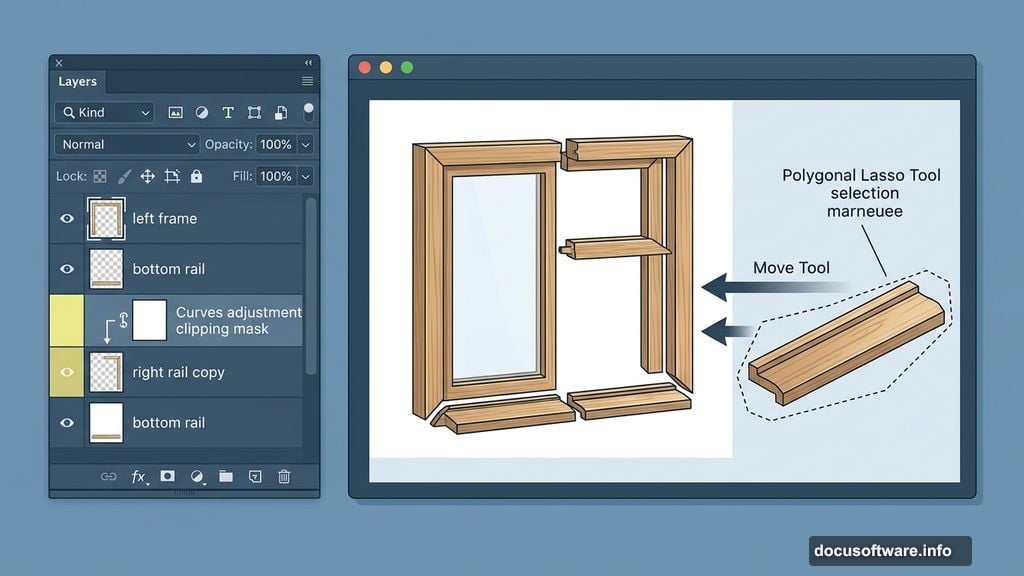
This is where patience pays off. Use the Polygonal Lasso Tool again to select the rail on the left frame from your original window image. Bring it into the main document to sit alongside your existing left frame.

Then select a rail section along the bottom of the window frame and add that too. Duplicate this rail layer and move the copy to the right side. Add a layer mask by clicking the second icon at the bottom of the Layers panel. Activate the Brush Tool (B), choose a hard round brush, and paint with black on the mask. This removes a small unwanted detail near the top of the rail — clean and non-destructive.
Next, select the right-side rail from your original image and place it on the right of the existing window frame.
Matching the Light with a Curves Adjustment
Raw composited pieces rarely match in brightness and contrast. So on your rail part layer, go to Layer > New Curves Adjustment Layer > Curves and set it as a Clipping Mask. Nudge the curve upward slightly to boost light and contrast. This brings the rail in line with the rest of the window so it looks like one cohesive piece rather than a collage.
Cleaning Up with the Clone Tool
No photo composite is perfect straight out of placement. Create a new layer and select the Clone Tool (S). Use it to paint over any unwanted gaps, seams, or distracting details on the window frames. Working on a separate layer keeps your original pieces intact and gives you room to experiment.
Patching the Frame Gap
Here’s a clever fix for a common compositing problem. On your window layer, use the Rectangular Marquee Tool (M) to select a clean section from the lower part of the window frame. Hit Ctrl+C to copy it, then create a new layer on top of your stack and hit Ctrl+V to paste it.
Move this patch to the right to cover any hole or gap on the right side of the frame. It sounds simple, and it is. But this kind of small repair makes the whole image feel much more polished.
From here, the tutorial continues into painting the background colors, adding raindrop textures, importing the leaf, placing the vase and flowers, and painting water effects. Each stage builds naturally on this foundation. The adjustment layers in the final steps are where the real magic happens, pulling all those separate elements into one cohesive, atmospheric scene.
The whole process rewards anyone willing to slow down and enjoy each layer. Photoshop photo manipulation like this isn’t just about technical skill — it’s about learning to see light, color, and texture differently. And a rainy window is one of the best subjects to practice that kind of seeing.