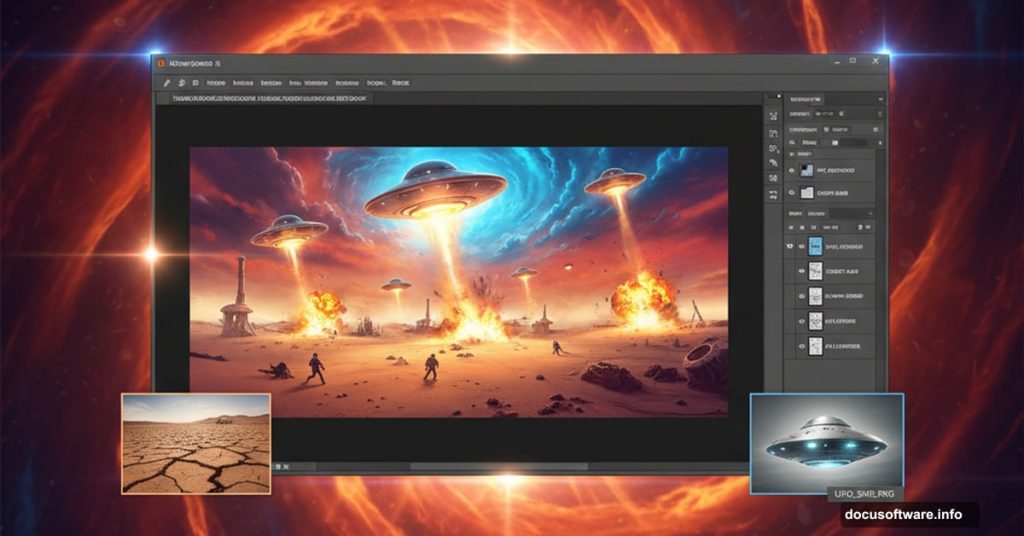
Want to create a dramatic alien attack scene that looks like a Hollywood movie poster? This tutorial breaks down the process into manageable steps that work even if you’re still learning Photoshop.
You’ll combine multiple stock images into one cohesive battlefield scene. Plus, you’ll learn lighting tricks that make everything look like it belongs in the same world. The techniques here apply to any sci-fi or action scene you want to build.
Let’s jump in.
What You’ll Need Before Starting
Grab these free stock images before opening Photoshop:
- Desert landscape photo (for foreground terrain)
- Rocky mountain scene (for background landscape)
- Fire and explosion effects
- Spark and debris overlays
- Alien spaceship images (PNG format works best)
You also need any recent version of Photoshop. The tools I reference exist in CS6 and newer. So don’t worry if you’re not running the latest Creative Cloud version.
Set aside 2-3 hours for your first attempt. You’ll move faster once you understand the workflow.
Set Up Your Canvas
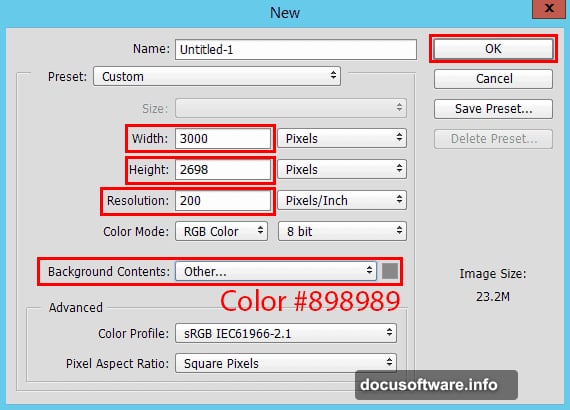
Create a new document in Photoshop (File > New or Cmd/Ctrl + N). Use these settings:
- Width: 3000 pixels
- Height: 2698 pixels
- Resolution: 200 pixels per inch
- Background: Fill with neutral gray (#898989)
Why gray background instead of white? It helps you judge colors and lighting more accurately. White backgrounds trick your eyes into thinking everything looks darker than it really is.
Build the Background Landscape
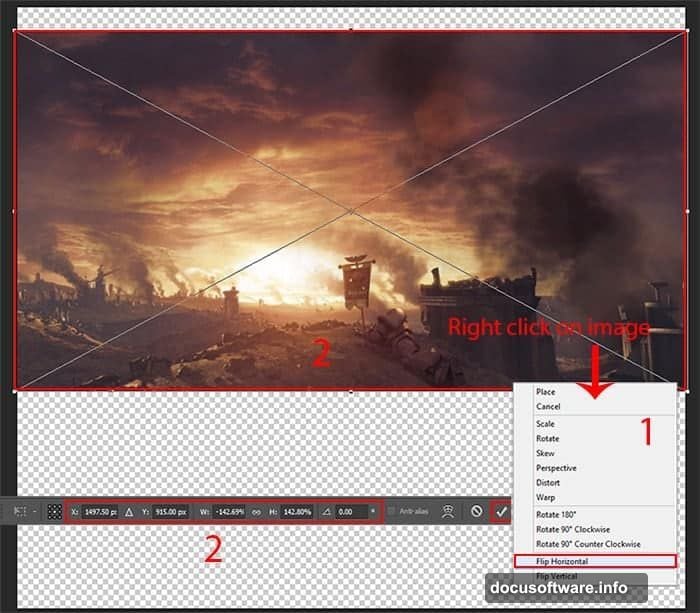
Now place your main battlefield image. Go to File > Place Embedded and select your rocky terrain photo.
Flip it horizontally if needed (Edit > Transform > Flip Horizontal). This gives you more composition options. Then resize using Free Transform (Ctrl/Cmd + T).
Position this image at the top of your canvas. But leave some empty space above it. That’s where you’ll add the sky later.
Add Foreground Terrain
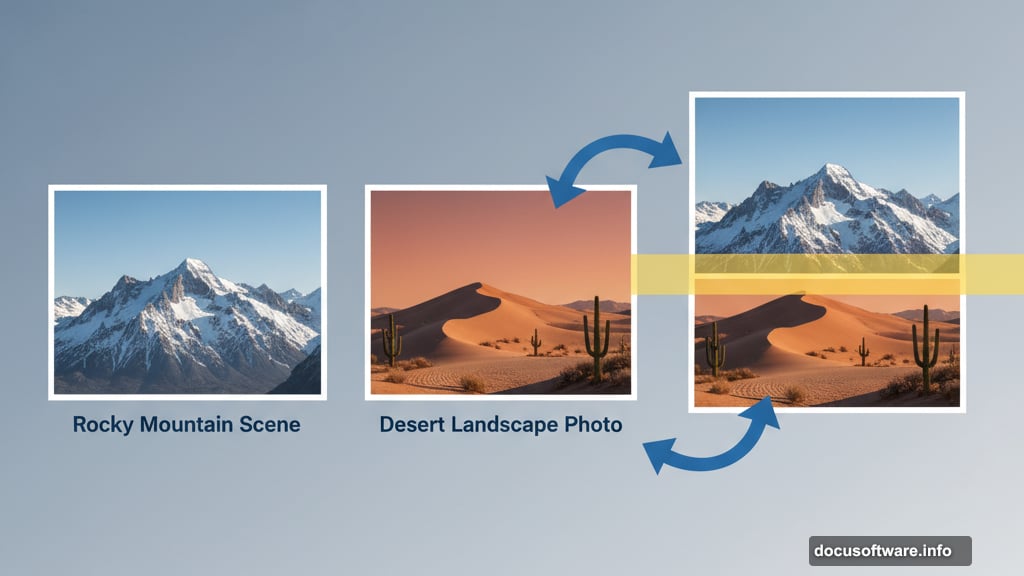
Place your desert landscape photo the same way (File > Place Embedded). Flip it horizontal too. Then resize and position it so the horizon line overlaps your background mountains.
This overlap creates depth. Your eye reads the desert as closer because it sits in front of the mountains.
Here’s the tricky part. You need to blend these two images seamlessly.
Remove Sky and Blend Layers
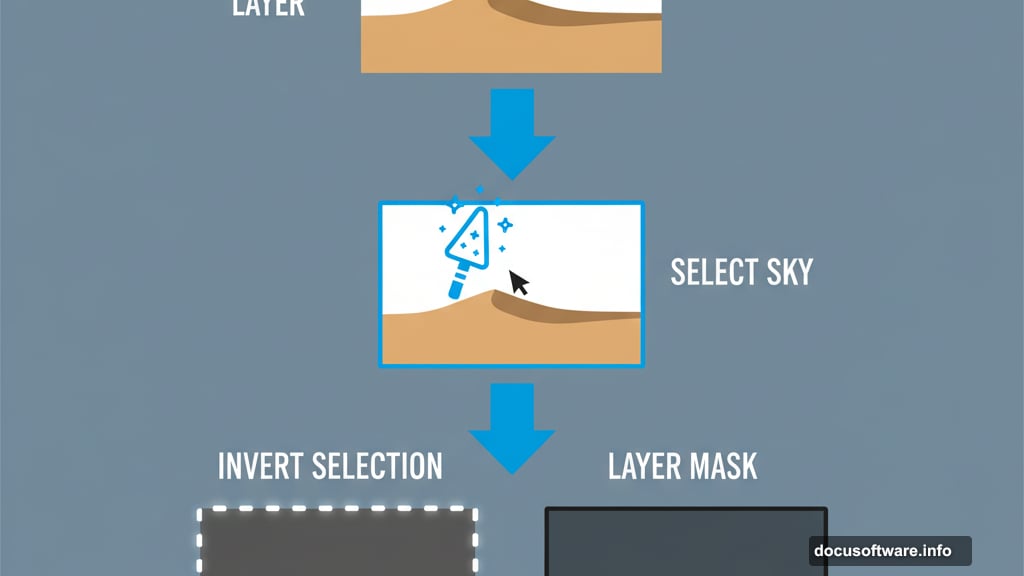
Select the Magic Wand Tool (W). Click the sky area in your desert image. Hold Shift and keep clicking until you’ve selected all sky colors.
Then inverse your selection (Select > Inverse or Cmd/Ctrl + Shift + I). This selects everything except the sky.
Now add a layer mask (Layer > Layer Mask > Reveal Selection). The sky disappears but your terrain remains.
But you’ll see a harsh line where the two images meet. Fix this by painting on your layer mask with a soft brush. Use black at low opacity (20-30%) to gently fade the transition zone. Paint back and forth until the seam disappears.
This technique takes practice. So don’t rush it. Spend 10-15 minutes getting the blend right.
Create a Dramatic Sky

Your alien invasion needs an ominous sky. Place a sunset or dramatic cloud image in the empty space above your landscape.
Resize it to fill the area. Then change the blend mode to Multiply or Overlay. Test both and see which looks better with your specific images.
Lower the opacity if the effect feels too strong. Aim for 60-80% opacity usually.
Add a layer mask here too. Paint along the horizon line to blend the sky naturally into your mountains.
Position Your Alien Ships
Now for the fun part. Place your alien spacecraft images throughout the scene.
Start with background ships first. Make them smaller and position them high in the sky. This creates the illusion of distance.
Then add mid-ground ships at medium size. Finally, place one or two large ships in the foreground. These become your focal points.
Flip and rotate each ship differently (Edit > Transform > Rotate). This adds variety and makes the invasion feel chaotic.
Match Lighting on the Ships
Here’s what separates amateur composites from professional work: consistent lighting.
Look at your landscape. Where’s the light coming from? Usually from one side. Your ships need to match that direction.
Add a new layer above each ship. Set the blend mode to Overlay. Then paint with a soft brush using your light color (usually warm yellow or orange). Paint only the side of the ship facing your light source.
Create another layer set to Multiply. Paint shadows on the opposite side using a dark blue or purple. This mimics ambient skylight.
These two layers make each ship look like it exists in your scene instead of floating awkwardly on top.
Add Destruction and Debris
Battle scenes need visual chaos. Place explosion effects near some of your ships. Use Screen or Add blend mode so the bright areas show through.
Scatter debris pieces throughout the sky. Rotate them at different angles. Add motion blur (Filter > Blur > Motion Blur) to some pieces. This suggests they’re falling rapidly.
Paint black smoke trails behind damaged ships using a textured brush. Set these layers to Multiply mode at 60-70% opacity.
Create Ground Impact Effects
Add explosion effects where alien weapons hit the ground. Place these in your foreground terrain area.
Use a large soft brush to paint orange glow on the ground beneath each explosion. Set this layer to Overlay mode. This simulates light from the blast illuminating the terrain.
Add spark overlays near impact points. Resize them small and scatter them randomly. Use Screen blend mode so they appear bright against the ground.
Fine-Tune Overall Lighting
Now step back and look at everything together. The lighting probably needs adjustment.
Add a Curves adjustment layer at the top of your layer stack (Layer > New Adjustment Layer > Curves). Darken the shadows slightly by pulling down the left side of the curve. This adds drama.
Create another adjustment layer for Color Balance (Layer > New Adjustment Layer > Color Balance). Push the shadows toward blue and the highlights toward yellow. This creates a cinematic color grade.
Add a final Vibrance adjustment layer (Layer > New Adjustment Layer > Vibrance). Increase vibrance by 20-30 points. This makes colors pop without looking oversaturated.
Add Atmospheric Depth
Objects farther away should look hazier. This effect is called atmospheric perspective.
Create a new layer at the top. Fill it with light blue-gray (#b0c4d3). Set blend mode to Lighten at very low opacity (10-15%).
Add a layer mask. Use a gradient tool (G) to mask the foreground completely. The effect should only affect the distant background.
This subtle haze adds realism and depth to your scene.
Final Details and Polish
Zoom in and look for rough edges around your ships and debris. Refine these with a small eraser at 50% hardness.
Add lens flare effects near bright explosions (Filter > Render > Lens Flare). Use these sparingly. One or two bright flares is enough.
Sharpen the overall image slightly (Filter > Sharpen > Unsharp Mask). Use amount 80%, radius 1.0, threshold 0. This brings back detail that blending sometimes softens.
Finally, flatten your image (Layer > Flatten Image) and save as JPEG for sharing.
Common Mistakes to Avoid
Don’t place all ships at the same distance. Vary their size dramatically to create depth.
Avoid uniform lighting across all elements. Different parts of your scene need different light intensities.
Don’t overdo effects. Three well-placed explosions beat ten mediocre ones.
Never skip the blending step. Harsh edges instantly reveal that you composited multiple images.
Resist the urge to crank saturation to maximum. Subtle color adjustments look more professional.
What Makes This Scene Work
Great photo manipulation comes down to three things: believable perspective, consistent lighting, and appropriate atmospheric effects.
You built depth by layering images at different scales. You unified everything with matching light direction and color. Plus, you added haze and glow effects that mimic how cameras actually capture dramatic scenes.
These same principles apply whether you’re creating alien invasions, fantasy landscapes, or surreal portraits. Master the fundamentals here and you can tackle any composite project.
Now go create something epic. Your alien invasion awaits.
