Creating fantasy photo manipulations in Photoshop sounds intimidating. But the process breaks down into manageable steps anyone can follow.
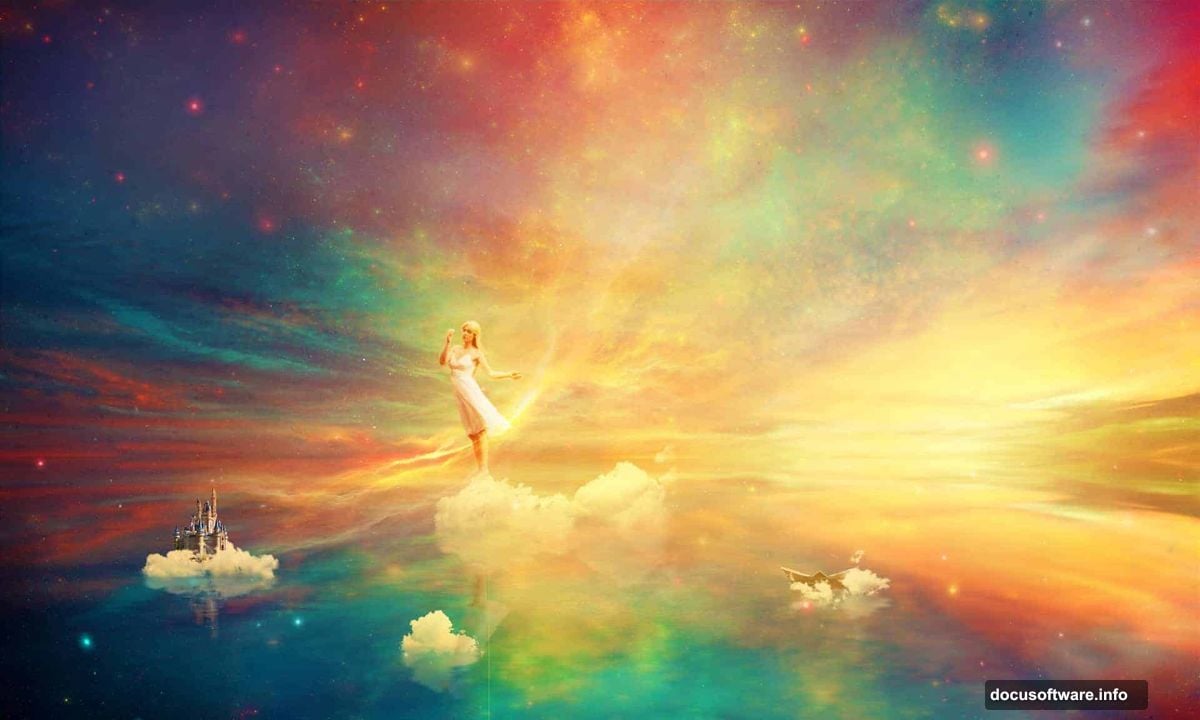
This guide walks you through building a colorful dream scene from scratch. You’ll learn how to blend sky images into surreal lakes, add glowing nebula textures, and paint realistic lighting effects. Plus, we’ll cover the adjustment layer tricks that make everything pop.
The best part? You don’t need advanced skills to get started. Just Photoshop CS3 or newer and patience to work through each technique.
What You’ll Need Before Starting
First, gather your source images. You’ll need sky photos, nebula textures, cloud images, and a subject like a model or castle. Free stock sites offer tons of options if you don’t have your own.
Make sure your Photoshop version supports adjustment layers properly. CS3 works fine. But newer versions give you more flexibility with masking and blending modes.
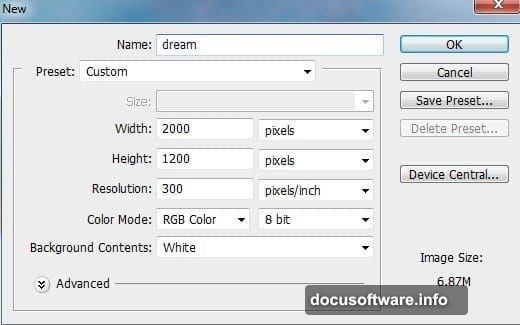
Set up a new document at your preferred size. Most fantasy scenes work well at 2000-3000 pixels wide. That gives you room to work without creating massive files.
Build the Foundation Scene
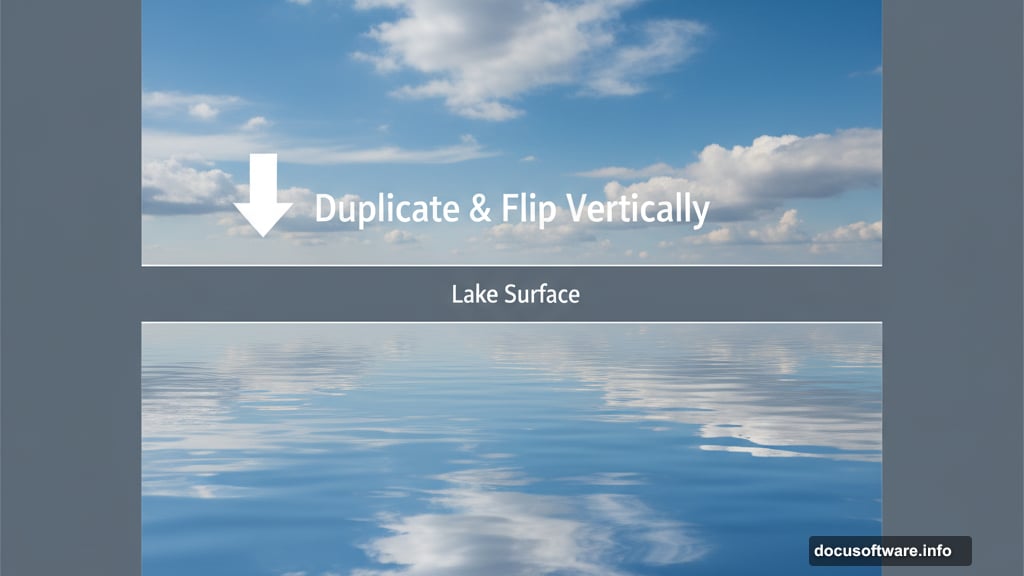
Start by selecting just the sky portion from your source image. Use the Rectangular Marquee Tool to grab the area you want. Then drag it onto your blank canvas.
Here’s where it gets interesting. Duplicate that sky layer and flip it vertically. Position it below the original to create a mirror reflection. This becomes your lake surface.
Apply a Motion Blur filter to the flipped layer. Set the angle to 90 degrees and adjust the distance until it looks like water. Around 50-100 pixels usually works well.
The reflection won’t look realistic yet. That’s fine. We’ll fix it with adjustment layers next.
Color Grading Makes Everything Better
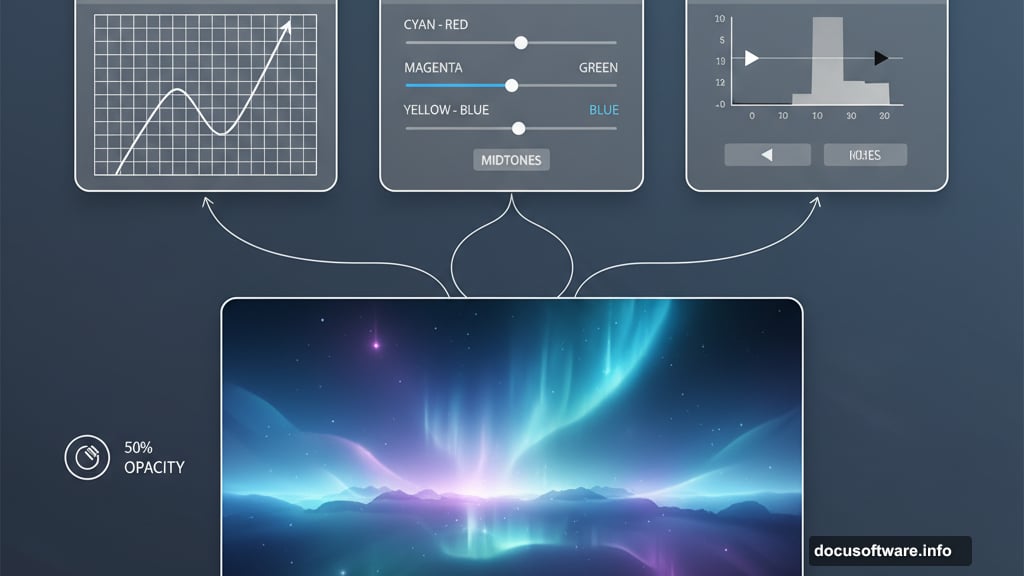
Color Balance adjustment layers transform bland photos into magical scenes. Add one and push the midtones toward cyan and blue. This creates that dreamy, ethereal atmosphere.
Don’t go crazy with the sliders. Subtle shifts work better than dramatic changes. You want the scene to feel cohesive, not oversaturated.
Next, add a Curves adjustment layer. Pull up the RGB curve slightly in the highlights. This brightens the overall image and adds that soft glow fantasy scenes need.
Use the layer mask to control where these adjustments apply. Paint with a soft black brush at low opacity to reduce effects in areas that shouldn’t glow as much.
Levels Adjustment Controls Contrast
A Levels adjustment layer gives you precise contrast control. Move the black and white input sliders closer together. This increases the contrast between dark and light areas.
But don’t apply this evenly across the scene. Use the layer mask to paint away the effect in the center and right side. This creates depth by keeping some areas softer than others.
The horizon line should stay bright while the foreground gets slightly darker. This draws the viewer’s eye toward the background naturally.
Test different opacity settings on your adjustment layers. Sometimes 70-80% looks better than full strength.
Add Atmosphere With Light Painting
Create a new layer and grab a soft brush. Pick a warm yellow color like #f9e398. Paint over the horizon where the sun would hit.
Change the blend mode to Overlay. This makes the light interact with the colors underneath instead of sitting on top. The result looks way more natural.
Add a layer mask and paint with black to reduce the glow in areas that shouldn’t be as bright. Focus the strongest light near the horizon and let it fade outward.
This technique works for any light source. Moon glow, magical sparkles, or glowing objects all use the same approach.
Nebula Textures Add Fantasy Flair
Place your nebula image over the scene. These colorful space photos inject instant fantasy vibes into any composition.
Set the blend mode to Hard Light or Screen. Both create different effects, so test them. Hard Light tends to look more dramatic while Screen feels softer.
Lower the opacity if the effect overwhelms the scene. Around 50-70% usually balances well. You want the nebula to enhance the atmosphere without dominating it.
Use a layer mask to remove nebula from areas where it doesn’t make sense. The foreground should stay mostly clear while the sky gets the full effect.

Blending Additional Elements
When you add models, castles, boats, or other objects, blending matters more than placement. Even perfectly positioned elements look fake without proper color matching.
For each new element, add Color Balance and Curves adjustment layers clipped to that object layer. Match the color temperature and brightness to your base scene.
Use a soft brush on the layer masks to blend edges. Hard cutouts scream “amateur Photoshop job.” Soft, feathered edges look way more believable.
Pay attention to light direction. If light hits from the right in your scene, your added elements need shadows on the left. This consistency sells the illusion.
Final Enhancement Pass
Once everything’s in place, add one more Curves adjustment layer at the top of your layer stack. Make subtle tweaks to the overall color and brightness.
This final pass unifies all your elements. Small adjustments here make a huge difference in how cohesive everything looks.
Consider adding a slight vignette by painting dark edges on a new layer set to Multiply. This draws focus to the center of your composition.
Save a copy before flattening. You’ll probably want to tweak things later, and keeping your layers makes that possible.
Common Mistakes to Avoid
Don’t rush the color grading. Most beginners add too much saturation or contrast. Subtlety creates more believable fantasy scenes than cranking every slider to maximum.
Watch your light sources. Multiple conflicting light directions ruin the illusion. Pick one main light source and stick with it throughout the composition.
Blend modes are your friend, but don’t overuse them. Not every layer needs a fancy blend mode. Sometimes Normal works best.
Take breaks while working. Fresh eyes catch problems you miss after staring at the screen for hours.
Why This Approach Works
Fantasy manipulations succeed when you build them methodically. Start with a solid foundation, add elements one at a time, and blend carefully as you go.
The adjustment layer workflow gives you incredible flexibility. You can tweak colors and lighting at any point without destroying your work. That’s way better than trying to get everything perfect in one pass.
Plus, this technique scales to any skill level. Beginners can follow the basic steps and get good results. Advanced users can add more complex elements and refinements.
Practice these fundamentals on simple scenes first. Master the blending and color grading before tackling complicated multi-element compositions. Your skills will improve faster that way.
Post Title: Photoshop Fantasy Scenes: Dream Manipulation Guide
Meta Description: Creating fantasy photo manipulations in [Photoshop](https://www.adobe.com/products/photoshop.html) sounds intimidating. But the process breaks down into manageable steps anyone