There’s something humbling about staring at the night sky. The universe feels infinite, mysterious, and honestly a little terrifying. That’s exactly the mood we’re going for in this Photoshop tutorial.
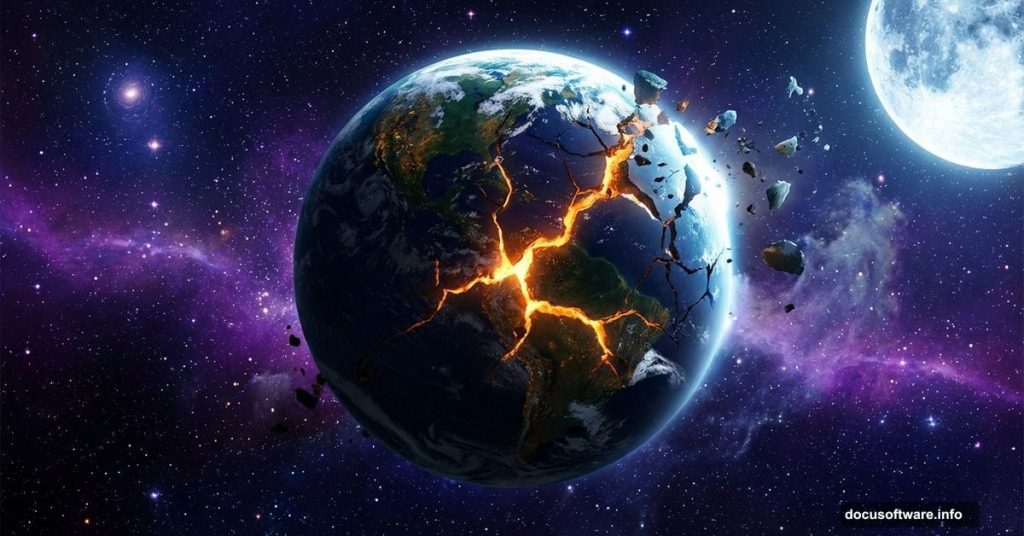
We’re building a galaxy apocalypse scene from scratch. Think Earth cracking open against a sweeping cosmic backdrop, stars, moons, and that deep space atmosphere that makes your eyes go wide. By the end, you’ll have a dramatic space composite that looks like it belongs on a sci-fi movie poster.
Here’s what we’re working with. You’ll need several stock images to pull this together, including an Earth planet photo, a Moon, Stars, a Galaxy, a Hole, the Milky Way, and two additional planets. Grab those first and let’s get started.
Start With the Right Canvas Size
Before anything else, set up your document properly. Getting the canvas wrong at the start is one of those mistakes that haunts you later.
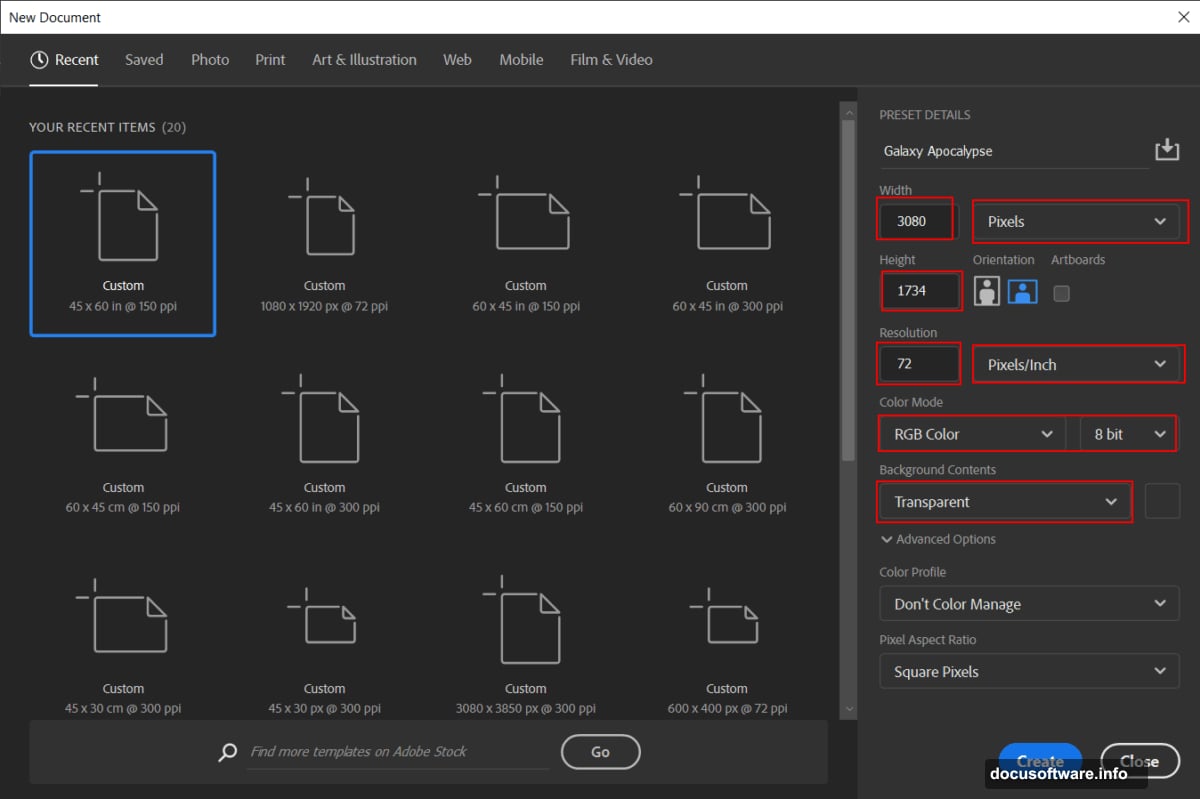
Go to File > New and enter these exact values. Set Width to 3080px and Height to 1734px. Keep Resolution at 72, Color Mode at RGB Color 8-bit, and Background Contents to Transparent. This widescreen format gives you plenty of space to build your cosmic scene without things feeling cramped.
Hit OK and you’re ready to go.
Place Earth and Get It Positioned
Now bring in your Earth photo. Go to File > Place and select your Earth stock image. Once it lands on the canvas, grab the Transform tool with Ctrl/Cmd + T to resize and reposition it.
Here’s a quick tip depending on your Photoshop version. In older versions, hold Alt + Shift while dragging a corner handle to scale proportionally from the center. In Photoshop CC, just hold Alt and it handles all sides together automatically. Get Earth sitting roughly where you want it in the composition, then commit the transform.
Shape the Lighting With Curves Adjustments
This is where the magic starts. Raw stock photos rarely match the moody, dramatic lighting a space scene needs. Adjustment Layers fix that without destroying your original image.
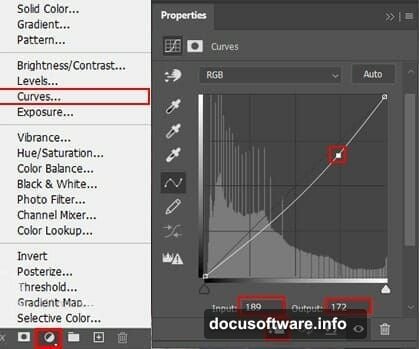
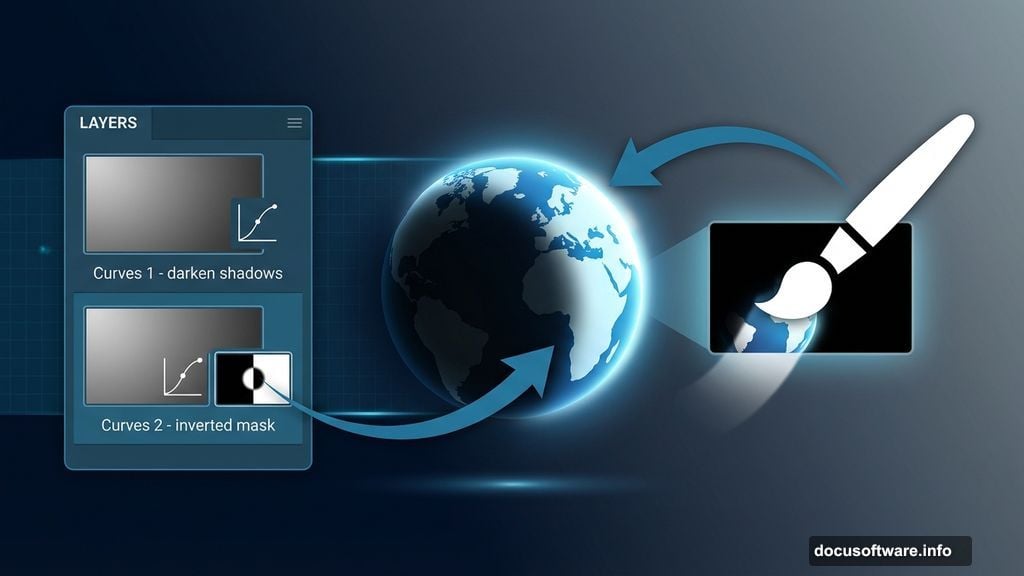
Add your first Curves Adjustment Layer. Use this to darken the overall image and deepen the shadows. Think about how Earth would actually look against the darkness of space. Most of the planet sits in shadow, with light catching one edge.
Add a second Curves Adjustment Layer on top of that. This time, press Ctrl/Cmd + I immediately after adding it. That inverts the mask, hiding the adjustment completely. Then grab your Brush Tool (B), set it to Soft Round, and make sure your foreground color is white. Paint directly onto the mask over the areas where light should hit the Earth’s surface. You’re essentially painting light back in exactly where you want it.
This two-Curves approach gives you enormous control. The first layer sets your base darkness. The second lets you sculpt light with a brush, creating that beautiful edge-lit look you see in NASA photographs.
Paint Extra Edge Glow on Earth
Create a brand new empty layer above your Curves adjustments. Keep your Brush Tool active on Soft Round, foreground color still white.
Now paint along the edge of Earth where light would catch it. Keep your brush opacity low, around 20-30%, and build the glow up gradually with multiple strokes. This soft, hand-painted edge light adds depth that adjustment layers alone can’t quite achieve. It also helps Earth feel like it belongs in the scene rather than sitting on top of it.
Bring In Your Second Planet
Open your Planet stock photo by going to File > Open. This works differently from Place, so you’ll need to select the area you want using the Rectangular Marquee Tool (M).
Hold Shift while dragging your selection to constrain it to a perfect square shape if needed. Release the mouse button before releasing Shift to lock that constraint in. Once selected, move the planet element into your main composition.
Here’s the blend mode trick that makes this step sing. Change the layer’s Blend Mode to Color Dodge and drop the Opacity to 88%. Color Dodge brightens the layers beneath based on the color of the layer above, creating a luminous, almost glowing quality. At 88% opacity it stays intense without going overboard.
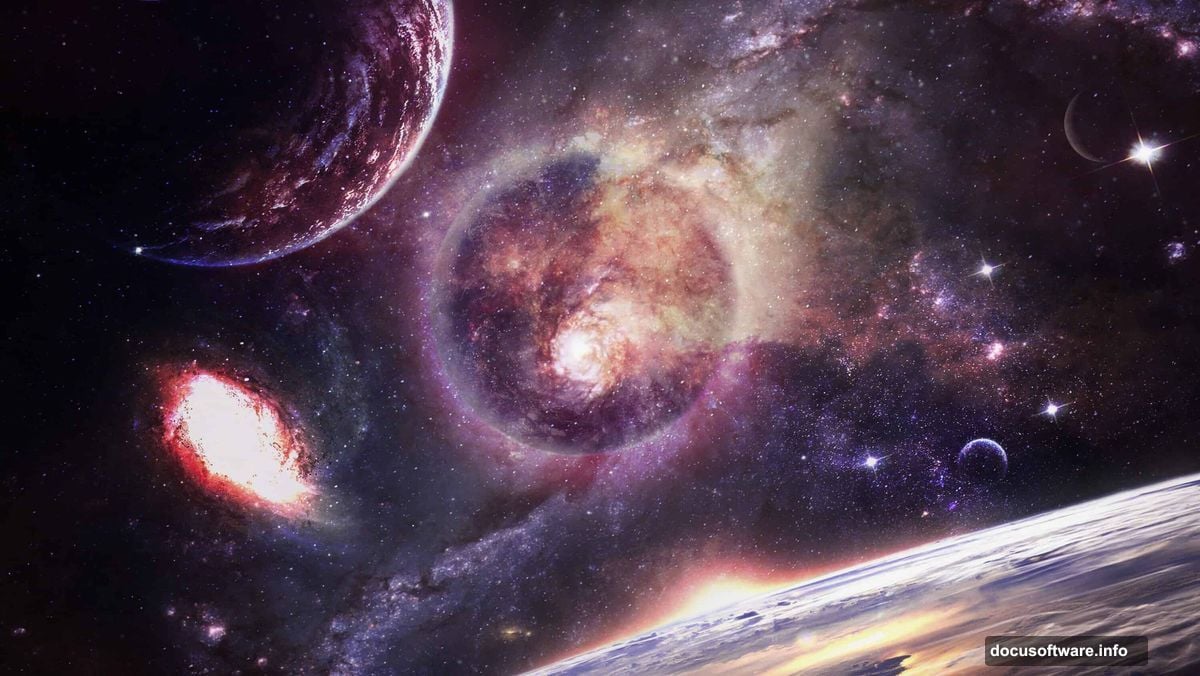
Build the Galaxy Atmosphere
With your Earth and planet elements placed, it’s time to bring in the galaxy, stars, and Milky Way images. Layer these beneath your planet layers so the cosmic backdrop sits behind everything else.

Use Adjustment Layers to blend these elements together so they feel like one unified scene. Curves work great here again. You can also experiment with Hue/Saturation to push colors into a cohesive palette. Deep blues, purples, and warm orange highlights tend to sell the “galaxy apocalypse” vibe best.
The hole image gets layered in around Earth, giving the impression that space itself is tearing open. Play with its blend mode and opacity until the edges feel naturally integrated rather than pasted.
Finish With Camera Raw Filter
The Camera Raw filter is your secret weapon for final polish. Once you’re happy with your composite, flatten a merged copy of your layers (Ctrl/Cmd + Alt + Shift + E creates a stamped visible layer). Then go to Filter > Camera Raw Filter.
Inside Camera Raw, you have access to controls that feel intuitive if you’ve ever edited photos in Lightroom. Boost Clarity slightly to add crispness to the cosmic details. Push Vibrance to make those galaxy colors pop. Adjust the Color Temperature to warm or cool the overall tone until the scene feels complete.
A slight vignette added in Camera Raw pulls the viewer’s eye toward the center of the composition. It also adds that cinematic quality that separates a good composite from a great one.
The result is a sweeping galaxy apocalypse scene, Earth bathed in dramatic edge lighting, planets and stars scattered across a deep cosmic sky, with that sense of vast, beautiful destruction hanging over everything. Not bad for a few hours in Photoshop.
Space-themed composites like this one are genuinely fun to build because the source material is so forgiving. Outer space is naturally mysterious, so small imperfections just add to the atmosphere. If an edge looks rough or a blend feels weird, lean into it. Sometimes the happiest accidents become the best parts of the image. Try swapping out the color palette once you finish the tutorial. A red and gold version of this scene hits completely differently than the cool blue original.