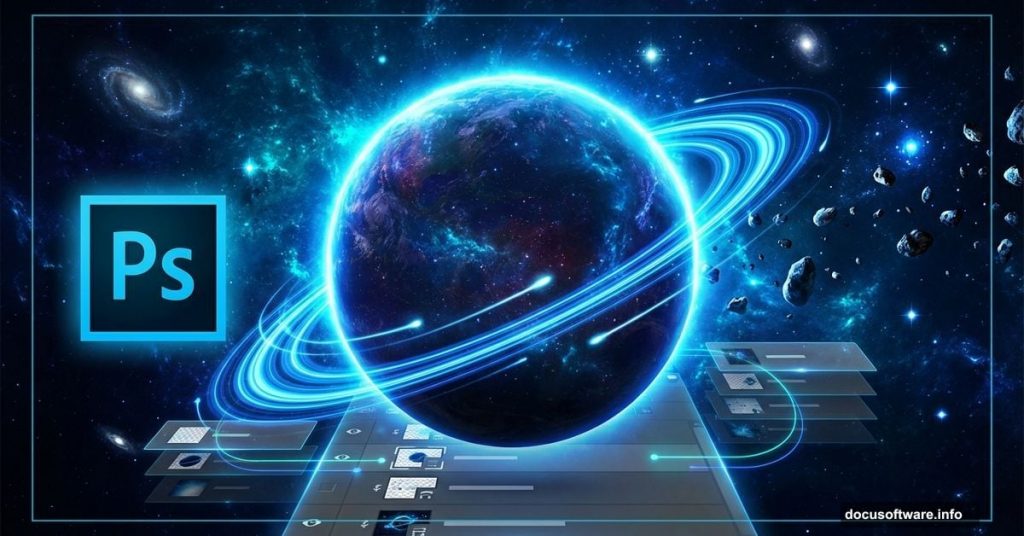
Creating dramatic space scenes in Photoshop sounds complicated. But the process breaks down into manageable steps that anyone can follow.
This tutorial shows you how to blend planets, asteroids, and cosmic textures into one explosive galaxy composition. Plus, you’ll learn tricks that work for any space-themed project. The techniques apply whether you’re designing book covers, game assets, or just experimenting with photo manipulation.
Let’s dive into building your own universe.
Set Up Your Canvas Right
Start with proper dimensions. Large canvas sizes give you flexibility for print or high-res digital work.
Create a new document with these specs:
- Width: 3080px
- Height: 3850px
- Resolution: 300 DPI
- Color Mode: RGB, 8-bit
- Background: Transparent
Why transparent? It lets you control the background separately. So you can test different space textures without starting over.
These dimensions work great for poster-sized prints. But feel free to adjust based on your final output. Just keep that 300 DPI for crisp details.
Layer Your Starfield Background
Now bring in your base starfield image. Go to File > Place and select your star texture.
Position it with Transform (Ctrl/Cmd + T). Hold Alt + Shift while dragging corners to maintain proportions. In newer Photoshop versions, just Alt alone keeps everything locked.
This creates your foundation. Everything else builds on top of this cosmic backdrop. So pick a starfield with good contrast and interesting detail clusters.
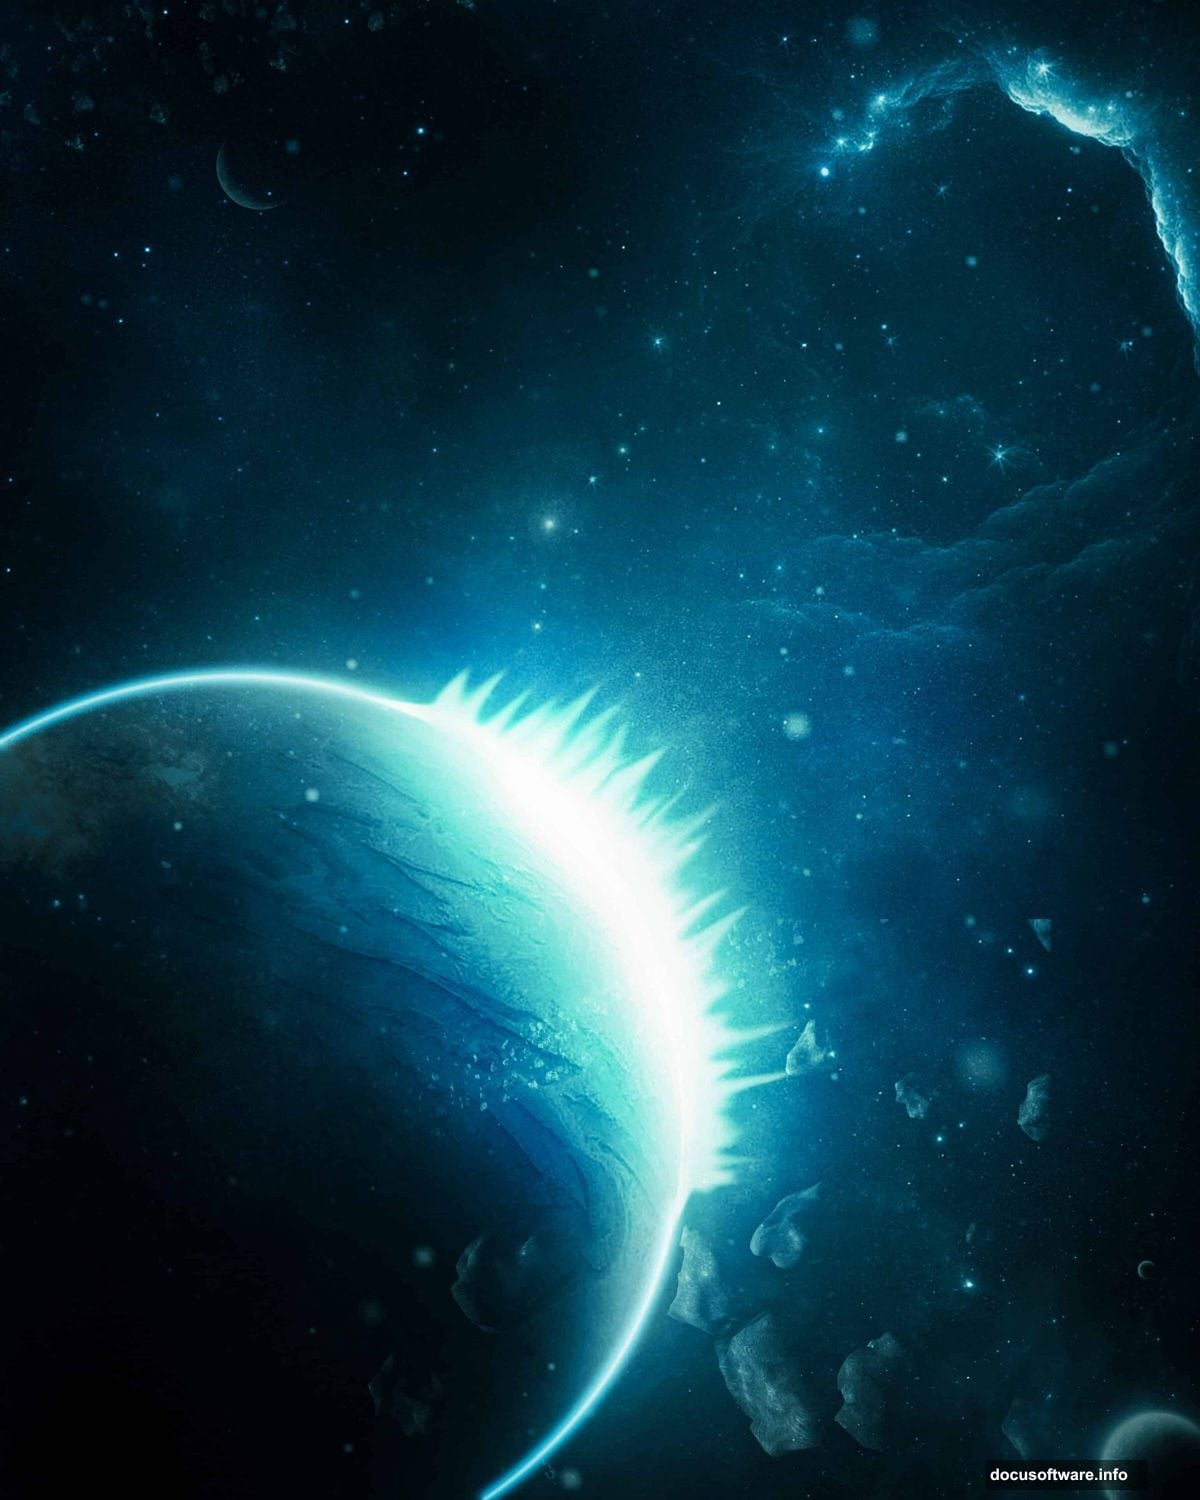
Add Your Main Planet
Time for the hero element. Place your planet image the same way as before.
But here’s where it gets interesting. Create a layer mask on your planet layer. Then grab the Brush Tool (B) with a soft round setting.

Paint with black to fade the planet edges naturally into space. This blending trick makes celestial objects look like they belong together instead of cut-and-pasted.
Focus on the edges farthest from your imagined light source. That creates depth and atmosphere around your planet.
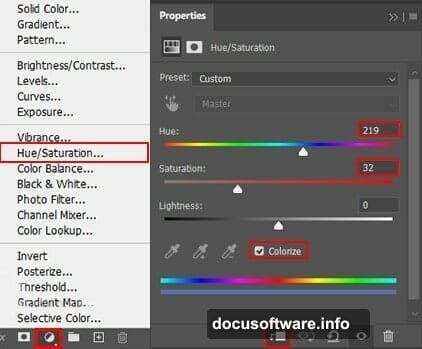
Adjust Color Balance
Add a Hue/Saturation adjustment layer. This lets you shift the planet’s colors to match your overall scene mood.
Want a cold, distant world? Push the hue toward blues and cyans. Need something warmer and more inviting? Nudge it toward oranges and yellows.
Keep saturation moderate. Real space photos rarely show super-saturated colors. In fact, subtle color shifts look more convincing than extreme adjustments.
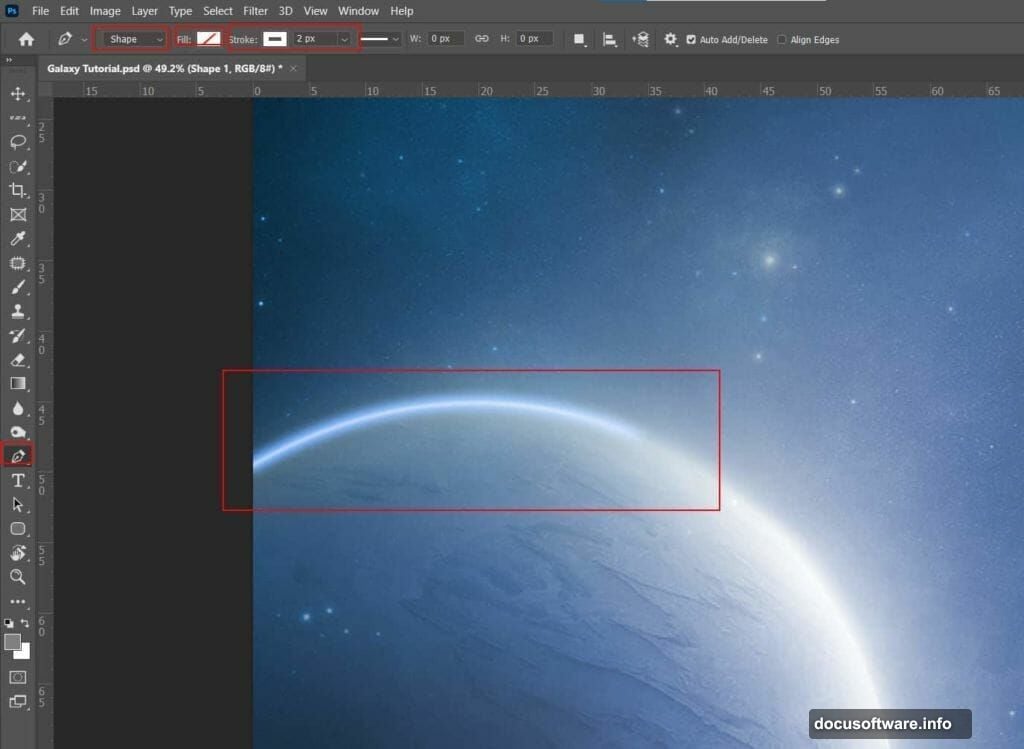
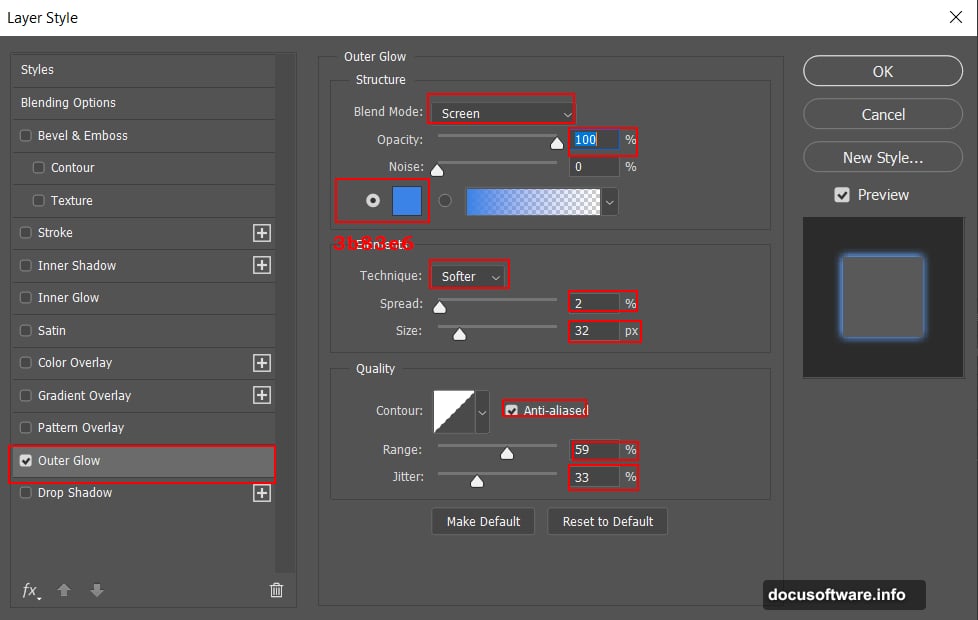
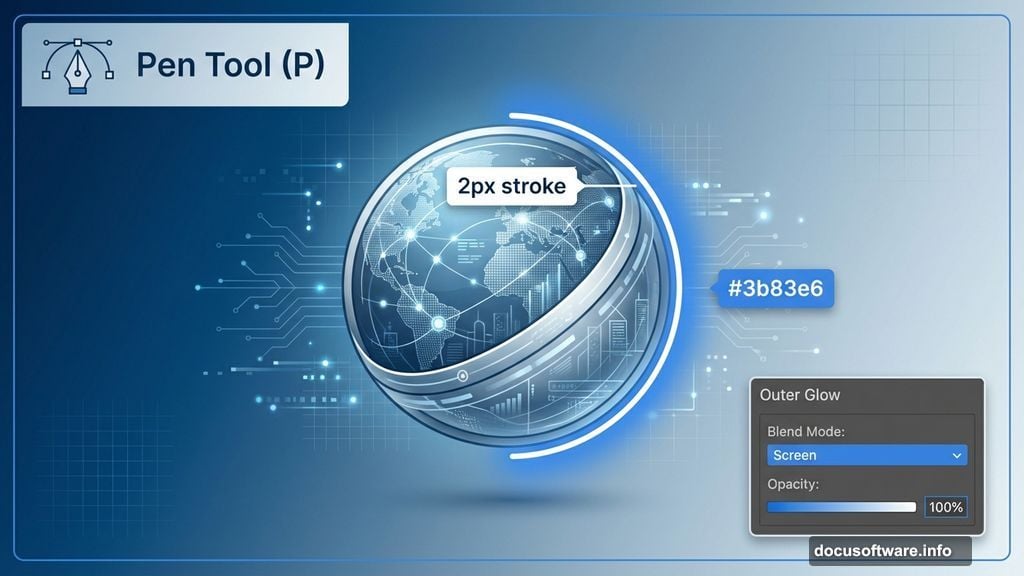
Create Glowing Ring Effects
Here’s a pro technique that adds serious wow factor. Create a new layer and convert it to a Smart Object first.
Grab the Pen Tool (P) and set it to Shape mode. Choose no fill and white stroke at 2px width. Draw a curved line around your planet’s edge.
Right-click the layer and select Blending Options. Add an Outer Glow with these settings:
- Blend Mode: Screen
- Opacity: 100%
- Color: #3b83e6 (electric blue)
- Technique: Softer
- Spread: 2%
- Size: 32px
- Range: 59%
- Jitter: 33%
Then apply Gaussian Blur at 4px. This creates that ethereal glow effect you see in sci-fi movie posters.
Add Debris and Asteroids
Space scenes need action. Place asteroid images around your composition using the same placement technique.
Vary their sizes and angles. Some should be sharp and close, others blurred to suggest distance. This depth layering makes your scene feel three-dimensional.
Use layer masks again to blend asteroid edges. Paint away hard boundaries where asteroids pass behind planets or through nebula clouds.
Build Up Secondary Elements
Now add supporting space objects. Maybe a distant moon, a space station, or another planet in the background.
Keep these elements smaller and less detailed. They shouldn’t compete with your main planet for attention. Instead, they fill empty space and guide the viewer’s eye through the composition.
Apply the same blending techniques. Soft edges, color adjustments, and careful positioning all matter here.
Layer in Space Fog
Add nebula or galaxy textures over everything. Set these layers to Screen or Lighten blend mode at reduced opacity.
This creates atmospheric depth. The fog effect unifies all your elements by wrapping them in shared lighting and color.
Paint with soft black brushes on layer masks to reveal or hide fog in specific areas. You want some objects to punch through clearly while others remain partially obscured.
Add More Star Layers
Your base starfield probably isn’t enough. Add 2-3 more star texture layers at different opacities.
Vary the sizes too. Some layers should have tiny pinpoint stars, others larger glowing dots. This variation mimics how real stars appear at different distances.
Use blend modes like Screen or Linear Dodge for star layers. They’ll glow naturally against your dark space background.
Apply Final Color Grading
Time for the Camera Raw filter. Go to Filter > Camera Raw Filter.
Adjust these key settings:
- Contrast: Boost it for more dramatic lighting
- Clarity: Push it higher for sharper details
- Vibrance: Subtle increase for richer colors
- Temperature: Shift slightly cooler for space scenes
- Vignette: Darken edges to focus attention
These global adjustments tie everything together. They create a consistent look across all your disparate elements.
Fine-Tune Individual Layers
Now review each major element. Does the planet’s color temperature match the scene lighting? Do asteroids have appropriate shadows?
Add Curves adjustment layers clipped to specific elements. This lets you darken shadows or brighten highlights without affecting other layers.
Small refinements make the difference between “pretty good” and “absolutely convincing.” So spend time here getting details right.
Export Your Masterpiece
Save a master PSD with all layers intact. Then flatten a copy for final export.
For web use, save as JPEG at 85-90% quality. For print, export as TIFF or high-quality JPEG at full resolution.
Keep that layered master file. You’ll thank yourself when you want to make adjustments later or reuse elements in other projects.
Why This Technique Works
This layered approach gives you complete control. Unlike automated filters, you decide exactly where each element goes and how it interacts.
The blend modes and adjustment layers create realistic lighting. That’s what sells the illusion that these separate photos exist in one unified space.
Plus, once you understand these core techniques, you can create infinite variations. Different planets, nebulas, asteroids, or spacecraft all use the same fundamental blending and masking methods.
Space art opens up creative possibilities. The subject matter is fantastical, so you can’t really do it “wrong.” Yet these technical skills ensure your final image looks polished and professional.
Now go build some galaxies. The universe is literally yours to create.