Want to build impossible worlds in Photoshop? This tutorial shows you exactly how to create a surreal destination floating above the clouds.
The best part? You don’t need advanced skills. Just patience and the right techniques. Let’s break down how to composite mountains, windows, and atmospheric elements into one believable scene.
What You’ll Build
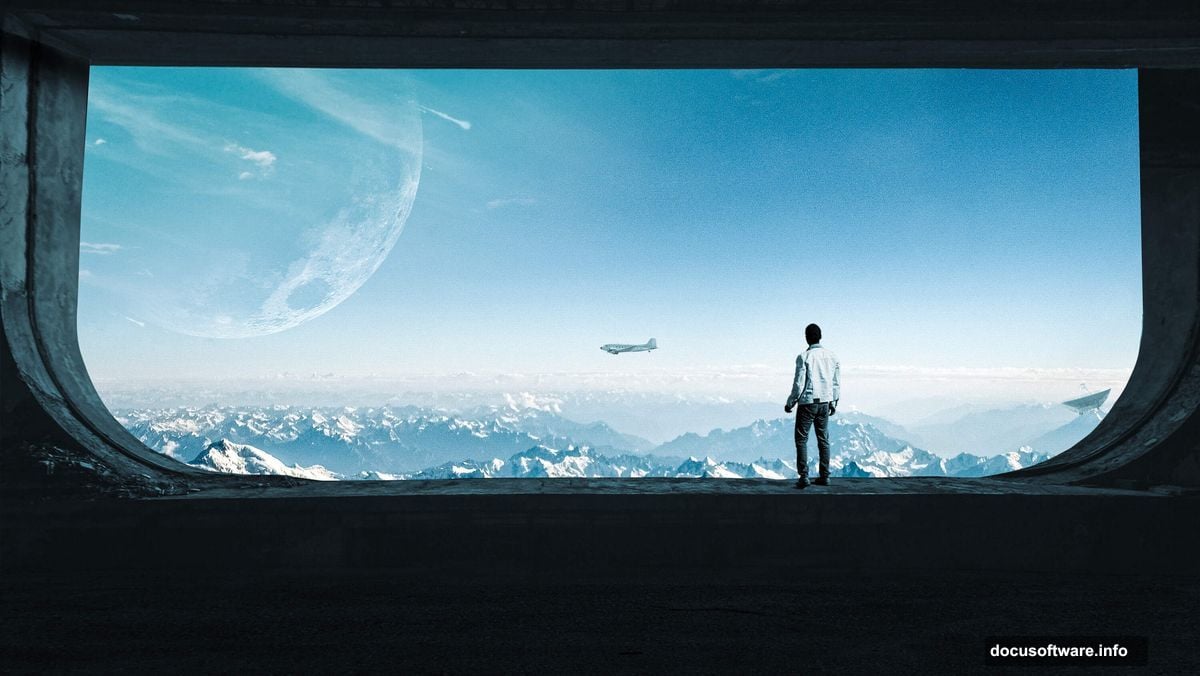
This project combines multiple stock images into a cohesive fantasy landscape. Think: a mysterious structure perched above cloud layers, complete with cosmic touches like moons and satellites.
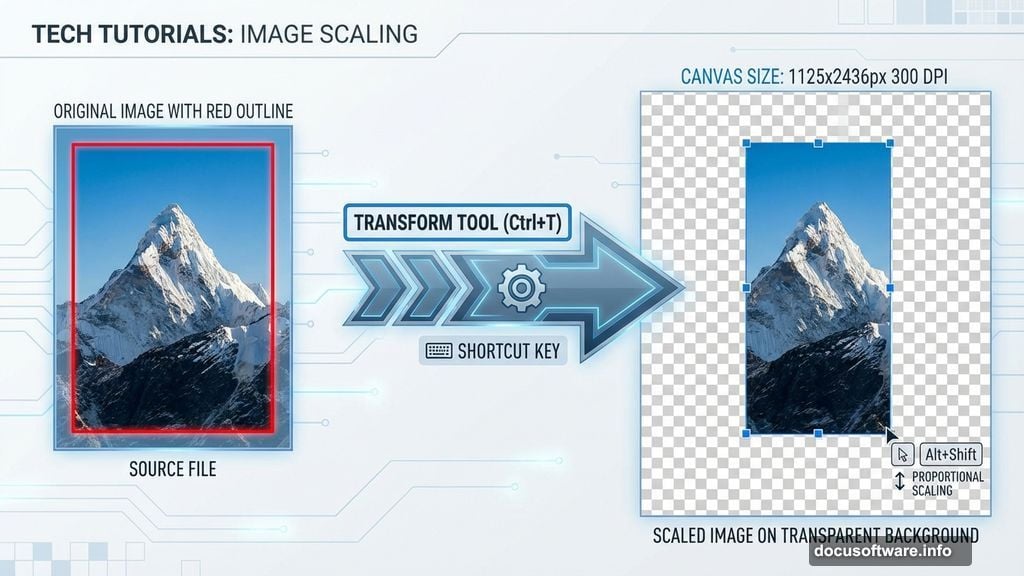
The final image measures 1125x2436px at 300 DPI. That’s print quality. Plus, the vertical format works perfectly for phone wallpapers or social media posts.
Setting Up Your Canvas
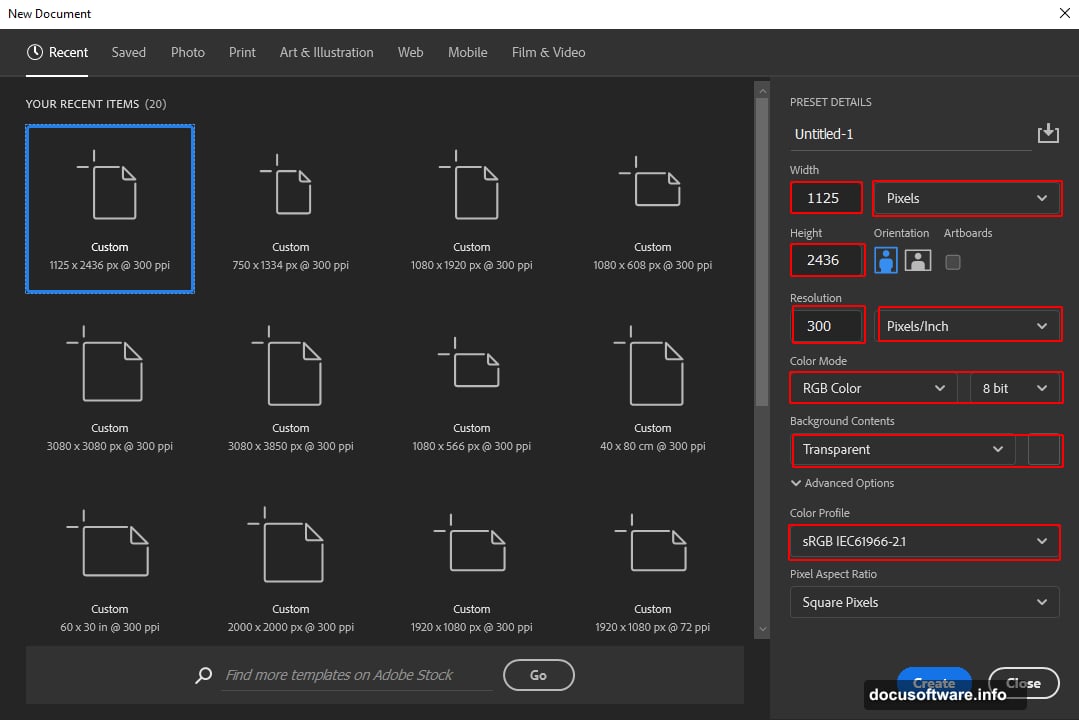
Start with a new document. File > New opens the creation dialog.
Set your dimensions to 1125×2436 pixels. Resolution should be 300 DPI for sharp details. Choose RGB color mode with 8-bit depth. Keep the background transparent so you can control every element.
These specs give you flexibility later. High resolution means you can crop or resize without losing quality. Transparent backgrounds make blending easier too.
Building the Foundation
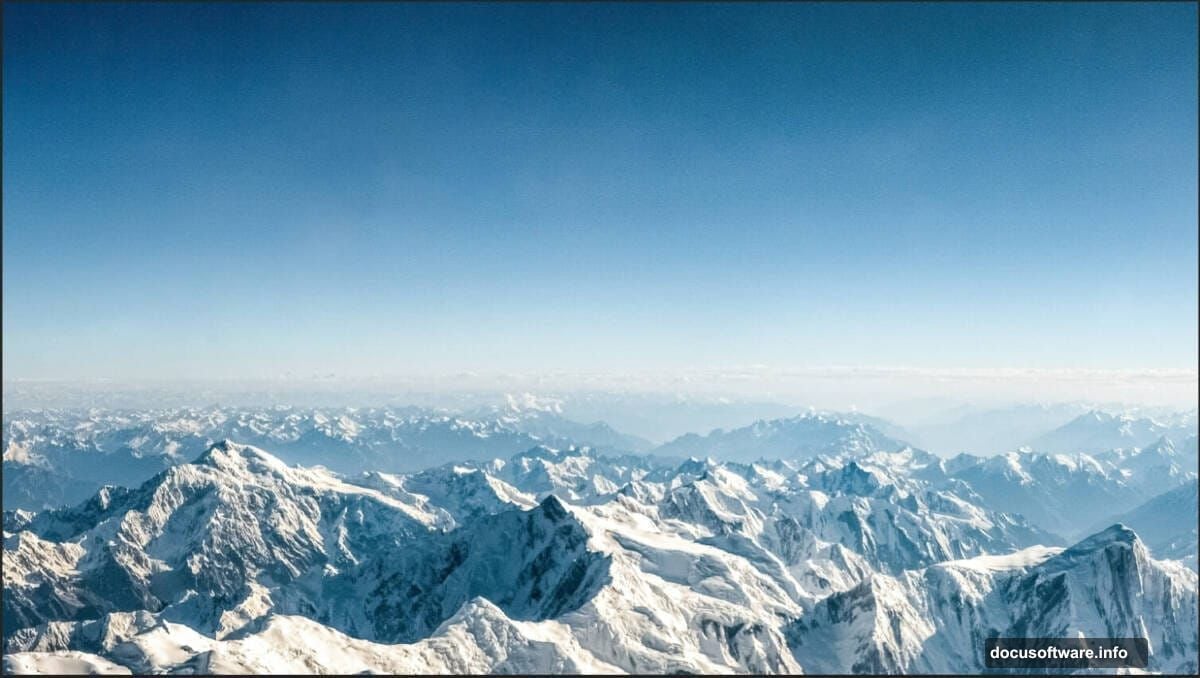
Mountains form your base layer. Place your mountain stock photo first.
Go to File > Place and select your mountain image. Position it with the Transform tool (Ctrl/Cmd + T). Hold Alt + Shift while dragging corners to maintain proportions. In Photoshop CC, just holding Alt works for all sides simultaneously.
This creates your anchor point. Everything else builds from here.
Adding Cloud Layers
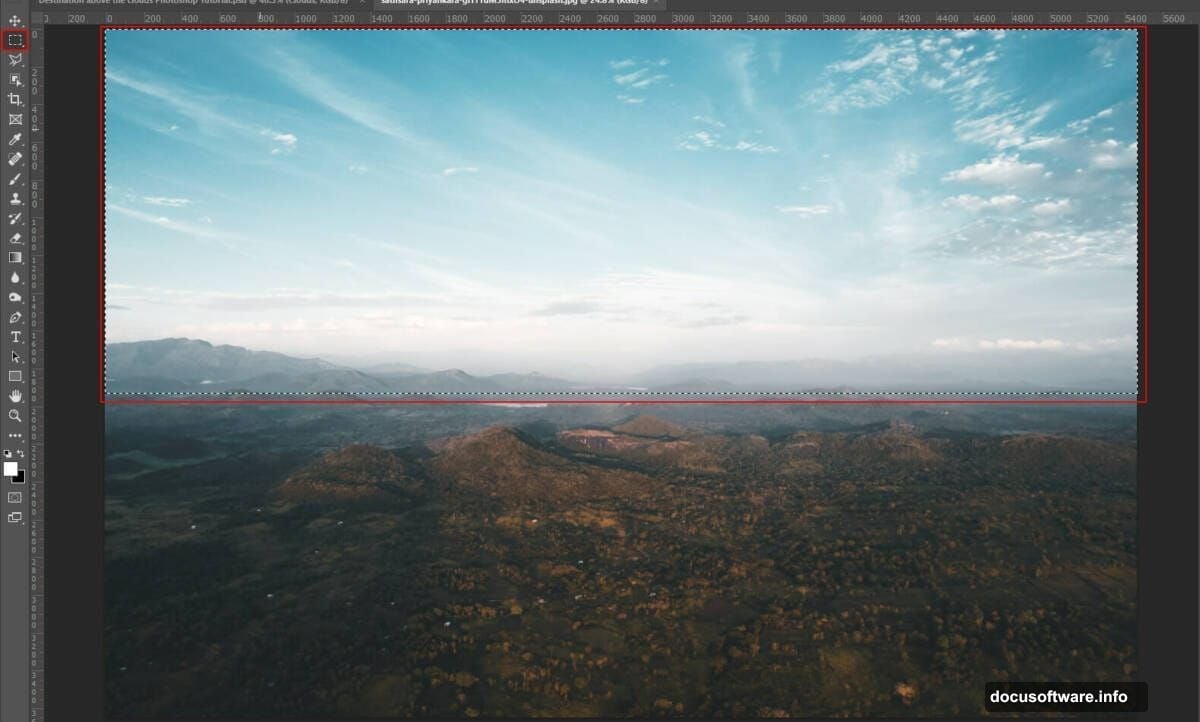
Clouds sell the illusion of height. Open your cloud stock image separately.
Use the Rectangular Marquee Tool (M) to select your desired cloud section. Copy it (Ctrl/Cmd + C) and paste into your main canvas (Ctrl/Cmd + V). Transform to fit, using the same Alt + Shift technique for proportional scaling.
Here’s where it gets interesting. Create a layer mask on your clouds. Select a soft round brush and paint away the bottom portions that overlap your mountains. This creates seamless integration.
Change the cloud layer blend mode to Lighten. Instantly, the clouds interact naturally with underlying elements instead of covering them completely.
Painting Atmospheric Effects
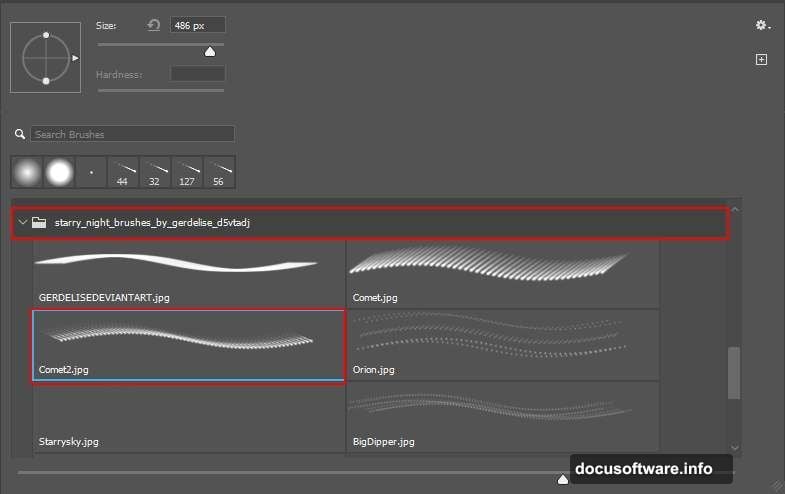
Custom brushes add authentic detail. Import cloud brushes by selecting the Brush Tool (B) and clicking the gear icon. Choose Import Brushes and load your downloaded brush pack.
Create a new layer above your clouds. Set the blend mode to Soft Light with white as your foreground color. Paint wispy cloud formations around your scene.
Soft Light blend mode prevents harsh edges. Your painted clouds look like natural atmospheric haze rather than obvious additions. That subtlety makes the difference between amateur and professional composites.
Adding the Moon
Celestial objects ground fantasy scenes in familiar reality. Open your moon stock photo separately.
Select the Elliptical Marquee Tool (M). Hold Shift while dragging to constrain your selection to a perfect circle. This ensures your moon stays round instead of oval.
Pro tip: Hold Alt/Option after you start dragging to create the selection from its center point. This gives you better control over positioning. Release your mouse button before releasing Shift to maintain the circular shape.
Copy your moon selection and paste it into your main composition. Scale and position it in your sky area.
Integrating Architectural Elements
Windows and structures add narrative intrigue. Place your window or building stock photo.
Use the Pen Tool (P) to trace precise selections around architectural elements. The Pen Tool gives you clean edges that look professional rather than rough or pixelated.
After creating your path, convert it to a selection (Ctrl/Cmd + Enter). Copy and paste into your main canvas. Position your architectural element so it interacts logically with your mountains and clouds.
Adding Human Scale
People and objects establish size relationships. Place your human figure, satellite, or plane stock images.
These elements tell viewers how massive your scene is. A tiny person silhouette makes mountains look enormous. A satellite suggests you’re above the atmosphere entirely.
Position each element thoughtfully. Consider light direction and perspective. Elements should feel like they belong in the same space, not randomly pasted.
Extending Surfaces
Sometimes stock photos don’t give you enough architecture. The Clone Stamp Tool (S) extends walls and roofs seamlessly.
Select a textured area of your existing structure. Alt/Option-click to set your clone source. Paint over empty areas to replicate that texture. Vary your source point frequently to avoid obvious repetition.
This technique fills gaps without requiring additional stock photos. Just be careful to match lighting and perspective as you clone.
Organizing Your Layers
Group related elements together. Select multiple layers and press Ctrl/Cmd + G to create a group.
Name your groups logically: “Landscape Base,” “Atmospheric Effects,” “Structures,” “Characters.” This organization saves massive time when you need to adjust specific elements later.
Plus, you can apply adjustment layers to entire groups at once. More on that next.
Color Grading for Unity
Adjustment layers blend disparate stock photos into cohesive scenes. Add a Curves adjustment layer above all your grouped elements.
Drag the curve to adjust overall brightness and contrast. Small adjustments go far. The goal is making all elements appear lit by the same light source.
Add a Color Balance adjustment next. Push midtones slightly toward blue or orange depending on your desired mood. Cool tones suggest evening or mystery. Warm tones feel more inviting.
Hue/Saturation adjustments unify color intensity across all elements. Slight desaturation often looks more realistic than the vibrant colors in stock photos.
The Camera Raw Secret
Camera Raw Filter gives you professional-grade control. With all layers visible, press Ctrl/Cmd + Shift + Alt/Option + E to create a merged stamp of everything.
Go to Filter > Camera Raw Filter. This opens a panel with extensive controls.
Adjust Clarity to enhance mid-tone contrast. Boost it slightly for dramatic skies. Lower it for dreamy, soft effects.
Dehaze cuts through atmospheric fog if your composite feels too hazy. Or add negative Dehaze values to increase mystical atmosphere.
Temperature slider shifts your entire color palette warmer or cooler. Small adjustments here have dramatic impact on mood.
Why Some Tutorials Feel Frustrating
Complex compositing takes practice. Stock photos never fit perfectly on the first try.
The challenge lies in making unrelated images look like they belong together. Light direction matters. Perspective matters. Color temperature matters tremendously.
Don’t expect perfection immediately. Professional compositors spend hours tweaking blend modes, layer masks, and adjustment layers. Your first attempts will teach you more than any tutorial.
What Makes Composites Work
Successful fantasy scenes balance the impossible with the believable. Yes, you’re creating something that doesn’t exist. But light still follows rules. Perspective still applies. Colors still need harmony.
Focus on these fundamentals:
Light consistency across all elements. If your moon casts light from the right, everything should show subtle right-side lighting.

Atmospheric perspective makes distant elements hazier and less saturated. Your farthest mountains should fade slightly into the sky.
Scale relationships must be logical. Even in fantasy, viewers need size cues to understand your scene.
Color harmony ties everything together. All elements should share similar color temperatures or complementary hues.
Where to Go From Here
This technique works for any surreal composite. Floating islands. Underwater cities. Space stations above Earth.
The process stays the same. Gather stock images. Build from background to foreground. Use layer masks for seamless blending. Apply adjustment layers for color unity. Finish with Camera Raw Filter for professional polish.
Each project teaches new problem-solving skills. Maybe your mountains don’t match your clouds. That’s when you learn advanced masking techniques. Perhaps your architectural elements feel flat. That’s when you discover how shadows and highlights create depth.
Keep experimenting. Save your work frequently. Try different blend modes on every layer. Sometimes Screen mode works magic. Other times Multiply solves everything. You won’t know until you test.
The only way to master Photoshop compositing is making lots of composites. Start simple. Build complexity gradually. Your skills compound faster than you expect.