Creating surreal photo manipulations sounds intimidating. But once you understand the layering process, it’s surprisingly manageable.
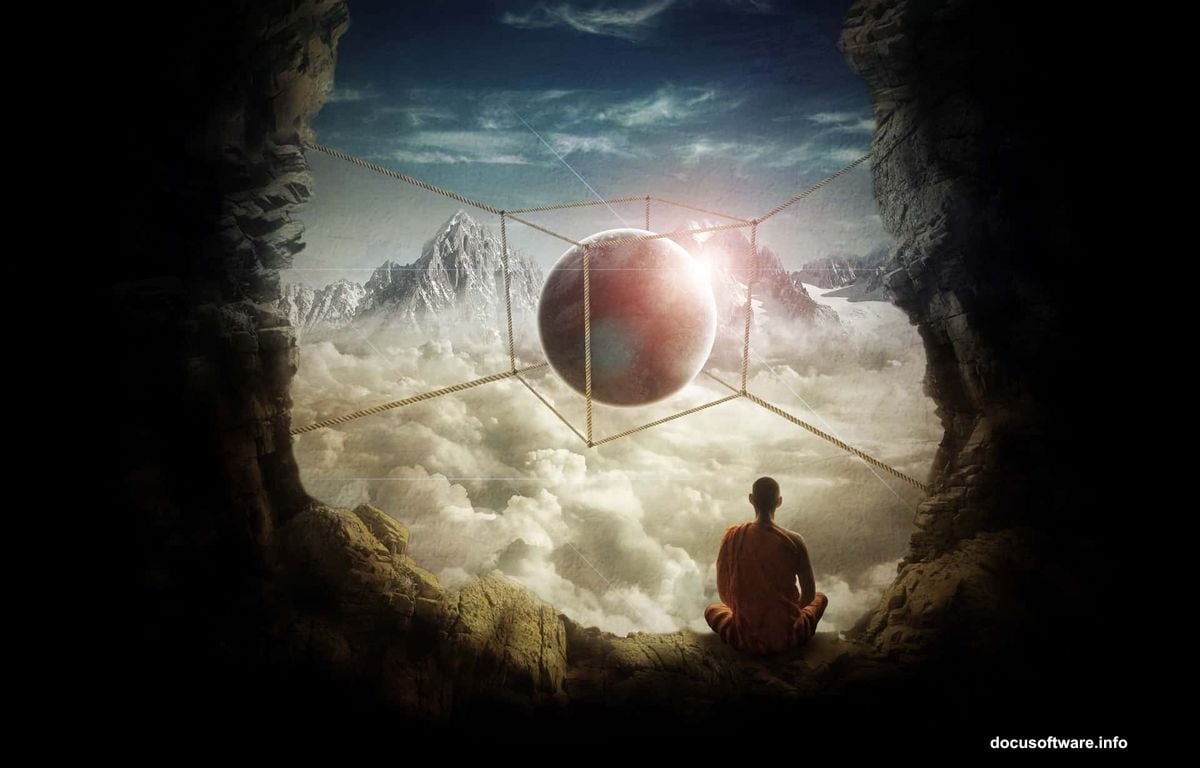
This tutorial breaks down how to build a complex cave scene featuring a monk and floating sphere. You’ll learn practical techniques for blending rock formations, creating realistic ropes, and compositing mountain peaks above clouds. Plus, we’ll cover lighting tricks that make everything look believable.
No magic required. Just systematic layering and smart masking.
Setting Up Your Canvas
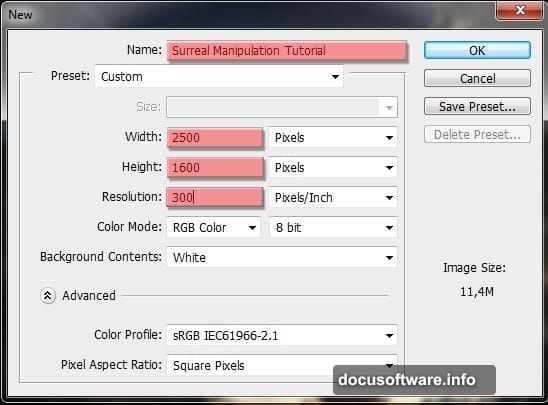
Start with a new Photoshop file. Use 1920×1080 pixels at 72 DPI for web projects. Higher resolution works for print, but increases file size significantly.
Name your file something memorable. “Surreal Cave Scene” beats “Untitled-47” when you’re hunting through folders later.
Building the Sky Foundation
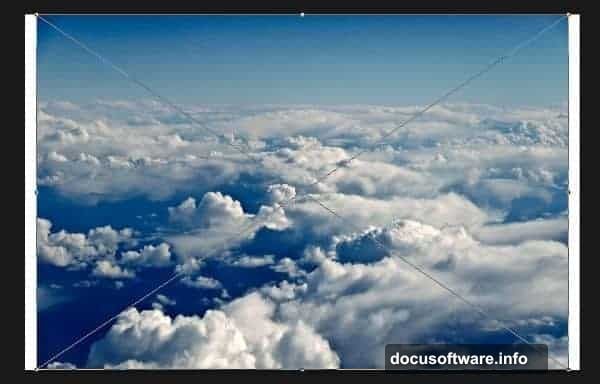
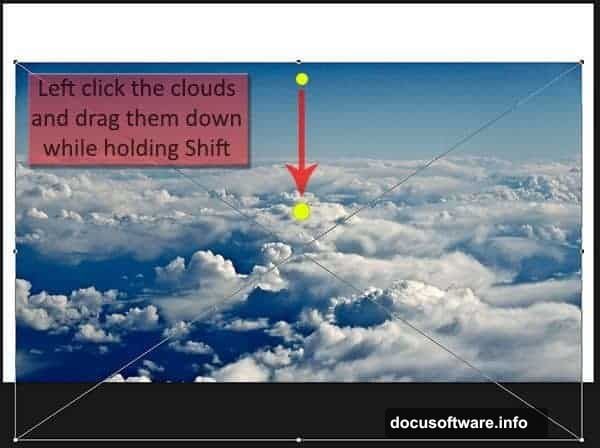
Place your first cloud stock image. Go to File > Place and select your sky resource. The image appears with transform handles.
Hold Shift while dragging. This locks movement to one axis. Pull the image down slightly, then hit Enter to confirm.
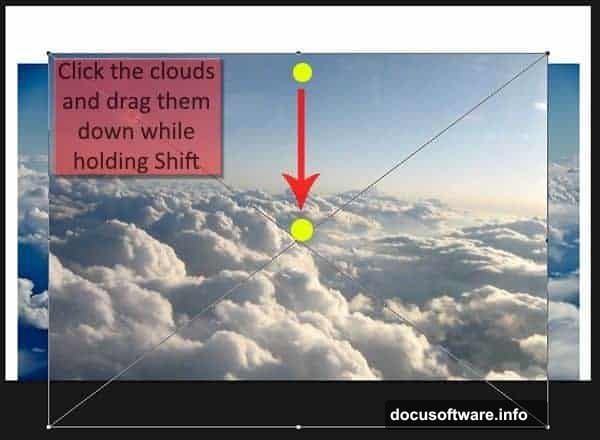
Repeat with your second cloud layer. Place it and drag down while holding Shift. Your layers panel now shows two cloud images stacked vertically.
Add your field/ground image next. Place it and drag upward past the canvas top. This creates depth when we mask it later.
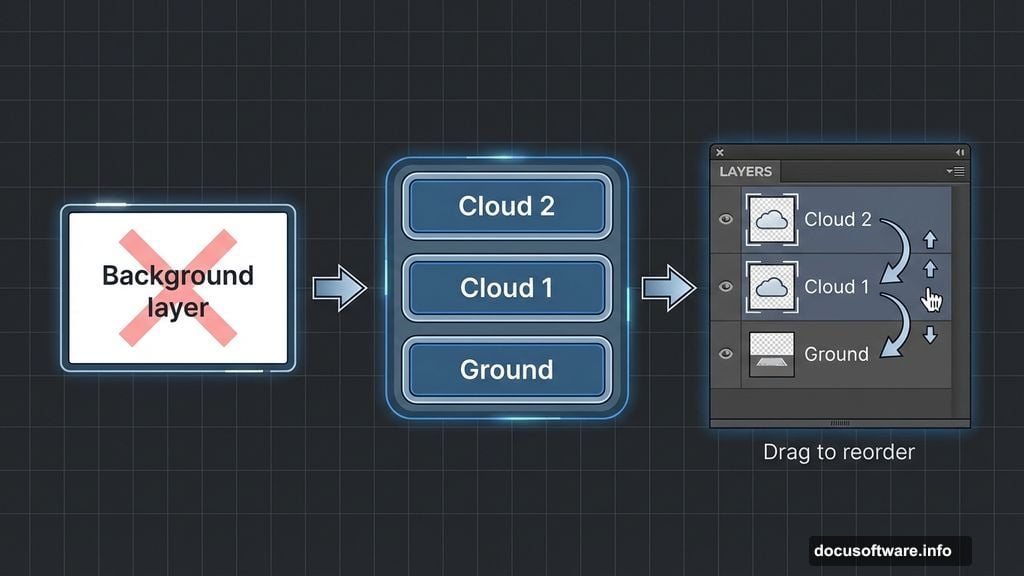
Delete the Background layer if it exists. We’re building everything from scratch, so that white rectangle just clutters your panel.
Reorder your layers. Drag the field layer below both cloud layers. This puts clouds in front, which makes visual sense.
Rename everything now. “Cloud 1”, “Cloud 2”, and “Ground” beat “Layer 1”, “Layer 2”, “Layer 3” when you’re juggling 50+ layers later.
Blending Clouds Seamlessly
Your canvas probably looks terrible right now. Hard edges. Visible seams. Clashing colors. That’s normal.
Click the “Cloud 2” layer. Add a layer mask by clicking the camera icon in the layers panel.
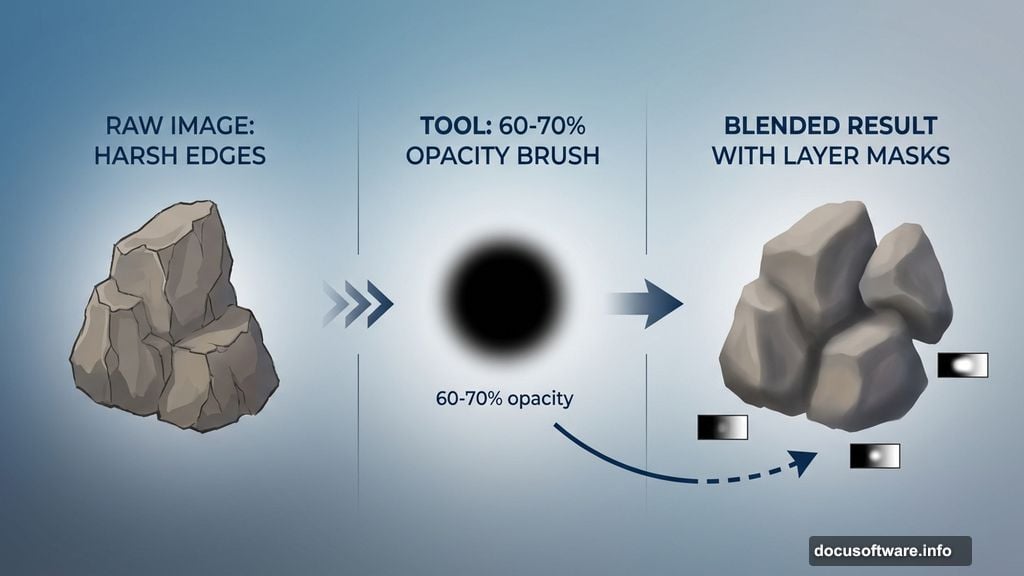
Select a soft brush. Set it to black. Paint along the bottom edge of your second cloud layer. This gradually reveals the sky below, creating a smooth transition.
Lower the opacity if the blend looks too abrupt. Aim for 60-70% opacity on your brush. You can always paint more. Removing excess is harder.
Constructing the Cave Structure
Here’s where patience matters. Building a believable cave takes multiple rock images blended together.
Place your first rock formation. Transform it to fit your composition. Remember, caves have irregular shapes. Don’t worry about making it perfectly symmetrical.
Add more rock pieces. Place them at different angles. Overlap edges where they meet. This creates natural-looking formations instead of obvious stock image borders.
Use layer masks on each rock piece. Paint away hard edges. Blend where rocks connect. The goal is making viewers forget these came from separate photos.
Group all cave layers into a folder. This keeps your panel organized and makes adjustments easier later.
Creating Rope Geometry
Want to add hanging ropes without modeling them in 3D? Use a reference cube image as your guide.
Place your 3D cube stock. This provides perspective lines to follow.
Create a new layer. Use the Line Tool set to 3-4 pixels width. Draw along the cube’s edges. This creates rope paths that follow proper perspective.
Add texture to your rope lines. Place actual rope stock on top. Use Warp Tool to follow your drawn paths. This maintains correct perspective while adding realistic texture.
Duplicate rope layers for thickness. Offset them slightly. This creates dimension instead of flat lines.
Lighting the Cave Interior
Create a new layer above your cave group. Set it to Soft Light blending mode.
Choose a warm orange color. Paint where light would naturally hit rock surfaces. Caves get indirect sunlight, so focus on areas near openings.
Add another layer set to Multiply. Use dark blue or purple. Paint shadows in recessed areas. This creates depth and makes your cave feel three-dimensional.
Lower layer opacity if effects look too strong. Aim for 30-40% opacity initially. You can always increase it.
Adding the Floating Sphere
Place your planet or sphere image. Transform it to appropriate size. Smaller spheres feel more magical. Oversized ones look cartoonish.
Add a layer mask. Paint away the bottom edge slightly. This creates the illusion of atmospheric haze between sphere and viewer.
Create a shadow layer beneath the sphere. Use a soft black brush at 20-30% opacity. Paint a subtle shadow on cave surfaces below. Even floating objects cast some shadow.
Add rim lighting to the sphere. Create a new layer set to Screen mode. Use a soft white brush along the top edge. This suggests light from above and separates the sphere from the background.
Compositing the Monk Figure
Place your monk stock image. Position him where composition feels balanced. Usually slightly off-center works better than dead center.
Match his lighting to your cave lighting. If your cave uses warm orange tones, add orange to his shadows.
Paint shadows beneath him. Even if he’s standing on rock, he needs contact shadows. Use Multiply layers at low opacity.
Add atmospheric haze in front of him. Create a layer between monk and background. Use a soft white brush at 5-10% opacity. This adds depth and makes him feel integrated into the scene.
Building Mountain Peaks Above Clouds
Place your mountain stock. Position it so peaks emerge from your cloud layer.
Add a layer mask. Paint away everything below the cloud line. This creates the illusion mountains rise from the cloud bed.
Adjust colors to match your sky. Use Hue/Saturation adjustments. Mountains should feel like they exist in the same atmosphere as your clouds.
Add atmospheric perspective. Mountains farther away appear lighter and bluer. Use Curves adjustments to desaturate and lighten distant peaks.
Final Color Adjustments
Create a Curves adjustment layer at the top of your layer stack. This affects everything below.
Adjust the curve slightly. Pull highlights up for brightness. Push shadows down for contrast. Small movements make big differences.
Add a Color Lookup adjustment layer. Try “Moonlight” or other cinematic presets. Lower opacity to 30-50%. This unifies all your elements with consistent color grading.
Create a final Sharpen layer. Merge a copy of all visible layers. Apply Smart Sharpen filter at 80-100%. Set this layer to 50% opacity. This adds crispness without looking over-processed.
Common Mistakes to Avoid
Don’t skip masking. Hard edges scream “bad composite” louder than anything else.
Avoid inconsistent lighting. If your cave has warm light, everything inside needs warm shadows.
Don’t forget atmospheric haze. Real scenes have depth created by air and particles. Add subtle haze layers between foreground and background elements.
Skip over-sharpening. It’s tempting to crank sharpening to maximum. But soft, slightly hazy composites often look more believable than razor-sharp ones.
Why This Technique Works
This systematic approach builds complexity gradually. Each step adds one element. By the end, you’ve created something intricate without feeling overwhelmed.
Plus, this method scales. Once you understand layering, masking, and lighting principles, you can build any surreal scene. Different stocks. Same techniques.
The key is patience. Rush through masking, and seams show. Skip lighting layers, and everything looks flat. But invest time in each step, and your final image rewards that effort.
This isn’t about Photoshop magic. It’s about understanding how light, perspective, and atmosphere work. Then using layers to recreate those effects digitally.