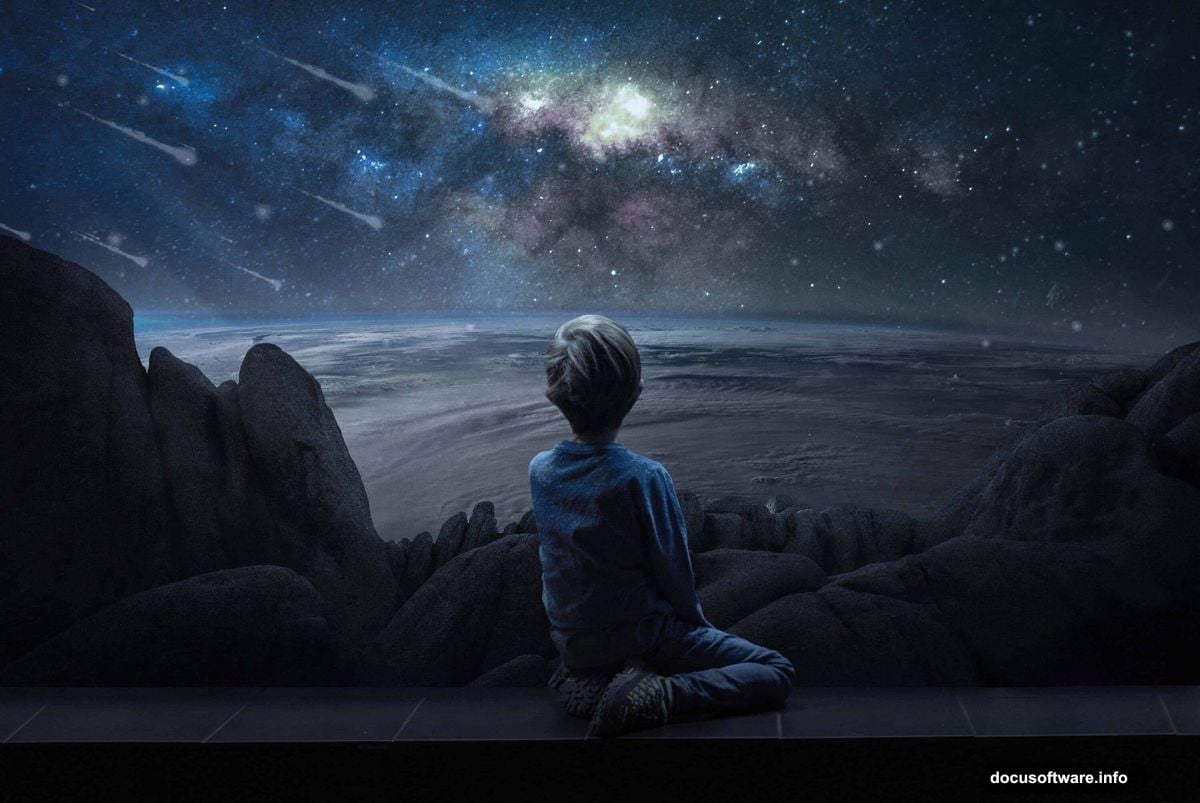
Want to build dreamlike compositions that look impossible? Photo manipulation lets you combine everyday images into scenes that defy reality.
This tutorial walks through creating a surreal space scene in Photoshop. We’ll place a figure on Earth’s surface while floating in space. Plus, you’ll learn techniques that work for any photo manipulation project.
You don’t need advanced skills. Just patience and willingness to experiment with layers and masks.
What You’ll Need
Gather these resources before starting:
Images:
- Model or figure photo
- Mountain landscape
- Earth from space
- Sky texture
- Astronaut reference
- Surface textures
Photoshop Tools:
- Adjustment layers
- Layer masks
- Pen tool for selections
- Soft round brush
- Camera RAW filter
Most stock photo sites offer these image types. Or shoot your own base photos for unique results.
Setting Up Your Canvas
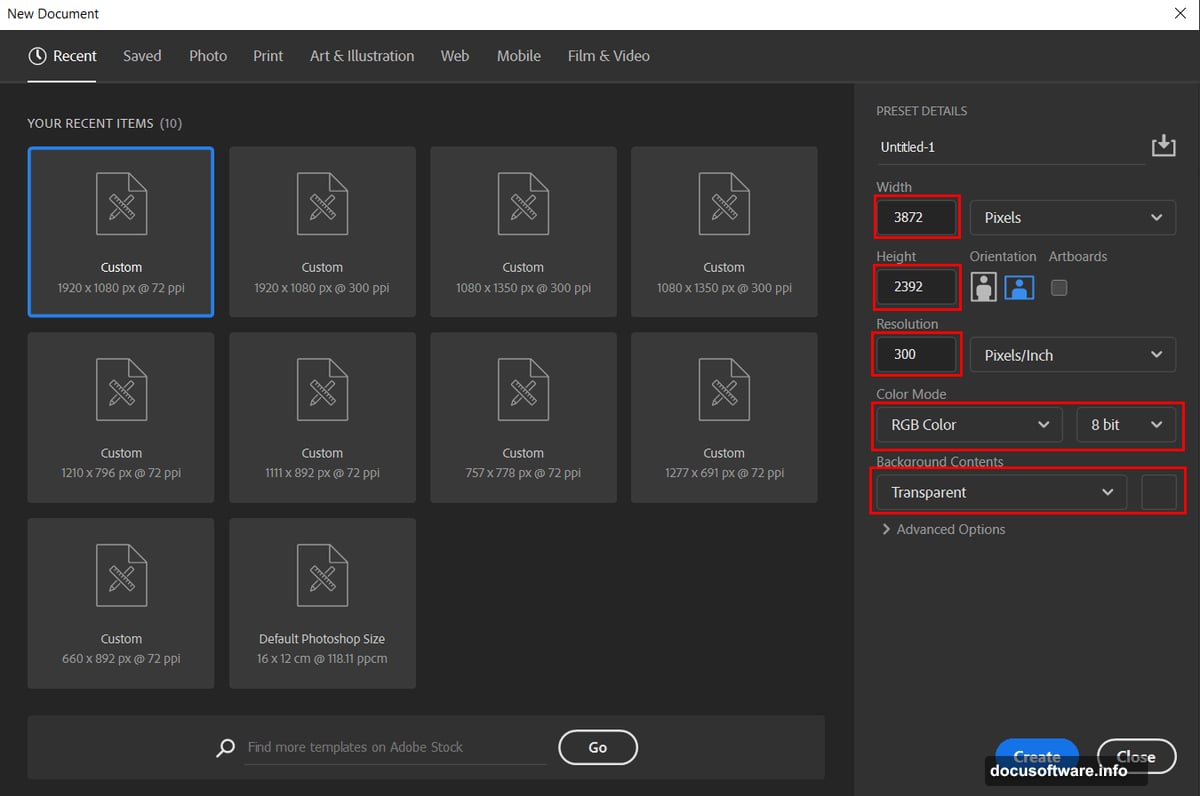
Start with a new Photoshop document. Here’s what works for surreal compositions:
Document specs:
- Width: 3000 pixels
- Height: 2000 pixels
- Resolution: 300 DPI for print, 72 for web
- Color mode: RGB
These dimensions give plenty of room to work. You can always resize later if needed.
Cutting Out Your Subject
The pen tool gives clean selections that look natural. Here’s the process:
First, open your model image. Select the Pen tool (P) from the toolbar.
Creating the path:
- Click to place anchor points around your subject
- Keep points close together on curves
- Use fewer points on straight edges
- Close the path by clicking the first anchor point
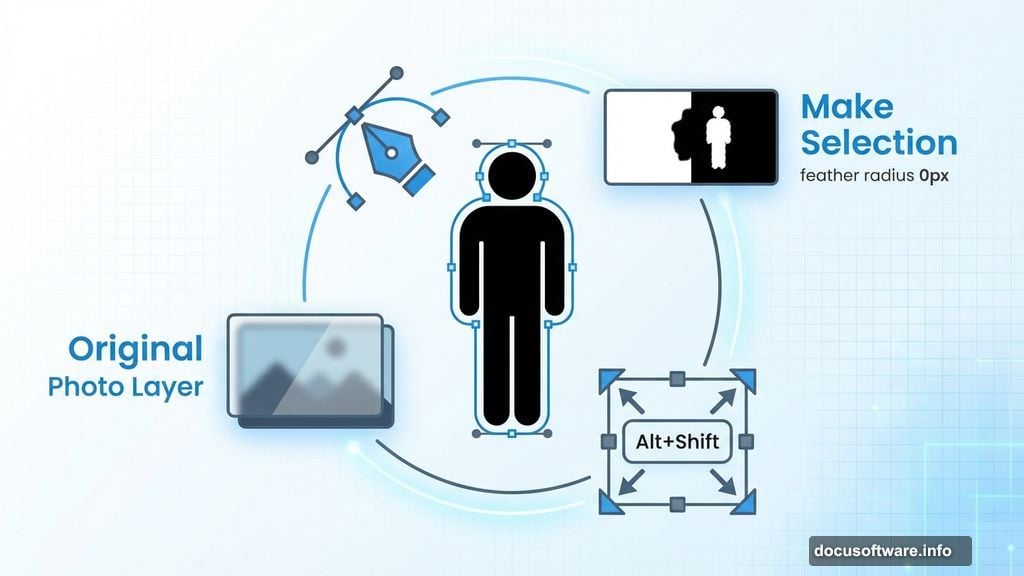
Now right-click and choose “Make Selection.” Set feather radius to 0px and enable anti-aliasing. This keeps edges sharp but not jagged.
Copy (Ctrl/Cmd + C) and paste (Ctrl/Cmd + V) into your main canvas. Use Transform (Ctrl/Cmd + T) to resize. Hold Alt + Shift while dragging corners to maintain proportions.
Building Depth with Adjustment Layers
Adjustment layers make your subject blend into the scene. They’re non-destructive, so you can tweak settings anytime.
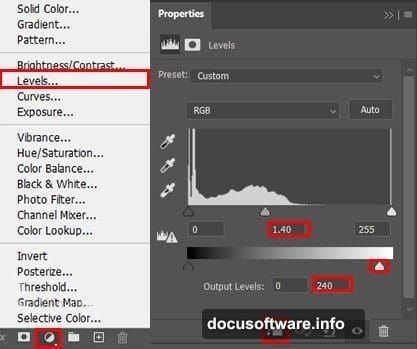
Add these adjustments in order:
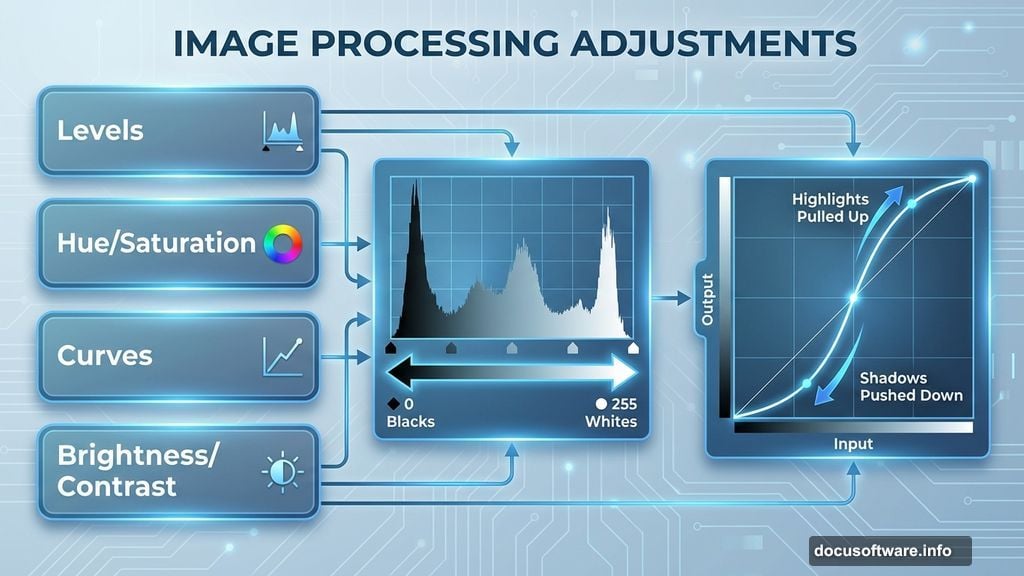
Start with Levels. This controls overall brightness and contrast. Drag the black and white input sliders toward the center of the histogram. Stop when shadows look rich but retain detail.
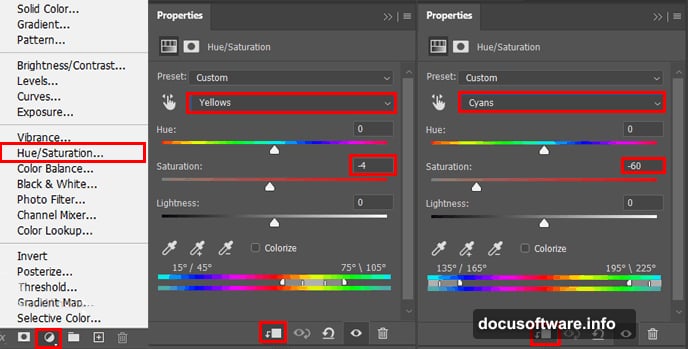
Next comes Hue/Saturation. Shift the hue slightly to match your background’s color temperature. Reduce saturation by 10-15% so your subject doesn’t look too vivid.
Then add Curves. Create a subtle S-curve by pulling up highlights and pushing down shadows. This adds dimension and makes lighting feel more dramatic.
Finally, apply Brightness/Contrast. Lower brightness slightly on the subject layer. This prevents your figure from looking pasted on.
Selective Lighting Technique
Here’s where your composition gets interesting. We’ll brighten specific areas to simulate space lighting.
Add another Brightness/Contrast adjustment layer. Increase brightness significantly. Then press Ctrl/Cmd + I to invert the layer mask to black.
Select a soft round brush (B). Set foreground color to white. Paint on the mask where light would naturally hit your subject. Focus on:
- Top of shoulders and head
- Raised surfaces
- Areas facing the light source
Build up the effect gradually with multiple brush strokes. Lower brush opacity to 30-40% for subtle control.
Creating Multiple Instances
Time to add visual interest through repetition. Group all your subject layers (Ctrl/Cmd + G). Duplicate the group (Ctrl/Cmd + J).
Use the Move tool (V) to shift this copy slightly right. Make another duplicate and move it left.
Now add layer masks to each group. Use a soft black brush to fade the edges where copies overlap. This creates a ghosting effect that suggests movement or alternate realities.
The technique works because our brains expect solid, single objects. So seeing transparent duplicates triggers that surreal feeling.
Blending Background Elements
Open your Earth image. Drag it into your composition below the subject layers. Resize to fill most of the canvas.
Add a gradient mask to blend Earth’s edges into space. Select the Gradient tool (G). Choose black to transparent. Drag from the edges toward the center.
Next, bring in your mountain landscape. Place it on a new layer above Earth. Change the blend mode to Overlay or Soft Light. Reduce opacity to 40-50%.
This technique layers textures without making them look flat. The mountains add surface detail while Earth provides the overall form.
Finishing with Camera RAW
Almost done. Flatten your composition by going to Layer > Flatten Image. Then select Filter > Camera RAW Filter.
Adjust these settings:
Temperature: Shift toward blue (around 5000K) for that space coldness. Tint: Add slight magenta to counter green tones. Exposure: Increase by +0.5 to +1.0 stops. Contrast: Boost to +20 or +30. Clarity: Add +15 to +25 for edge definition. Vibrance: Increase by +10 to make colors pop.
In the Effects panel, add a subtle vignette. Set Amount to -15 and Midpoint to 50. This draws eyes toward the center.
Camera RAW gives you the final color grade. It unifies all your layers into a cohesive scene that feels intentional rather than assembled.
Common Problems and Fixes
Subject looks pasted on:
Add shadow layers beneath your figure. Use a soft black brush at low opacity. Match shadow direction to your main light source.
Colors don’t match:
Create a Color Lookup adjustment layer. Try various presets until you find one that harmonizes your elements. Reduce opacity if the effect feels too strong.
Edges look too sharp:
Add a slight Gaussian Blur (0.5-1 pixel) to subject edges. Or use the Smudge tool at 10% strength to soften transitions between subject and background.
Lighting feels flat:
Dodge and Burn manually. Create a new layer set to Overlay blend mode. Paint with white to brighten, black to darken. This gives you precise control over light distribution.
Beyond This Tutorial
These techniques work for any surreal composition. Try combining:
- Urban scenes with fantasy elements
- Portraits with abstract textures
- Architecture in impossible locations
- Natural objects at wrong scales
Photo manipulation rewards experimentation. Don’t worry about perfect results on your first attempt. Instead, focus on understanding how layers, masks, and adjustments interact.
Save your PSD files with layers intact. You’ll want to revisit and refine your work after fresh eyes reveal new possibilities.
Start simple. Master one technique before adding complexity. Build your skills through repeated practice rather than trying to create masterpieces immediately.
The best part? Once you understand these fundamentals, you can apply them to endless creative projects. Your imagination becomes the only real limit.