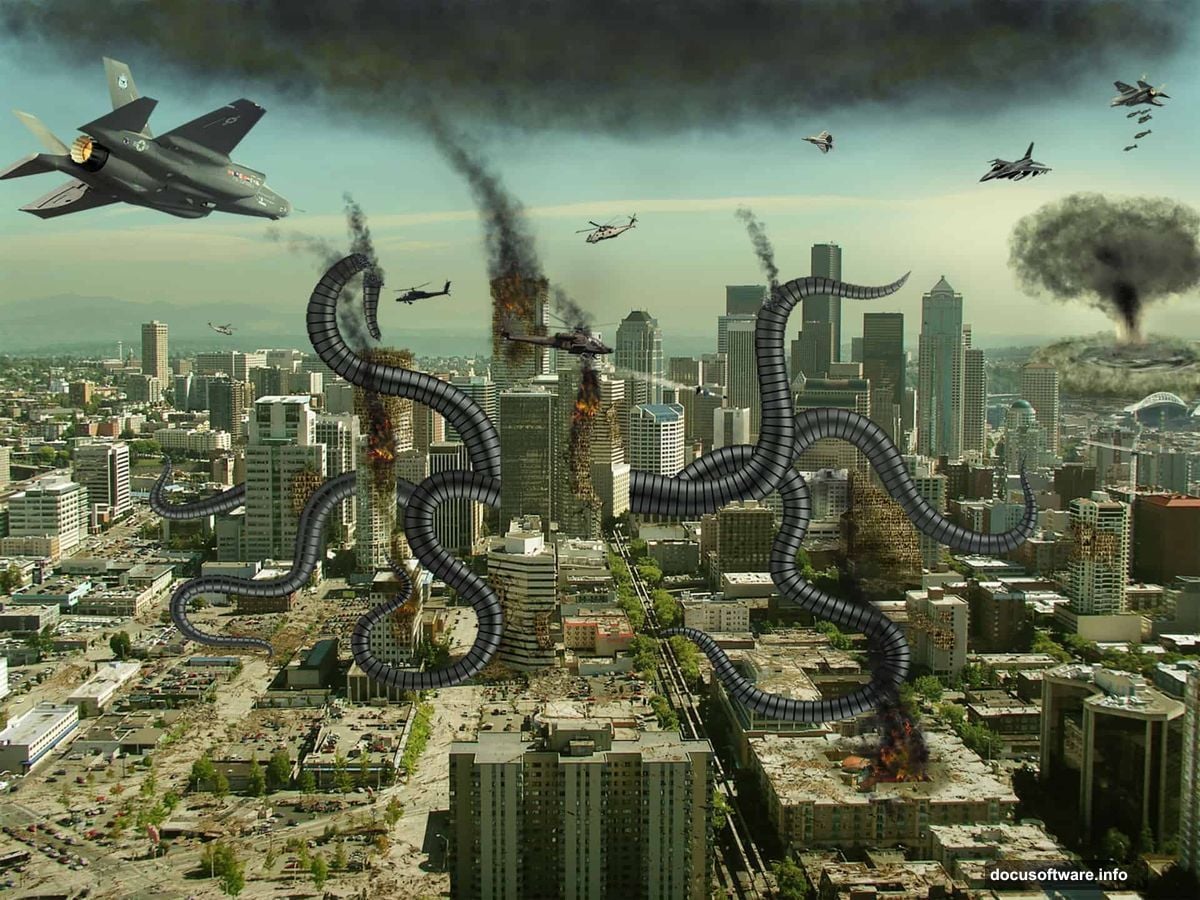
Ever wondered how movies create those massive destruction scenes? Turns out, you don’t need Hollywood’s budget. Just Photoshop and some patience.
Creating a convincing alien invasion scene involves way more than slapping tentacles on a skyline. You need proper perspective, realistic lighting, and attention to tiny details most people miss. But the results? Worth every minute.
Let me walk you through building a full-scale city destruction scene from scratch.
Why Destruction Scenes Are Actually Hard
Most beginners think adding explosions and rubble is easy. Wrong.
The challenge isn’t the destruction itself. It’s making everything look like it belongs in the same photo. Different lighting angles, mismatched perspectives, and inconsistent shadows will kill your realism instantly.
Plus, octopus arms need to look mechanical, not squishy. Buildings need to crumble properly. Aircraft need correct scale and positioning. Every element matters.
So this tutorial focuses on the fundamentals that make or break photo manipulations.
What You’ll Need Before Starting
First, gather your resources. You’ll need several stock images:
Essential elements:
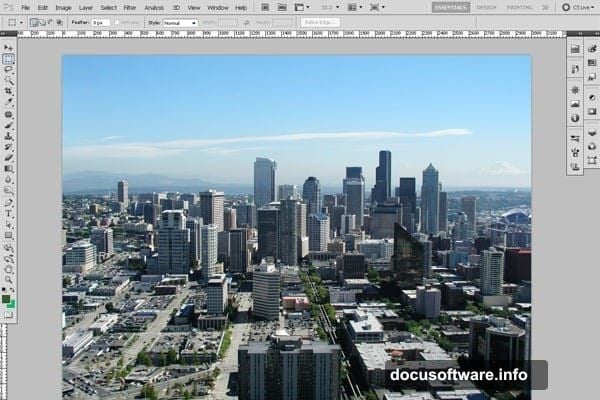
- Base city photo for your foundation
- Multiple demolished building shots for variety
- Fighter planes and helicopters for scale
- Crack brushes for surface damage
- Quality matters here – low-res images won’t cut it
Create a new document at 3000 x 2250 pixels. Yes, that’s large. But bigger canvases let you add finer details without pixelation. Trust me on this.
Building the Octopus Arms Using Paths
Here’s where things get interesting. We’ll create mechanical tentacles using Photoshop paths and Illustrator.
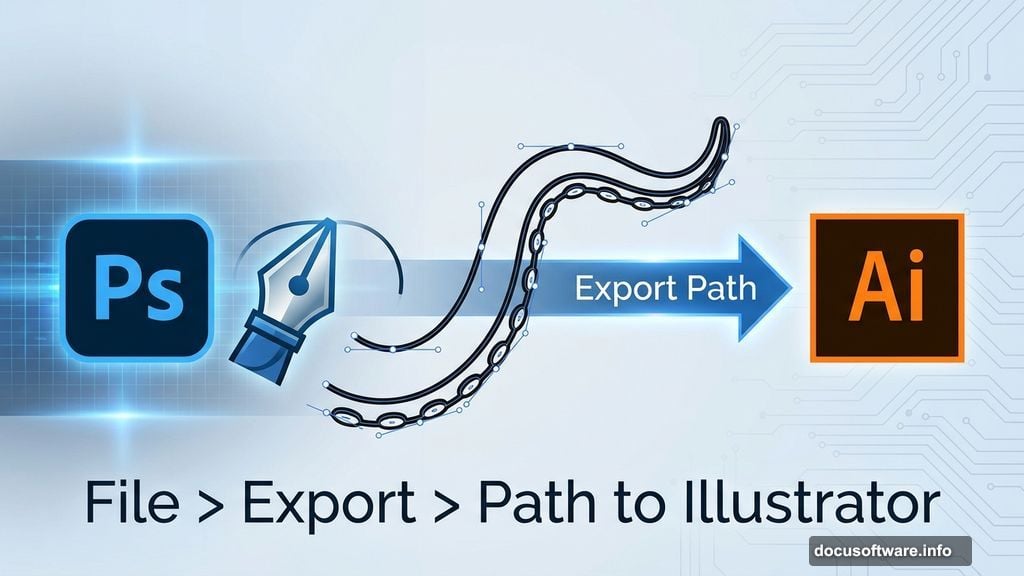
Grab the Pen Tool and sketch your first tentacle arm. Don’t worry about perfection yet. Just get the basic shape and flow right. Save this path as “arm1” by clicking the Path palette dropdown.
Press Ctrl+Enter to convert the path into a selection. Fill it with any bright color – this is just your template.
Repeat for multiple arms. Vary their positions and angles to create dynamic composition. Each arm should feel like it’s actively destroying the city, not just sitting there.
Now comes the clever part. Go to File > Export > Path to Illustrator. Export each arm path separately. We’ll refine them next.
Creating Mechanical Segments in Illustrator
Open Adobe Illustrator and import all your arm paths into one file.
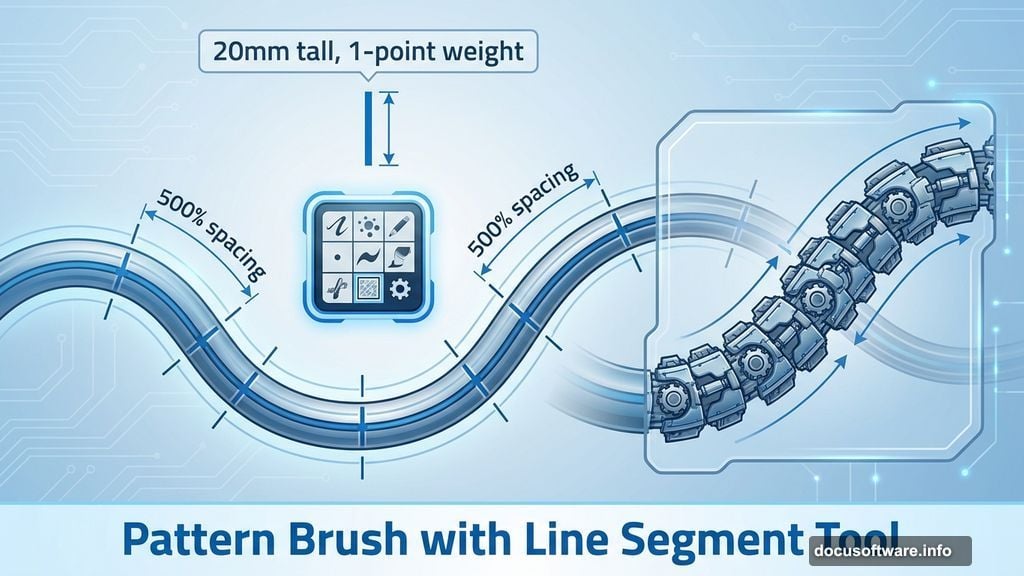
Time to make these arms look robotic. Select the Line Segment Tool and draw a vertical line exactly 20mm tall with 1-point weight. This becomes your division marker.
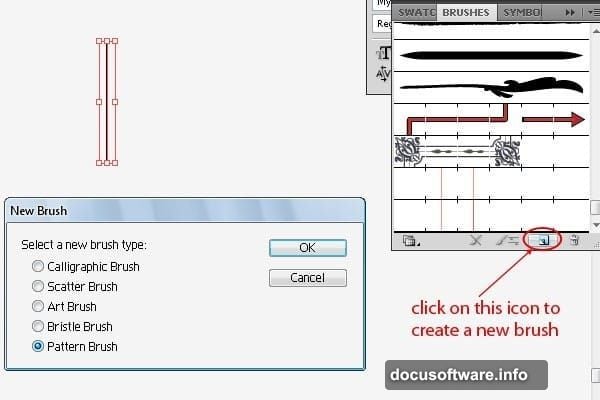
Create a pattern brush:
- Select your line segment
- Open the Brush palette
- Click the new brush icon
- Choose Pattern Brush
- Set spacing to 500%
This spacing creates uniform divisions along your arm. Now draw a baseline through the center of one arm using the Pen Tool. Apply your new pattern brush to this baseline.
Boom. Instant mechanical segmentation.
The vertical lines now repeat uniformly across the arm, creating that robotic look. Adjust spacing if divisions seem too tight or loose.
Importing Arms Back to Photoshop
Export your finished Illustrator arms as high-resolution PNGs with transparent backgrounds. Import these into your Photoshop document.
Position each arm carefully. Pay attention to:
- Perspective – Arms closer to the camera should appear larger
- Overlap – Some arms should pass behind buildings
- Ground contact – Where tentacles touch the street matters
Use Free Transform (Ctrl+T) to rotate and scale arms into realistic positions. Hold Shift while rotating to maintain proportions.
Adding Demolished Buildings
Now we destroy the city. Import your demolished building stock photos one by one.
Placement strategy:
- Put heavily damaged buildings near tentacle contact points
- Use lighter damage for buildings farther from destruction
- Vary building types to avoid repetition
For each building layer, add a layer mask. Use a soft brush to blend edges into the scene. Hard edges scream “fake photo manipulation.”
Color correction is crucial here. Each building probably came from different photos with different lighting. Create Hue/Saturation adjustment layers clipped to each building. Match the colors to your base city photo’s lighting.
Creating Realistic Ground Cracks
Download quality crack brushes or create your own. Apply cracks where tentacles meet the ground and around demolished structures.

Crack placement rules:
- Radiate outward from impact points
- Make cracks deeper and wider near the source
- Fade cracks as they spread further away
- Layer multiple crack types for depth
Create a new layer set to Multiply blend mode. Paint cracks in dark gray or black. Lower opacity until they look naturally embedded in the street surface.
Add subtle shadows along one side of major cracks using the Burn Tool. This adds dimensional depth.
Adding Aircraft for Scale and Drama
Import your fighter jets and helicopters. These serve two purposes: adding action and providing scale reference.
Aircraft positioning tips:
- Place some in mid-flight, others diving toward tentacles
- Add motion blur to faster-moving aircraft
- Scale aircraft appropriately – too big looks cartoony
- Include aircraft at various distances for depth
For motion blur, select Filter > Blur > Motion Blur. Adjust angle to match the aircraft’s direction. Keep blur subtle on closer aircraft, stronger on distant ones.
Lighting and Shadow Work
This step separates amateur work from professional results.
Study your base city photo’s lighting direction. Every element you add needs shadows matching this light source. Inconsistent shadows destroy believability instantly.
Create shadow layers beneath each major element:
- Make a new layer below the object
- Fill with black using the object’s shape
- Apply Gaussian Blur
- Lower opacity to 30-50%
- Transform shadow to match light angle
For complex shadows on tentacles, paint them manually. Use a soft brush with low opacity. Build up shadow gradually rather than painting one heavy layer.
Color Grading the Entire Scene
Almost done. Now we unify everything through color grading.
Create a new Curves adjustment layer above all other layers. Adjust the RGB curve slightly downward to create a darker, more dramatic atmosphere.
Add a color tint:
- Create a Solid Color fill layer
- Choose a dark teal or desaturated blue
- Set blend mode to Color
- Lower opacity to 15-20%
This subtle color overlay ties all disparate elements together. It’s the secret sauce that makes everything feel like one cohesive photograph.
Add a Levels adjustment layer. Crush the blacks slightly by moving the left slider inward. This adds contrast and drama.
Final Details That Sell Realism
Small touches make huge differences. Add these finishing details:
Dust and debris: Create a new layer and paint soft, light gray clouds near destruction areas. Set to Screen mode at low opacity.
Atmospheric haze: Duplicate your background layer, apply a 20-pixel Gaussian Blur, and mask out everything except distant buildings. This creates realistic depth haze.
Light rays: Use a soft white brush to paint subtle light beams through debris clouds. Set to Screen mode.
Edge darkening: Add a Curves adjustment layer. Load a radial gradient mask. Darken the edges slightly to draw focus toward your main action.
Common Mistakes to Avoid
After creating dozens of these manipulations, I’ve learned what kills realism:
Mismatched lighting angles. If shadows point different directions, your brain screams “fake.” Fix this before anything else.
Ignoring atmospheric perspective. Distant objects should appear slightly hazier and desaturated. Without this, scenes feel flat.
Over-sharpening elements. Real photos have some softness. Over-sharp elements look pasted in. Add slight blur to match the base photo’s sharpness level.
Forgetting color harmony. Use adjustment layers to match color temperatures across all elements. Cool-toned objects shouldn’t mix with warm-toned objects unless you’re doing it intentionally.
Why This Technique Works
This approach succeeds because it respects photographic reality. We’re not just slapping images together. We’re recreating how a camera would actually capture this impossible scene.
Every decision – from shadow placement to color grading – mimics real photography. That’s what tricks the viewer’s brain into accepting the impossible.
Plus, this foundation works for any destruction scene. Replace alien tentacles with meteors, robots, or natural disasters. The principles remain constant.
Master these fundamentals and you’ll create manipulations that make people do a double-take. That’s the real goal, isn’t it?