Adobe just dropped Generative Upscale in Photoshop Beta. It promises to enlarge images using AI without the usual quality loss.
But here’s the thing. Photoshop already has two other AI upscaling tools built in. So I tested all three to see which actually delivers. Plus, the results surprised me in ways I didn’t expect.
What Makes Generative Upscale Different
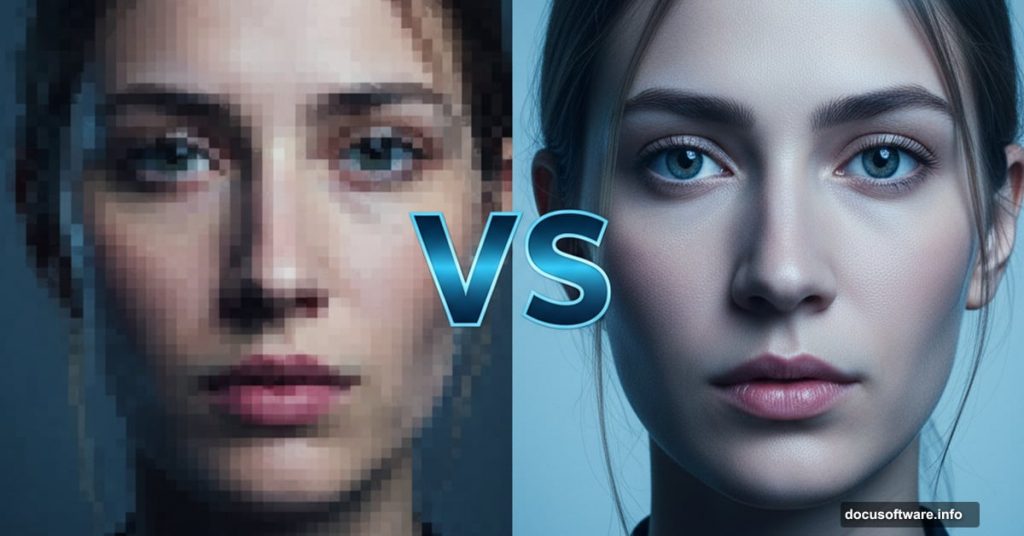
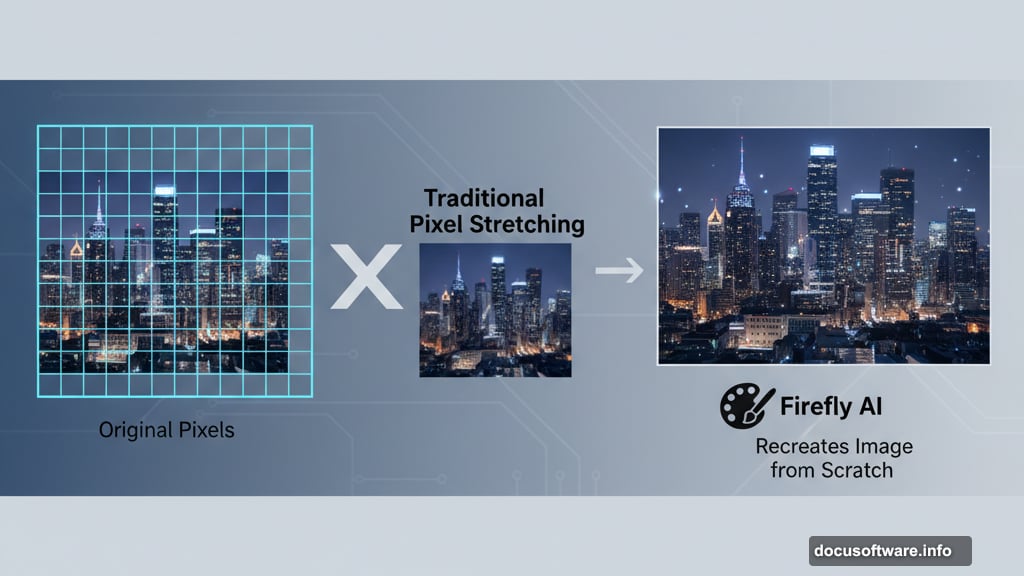
Traditional upscaling stretches pixels. That’s why enlarged images look blurry or pixelated. Generative Upscale works differently.
Instead of stretching, it recreates your entire image using Firefly AI. Think of it like asking an artist to repaint your photo at a larger size. The AI analyzes your image and generates new detail from scratch.
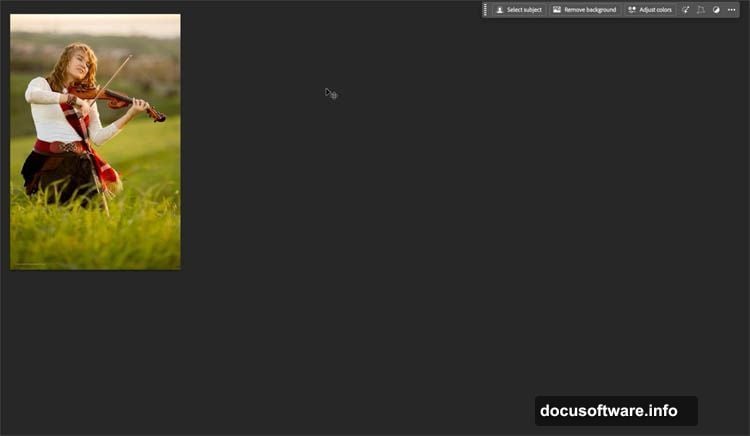
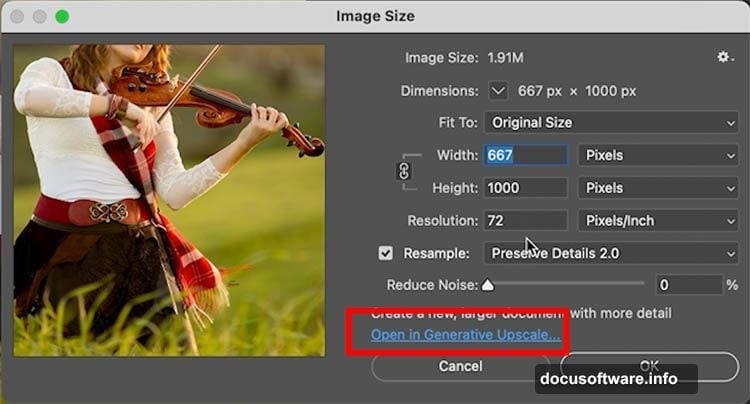
Here’s how to access it. Open your image and choose Image > Size. Then click “Open in Generative Upscale.” You’ll see three options: 2x, 3x, and 4x enlargement.
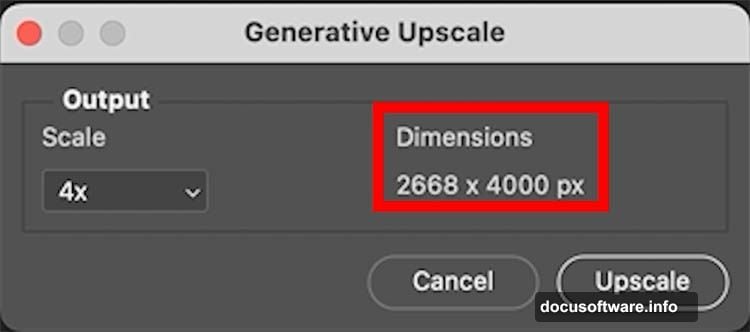
Currently, the tool maxes out at 4096 pixels on the longest edge. That’s plenty for most print and web projects. Adobe’s documentation hints they might increase this limit after beta testing ends.
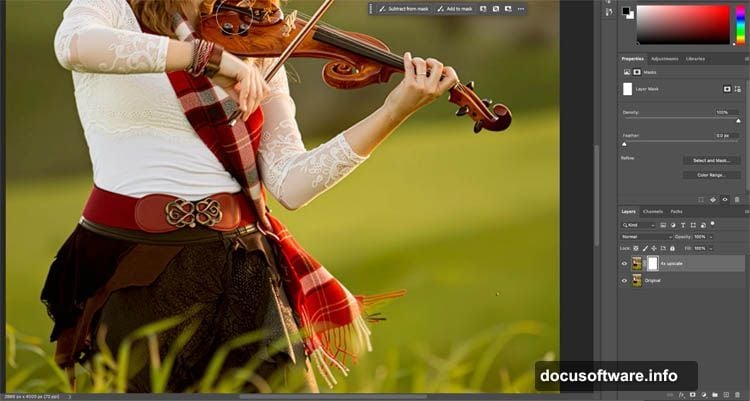
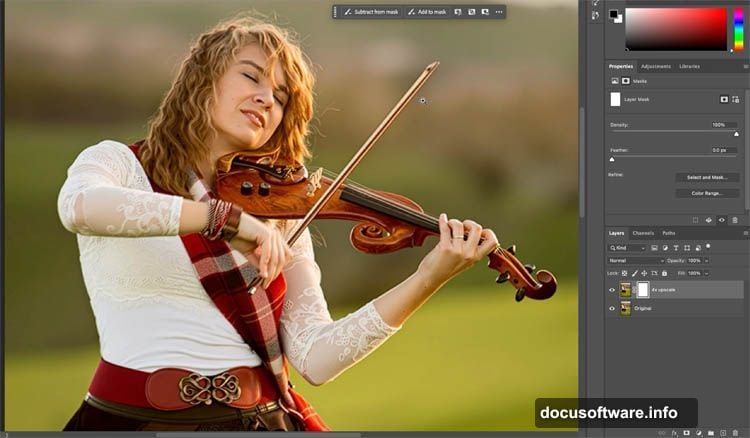
One nice touch? It creates a new document with two layers. The upscaled version sits on top, with your original underneath for comparison. Smart move by Adobe.
The Three-Way Showdown: Generative vs Neural vs Preserve Details
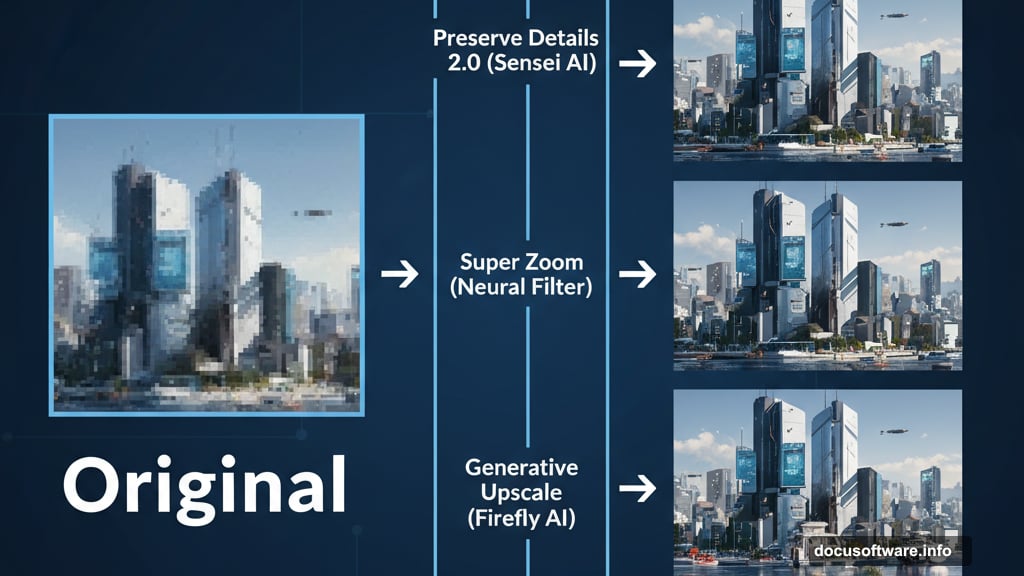
Photoshop actually has three AI upscaling methods now. Most users don’t realize this. So I tested them all on the same image.
Method one: Preserve Details 2.0 lives in Image > Size. Select it from the Resample dropdown. This uses Adobe’s older Sensei AI technology.
Method two: Super Zoom hides in Filter > Neural Filters. Turn it on and select 4x enlargement. Also powered by Sensei.
Method three: The new Generative Upscale with Firefly AI.
I upscaled the same photo to 4000 pixels using all three methods. Then I stacked the results as separate layers to compare directly.
The differences became clear immediately. Generative Upscale produces the smoothest skin tones. Plus, it handles facial features remarkably well. But that smoothness comes with a tradeoff.
Details get softened significantly. In fact, the image starts looking rendered rather than photographic. Some faces took on a slightly cartoonish quality. Not bad, just noticeably artificial.
Preserve Details 2.0 maintained sharper edges throughout. Text and hard-edged graphics stayed crisper. However, skin texture looked grainier than Generative Upscale.
Super Zoom fell somewhere in between. Decent overall results but nothing exceptional. It didn’t outperform the other methods in any specific area.
Text and Graphics Tell a Different Story
I ran another test using graphic design elements with text overlays. This revealed something important.
Generative Upscale struggled with type. Letters lost their crisp edges and sometimes looked slightly distorted. Meanwhile, Preserve Details 2.0 kept text razor-sharp.
So here’s my workflow recommendation. Use layer masks to combine methods. Apply Generative Upscale to photographic elements and faces. Then mask in Preserve Details 2.0 for text and hard-edged graphics.
This hybrid approach gives you the best of both worlds. Smooth, detailed faces from Generative Upscale. Sharp text from Preserve Details 2.0. Takes a few extra minutes but the results justify it.
The Credits Question Nobody’s Answering
Adobe’s documentation includes a curious note. Generative Upscale doesn’t consume generative credits during beta testing. That word “during” matters.
This strongly implies the feature will use credits after launch. How many credits per upscale? Adobe hasn’t said. But given that other Firefly features consume credits quickly, this could get expensive for heavy users.
Moreover, the current 4096-pixel limit might also change post-beta. Adobe’s wording suggests larger sizes could become available. Again, probably at the cost of more credits per use.
Plan accordingly. If you’re upscaling dozens of images regularly, those credit costs might add up fast once beta ends.
When Generative Upscale Shines (And When It Doesn’t)
This tool excels with portraits and organic subjects. Faces, landscapes, and natural textures benefit most from the AI recreation approach. The smoothing effect actually helps these subjects look more polished.
But there’s a philosophical question here. Is a completely AI-regenerated image still a photograph? Technically, it’s a rendering based on your photo. For fine art or documentary work, that distinction might matter.
Also consider this. Generative Upscale changes details subtly. Hair strands might flow slightly differently. Fabric texture gets reinterpreted. Usually these changes improve the image. But sometimes the AI makes creative choices you didn’t ask for.
I noticed it particularly with complex patterns and textures. The AI simplifies them during recreation. Not wrong, just different from the original. Sometimes better, sometimes not.
For precise technical photography where accuracy matters absolutely, stick with Preserve Details 2.0. You’ll sacrifice some smoothness but maintain exact fidelity to your original capture.
My Honest Take After Testing All Three
Generative Upscale represents impressive technology. Watching it recreate an entire image with convincing detail feels like magic. Adobe’s Firefly AI has come a long way.
But it’s not perfect. The smoothing effect goes too far sometimes. Plus, the cartoonish faces concern me for professional portrait work. These issues might improve as Adobe refines the algorithm.
Right now, Preserve Details 2.0 remains my default for most projects. It’s predictable, maintains sharpness, and doesn’t alter original details unpredictably. Boring but reliable.
However, I now keep Generative Upscale in my toolkit for specific scenarios. When I need maximum smoothness on portraits or landscapes, it delivers. Just understand what you’re getting: a beautiful AI interpretation rather than a true upscale.
The smart move? Learn all three methods. Each has strengths. Match the tool to your specific image and intended use. Don’t just default to the newest, shiniest option because it’s there.