Ever wondered what trespassing really means? Here’s a thought: sharks own the ocean. We’re just visiting.
This Photoshop tutorial walks you through creating a dramatic underwater photomanipulation. You’ll blend multiple ocean scenes, position a shark and diver, then polish everything with color grading and Camera Raw filters. Plus, the whole process teaches practical compositing skills you’ll use in future projects.
Let’s dive in.
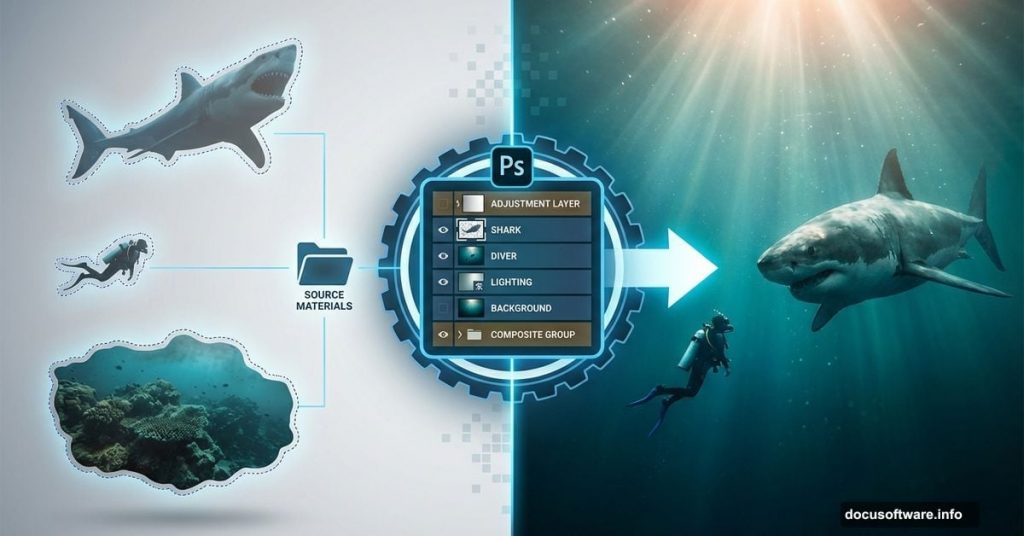
Gather Your Source Images First
Before touching Photoshop, collect these elements:
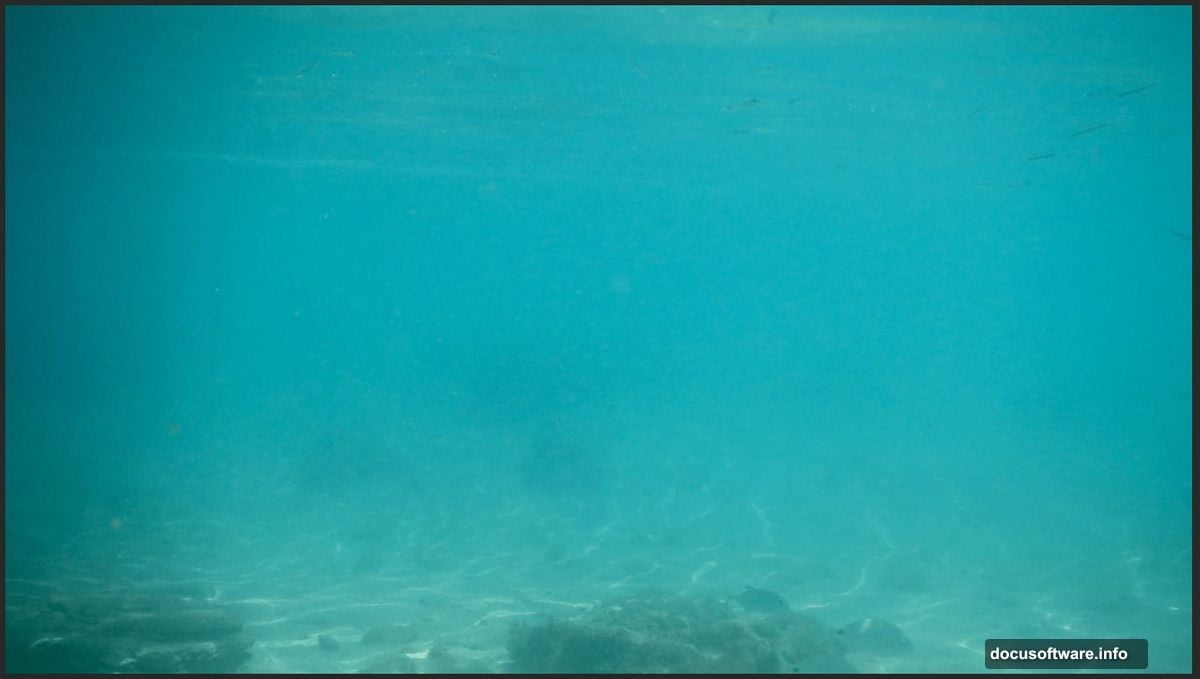
- Bermuda underwater background
- Secondary underwater texture layer
- Coral reef section
- Bubble overlays
- Diver photo (Pixabay requires free account)
- Shark image
Pro tip: Download everything before starting. Nothing kills creative momentum like hunting for missing files mid-project.
Set Up Your Canvas Right
Start with proper dimensions. Go to File > New and enter these specs:
- Preset: Custom
- Width: 4080px
- Height: 2297px
- Resolution: 300px
- Color Mode: RGB Color 8 bit
- Background: Transparent
Why these numbers? They give you room to work while maintaining print quality. Plus, the 16:9 aspect ratio works great for social media sharing.
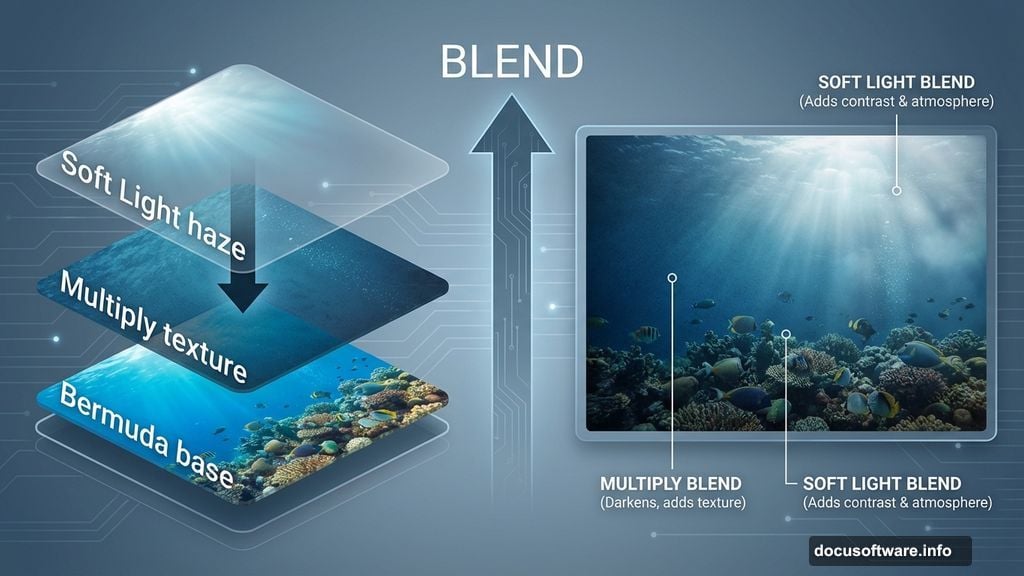
Build the Ocean Foundation
Now place your first underwater photo. Go to File > Place and select the Bermuda image.
Use Transform (Ctrl/Cmd + T) to position it. Hold Alt + Shift while dragging corners to resize proportionally. In Photoshop CC, just hold Alt.
Next layer matters: Place the second underwater texture. Position it with Transform again. Then change the blend mode to Multiply. This darkens the scene and adds depth.
For the third underwater layer, switch blend mode to Soft Light instead. This creates atmospheric haze that makes the scene feel more realistic.
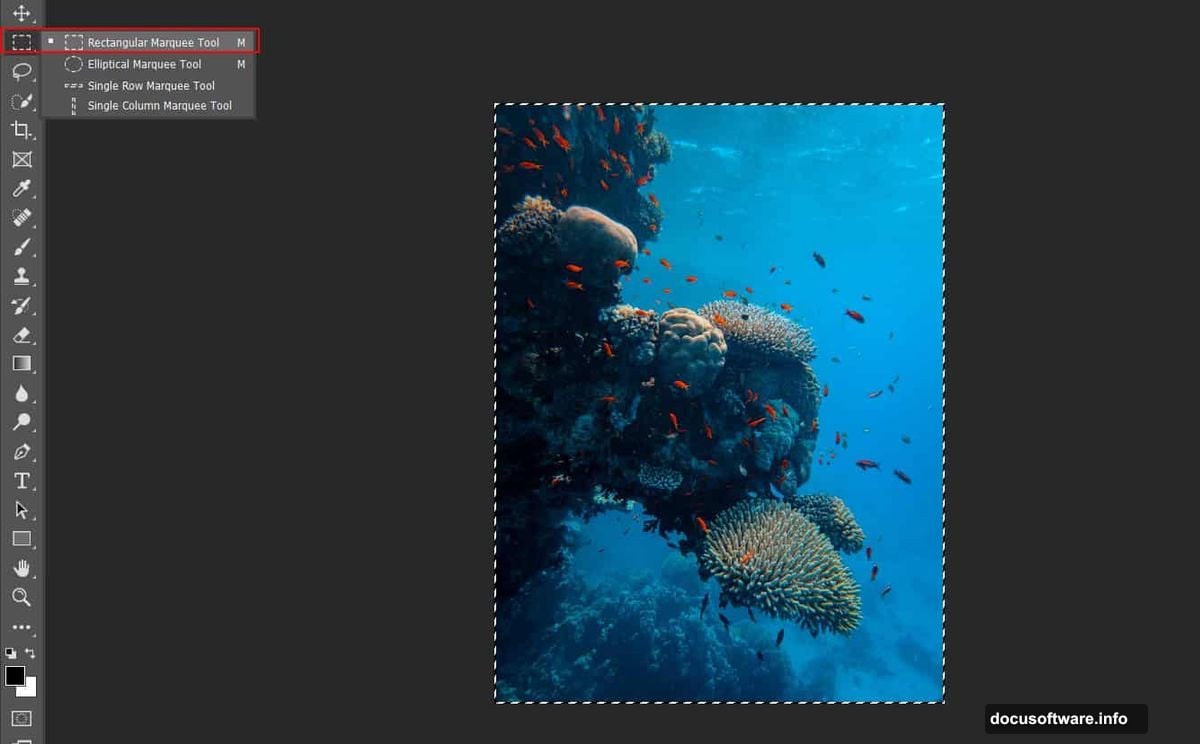
Add the Coral Reef Detail
Open your coral reef photo separately (File > Open). Select the area you want with the Rectangular Marquee Tool (M).
Copy it (Ctrl/Cmd + C) and paste into your main canvas (Ctrl/Cmd + V). Transform and position where it looks natural.
Here’s where masking saves you: Add a layer mask to the coral layer. Grab the Brush Tool (B) with a soft round tip. Set foreground color to black. Then paint over harsh edges to blend the coral seamlessly into your scene.
Black conceals. White reveals. Paint carefully around the edges.

Place Your Main Characters
Time for the shark and diver. These anchor your entire composition.
Place each one separately using File > Place. Position them with Transform. Make the diver smaller and the shark larger to create dramatic scale contrast.
Lighting consistency matters here. Both subjects should match your underwater scene’s light direction. If your background shows light from the top right, position your shark and diver so their highlights match.
Blend With Adjustment Layers
Raw placement looks flat. Adjustment layers fix that.
Create a Curves adjustment layer. Drag the midpoint slightly down to deepen shadows. This adds underwater atmosphere.
Add a Hue/Saturation layer next. Boost blue and cyan values by 10-15%. This reinforces the underwater color cast.
Color Lookup Tables work magic: Try “Moonlight” or “Teal Orange Plus Contrast” LUTs. These instantly give your scene a professional grade.
Polish With Camera Raw Filter
Almost done. Select all your layers (Ctrl/Cmd + Shift + Alt + E) to create a merged copy.
Go to Filter > Camera Raw Filter. Here’s what to adjust:
- Temperature: Shift slightly cooler (more blue)
- Clarity: Increase by 10-15 for sharpness
- Vibrance: Bump up 5-10 points
- Dehaze: Add 10-15 to cut through murky water
Split toning adds depth: In the Color Grading panel, add subtle blue to shadows and cyan to highlights. This creates dimensional color that feels more cinematic.
Fine-Tune the Final Details
Zoom to 100% and scan your image. Look for these common issues:
- Hard edges where layers meet
- Mismatched lighting between elements
- Color temperature inconsistencies
- Missing shadows under the diver or shark
Fix each one with targeted layer masks and small adjustment layers. These tiny corrections separate amateur work from professional results.
Why This Technique Matters
Learning underwater compositing teaches transferable skills. You practiced:
- Multi-layer blending for complex scenes
- Strategic masking for seamless integration
- Color grading for mood and atmosphere
- Non-destructive editing with adjustment layers
Apply these concepts everywhere: Product photography, fantasy landscapes, architectural visualization. The fundamentals stay the same.
One Technical Note About Trespassing
That opening quote about sharks and trespassing? It’s technically accurate. Humans evolved on land. Oceans belong to marine life.
But here’s the real lesson: respect the environment you’re working in. Whether that’s actual ocean water or a Photoshop canvas. Understand the rules. Then you can break them intentionally for creative effect.
Your composite scene works because you respected underwater lighting physics while creating something surreal. That balance between realism and fantasy makes the final image compelling.
Now go create something that makes viewers question what’s real and what’s Photoshop magic. That’s the goal.