Photoshop’s mosaic filter works fine. But let’s be honest—those square pixels look dated and overused.
Here’s a simple trick that creates triangle-based pixelation instead. The effect feels fresh and modern. Plus, it takes just minutes to master.
Why Triangles Beat Squares
Standard pixelation creates a blocky, predictable pattern. Triangles add visual interest through diagonal lines and geometric complexity.
The technique works great for backgrounds, artistic effects, or vintage-style designs. And you can adjust the triangle size to match your project needs.
Set Up Your Image First
Start by opening your photo in Photoshop. Resize it to your final output dimensions before continuing. This prevents quality issues later.
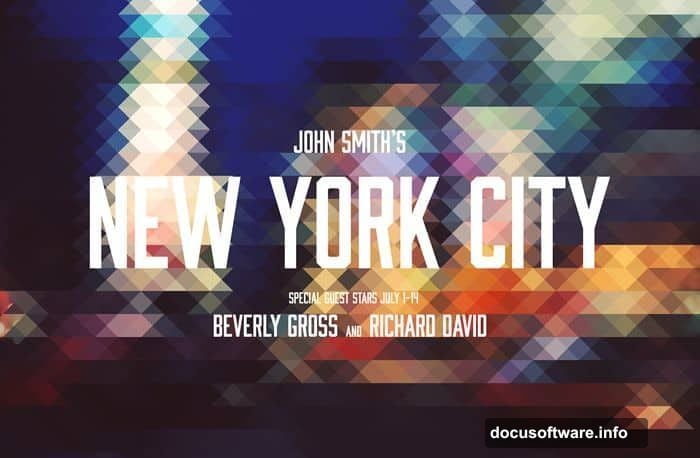
The technique works on any image type. Portraits, landscapes, and product shots all produce interesting results.
Duplicate Your Layers
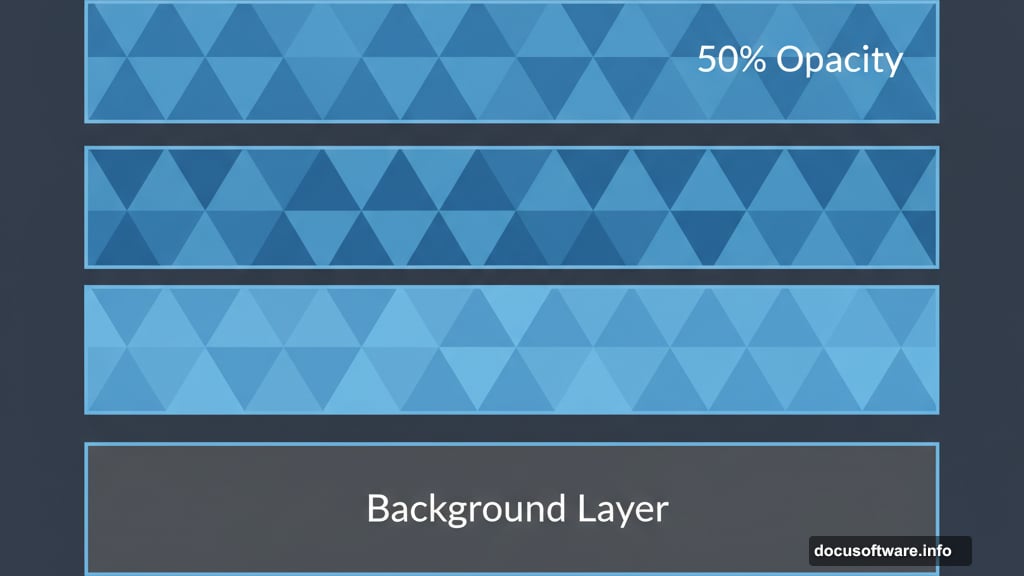
Create two copies of your background layer. You’ll need three total layers for this effect.
Keep all three layers visible for now. We’ll adjust opacity settings later in the process.
Transform the Top Layer
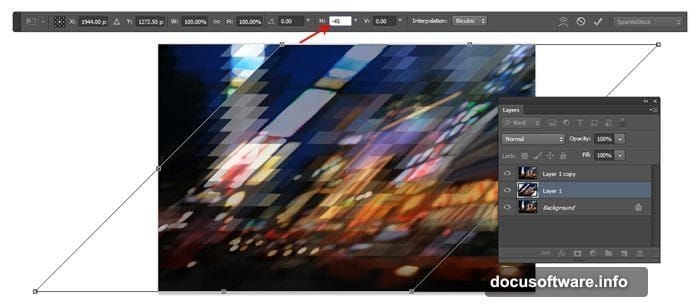
Select your top layer. Then activate the Free Transform tool by pressing Ctrl/Cmd+T or choosing Edit > Free Transform.
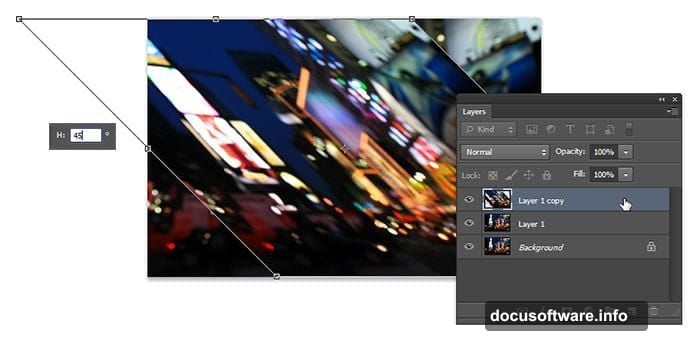
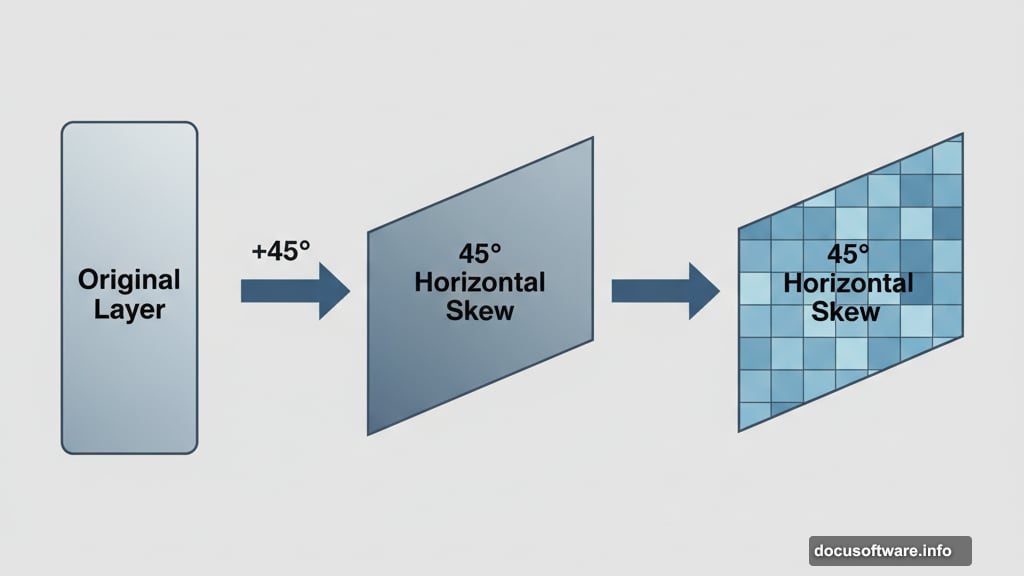
Look for the horizontal skew option in the toolbar at the top. Set this value to 45 degrees. Press Enter to lock in the transformation.
Your image now slants diagonally. Don’t worry—this distortion creates the triangle pattern.
Apply the Mosaic Filter
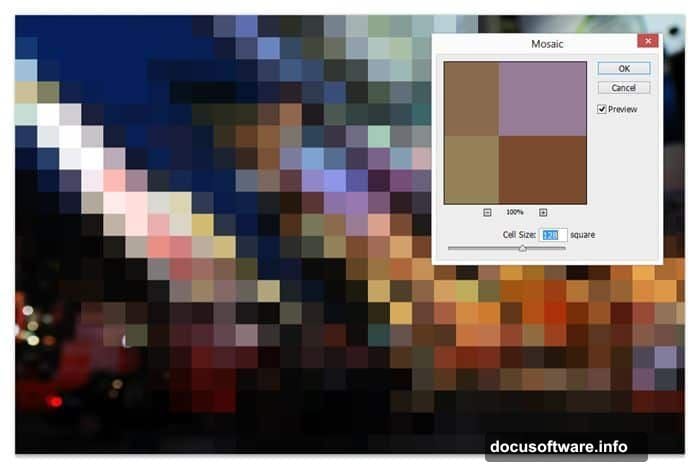
Go to Filter > Pixelate > Mosaic in the menu. A dialog box appears with cell size controls.
Adjust the cell size based on how large you want your triangles. Bigger numbers create larger triangles. Smaller numbers produce finer detail.
Click OK when satisfied. The pixelated effect appears across your slanted layer.
Transform Back to Normal
Activate Free Transform again (Ctrl/Cmd+T). This time, set the horizontal skew to negative 45 degrees.
Press Enter. Your layer straightens out, but the triangular pixels remain. Pretty cool, right?
Adjust Layer Opacity
Change the top layer’s opacity to 50%. This allows the layers beneath to show through and complete the triangle pattern.
Now select your middle layer. We’ll repeat the same steps but in reverse order.
Process the Middle Layer
With the middle layer active, open Free Transform (Ctrl/Cmd+T). Set the horizontal skew to negative 45 degrees this time. Notice we’re going the opposite direction from before.
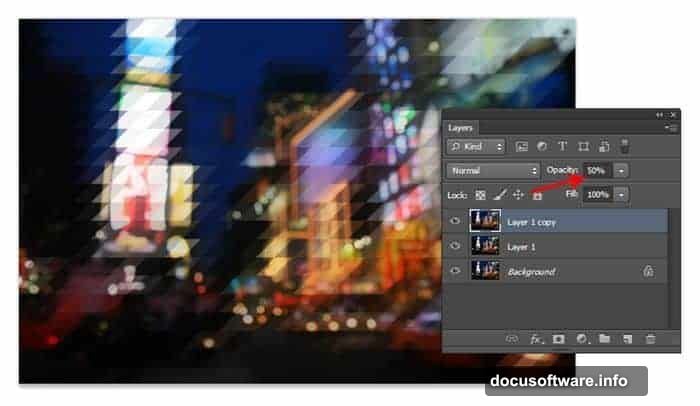
Press Enter to apply the transformation.
Reapply the Mosaic Filter
Apply the mosaic filter again. The quick method is pressing Ctrl/Cmd+F, which repeats your last filter with the same settings.
Alternatively, open the Filter menu. Photoshop places your most recent filter at the top for easy access.
Transform Back Again
Use Free Transform one more time (Ctrl/Cmd+T). Set the horizontal skew to positive 45 degrees.
Press Enter. Your middle layer now displays triangular pixels that intersect with the top layer.
Fine-Tune the Alignment
Zoom in to check how the triangle edges line up. You might notice slight misalignment at the intersections.
Select your middle layer. Then tap the left or right arrow keys on your keyboard. These nudge the layer by single pixels.
Keep tapping until the triangle points align cleanly. This small adjustment makes a huge difference in the final quality.
Polish the Final Look
The basic effect is complete. But you can enhance it further with color adjustments or texture overlays.
Vintage film effects pair particularly well with this geometric pattern. The combination of retro color grading and modern triangular pixels creates an interesting visual tension.
For text-based designs, choose bold fonts that complement the geometric aesthetic. Sans-serif typefaces typically work better than ornate scripts.
When to Use This Effect
Triangle pixelation works best as a background element or artistic overlay. It adds visual interest without overwhelming your main subject.
The effect shines in poster designs, social media graphics, and album artwork. Anywhere you want a modern, geometric vibe.
Avoid using it for important details or text that needs to remain readable. The pixelation obscures fine details by design.
Adjust Triangle Size for Different Moods
Smaller triangles create a subtle, textured appearance. They work well when you want the effect to feel understated.
Larger triangles make a bold statement. They’re perfect for dramatic backgrounds or artistic presentations.
Experiment with different cell sizes to find what fits your project. The beauty of this technique is how quickly you can test variations.
Save Time with Actions
Once you master the technique, consider recording it as a Photoshop action. Then you can apply the effect with a single click.
Actions eliminate repetitive work and ensure consistent results across multiple images. Perfect for batch processing or client work.
The technique translates well into an automated workflow. Just make sure your source images are properly sized before running the action.