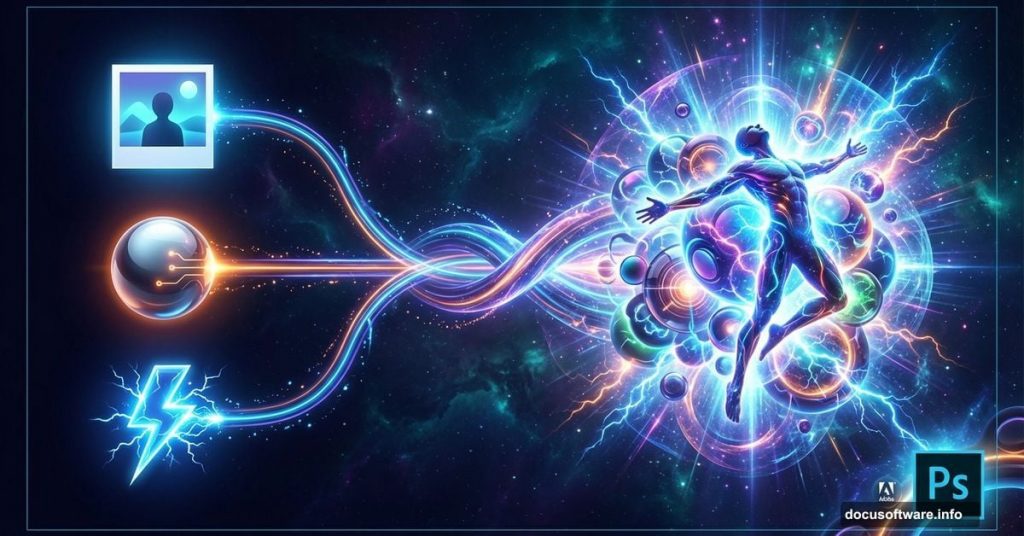
Most abstract composites demand dozens of stock photos and hours of layer juggling. This one breaks that rule completely.
Maria Semelevich designed a technique that builds stunning 3D radiation effects from three simple resources. Plus, the whole process relies on smart filters and custom brushes you’ll create yourself. No premium plugins needed.
Let’s walk through how to make glowing spheres appear to float in dimensional space.
What You’re Actually Building
This composite creates an immersive radiation effect around a central figure. Think sci-fi movie poster meets abstract art installation.
The technique combines an altitude chamber photo, 3D sphere renders, and lightning brushes. But here’s the clever part: you’ll manufacture most effects using Photoshop‘s built-in tools. So your three base images transform into something far more complex.

The final result offers two toning options. You can go dark and moody or vibrant and colorful. Both work beautifully with the glowing elements.
Setting Up Your Canvas
Start with a new document measuring 3000 by 2000 pixels at 200 PPI resolution. That size gives you plenty of room to work while maintaining crisp details.
Why 200 PPI instead of the standard 72? Higher resolution means smoother gradients and better quality when you add blur effects later. Plus, you’ll have flexibility if you want to print this piece.
Name your document something memorable. The tutorial suggests “Omega” which fits the cosmic vibe perfectly.
The Background Layer Trick
Place your altitude chamber image into the document. Then resize it using Free Transform so the edges extend beyond your canvas boundaries. This creates a mesh effect with natural vignetting around the foreground.

Now duplicate that background layer. Here’s where things get interesting.
Open the Blending Options for your duplicate layer. Uncheck the red channel in the advanced blending section. This splits the color information in a way that creates instant depth.
Next, use the Move tool to nudge the layer slightly down and left. Just a few pixels with your arrow keys. Suddenly you’ve got a 3D effect that would normally require complex displacement maps.
The technique works because you’re viewing separate color channels at a slight offset. Your brain interprets this as dimensional depth. It’s the same principle behind those old red-blue 3D glasses, just more subtle.
Building Custom Lightning Brushes
Standard lightning brushes often look generic and fake. Creating your own fixes that problem completely.

Download the lightning brush pack from the resources. Then open one lightning image and use the Magic Wand to select a single bolt. Copy it to your composite document.
Go to Edit > Define Brush Preset. Name it something descriptive like “Lightning Bolt 01.” Repeat this process with several different lightning shapes. Now you’ve got a custom brush library that matches your specific needs.
Why bother with custom brushes? Because you’ll paint lightning effects that wrap naturally around your spheres. Pre-made generic brushes never fit quite right. Your custom versions will.
Smart Filters Save Everything
Here’s where smart filters become your best friend. Every major effect in this composite uses them.
Convert your sphere layers to Smart Objects before applying any filters. This lets you adjust blur amounts, glow intensity, and color shifts non-destructively. Made the glow too strong? Just double-click the filter and dial it back.

For the radiation effect, stack multiple Gaussian Blur filters at different radii. Start with a small blur (maybe 5 pixels), then add progressively larger ones. This creates that soft, expanding glow that sells the radiation concept.
Layer your lightning brush strokes between the sphere layers. Apply Motion Blur as a Smart Filter to suggest energy movement. Adjust the angle and distance until it looks like the lightning is actually radiating from the spheres.
The Radiation Texture Method
Creating convincing radiation requires texture layering. Start with a solid color layer set to Radial Gradient. Choose a color that complements your overall tone – maybe deep blue or vibrant purple.
Apply Noise filter to that gradient layer. Set it to Gaussian with Monochromatic checked. This breaks up the smooth gradient into something more organic and energetic.
Now add a Gaussian Blur to soften those noise particles. The combination of noise and blur creates a texture that reads as glowing particles or energy waves. Adjust the opacity until it enhances rather than overwhelms your composition.

Duplicate this texture layer multiple times. Change the blend modes on each duplicate – try Screen, Linear Dodge, and Overlay. Mask areas where the effect gets too strong. You’re building depth through multiple semi-transparent layers rather than one heavy-handed effect.
Two Toning Options That Both Work
The tutorial offers dark and colorful toning approaches. Both enhance the sci-fi atmosphere differently.
For dark toning, add a Curves adjustment layer. Pull down the highlights and midtones while keeping shadows deep. Add a slight blue tint in the shadows for a cooler feel. This approach emphasizes mystery and drama.
The colorful version uses Color Balance and Vibrance adjustments instead. Push cyan into shadows, yellows into highlights. Boost vibrance to make the glowing elements pop. This creates a more optimistic, energetic mood.
Here’s the smart move: create both as separate layer groups. Toggle them on and off to see which better matches your vision. You might even export both versions for different uses.
Why This Technique Actually Matters
Most composite tutorials throw complexity at you. Add this, mask that, blend twenty layers. It’s overwhelming and often unnecessary.
This approach proves that restraint creates stronger results. Three images, smart use of channels, custom brushes, and layer effects. That’s the entire toolkit.
The 3D effect from split color channels costs you nothing in render time or plugin fees. The custom lightning brushes take five minutes to create but give you infinite variation. Smart filters mean you never commit to bad decisions.
You learn techniques that transfer to every future project. Channel splitting works for any image. Smart filter workflow improves any composite. Custom brush creation unlocks personal style.
That’s more valuable than following a paint-by-numbers tutorial that only works for one specific image. These are fundamental skills that compound over time.
Test this technique with different source images. Swap the altitude chamber for industrial backgrounds or forest scenes. Use different sphere styles or organic shapes. The core method adapts beautifully.