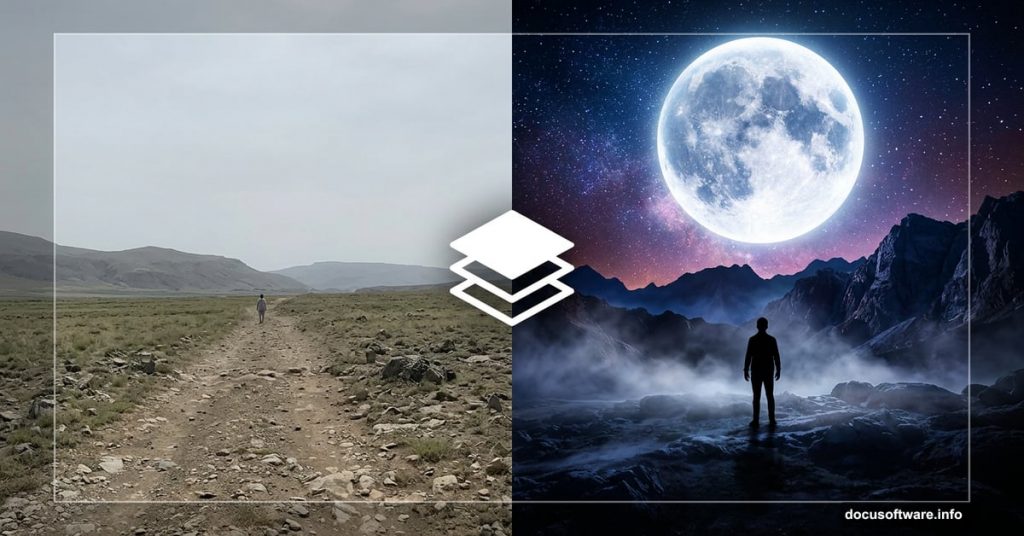
Ever looked at a plain daytime landscape photo and wished it had a little more drama? A little more mystery? With Photoshop, you can completely transform an ordinary shot into a moody, cinematic moonscape — complete with dramatic lighting, atmospheric depth, and an entirely new color palette.
This tutorial walks you through exactly how to do it. You’ll combine multiple photos, blend them seamlessly, and build up layers of atmosphere until your scene looks like it belongs on another planet. Let’s dive in.
What You’ll Need
Before starting, grab these free resources:
- Ground photo (Pelleron Art)
- Sky photo 1 (Pelleron Art)
- Sky photo 2 (Pelleron Art)
- Man silhouette (SnakStock on DeviantArt)
- Fog brushes (Pelleron on DeviantArt)
Download everything first. Having all your assets ready saves a lot of back-and-forth later.
![A Photoshop workspace showing the beginning stages of a dramatic moonscape photo manipulation with multiple landscape layers being combined]
Building Your Dramatic Sky First
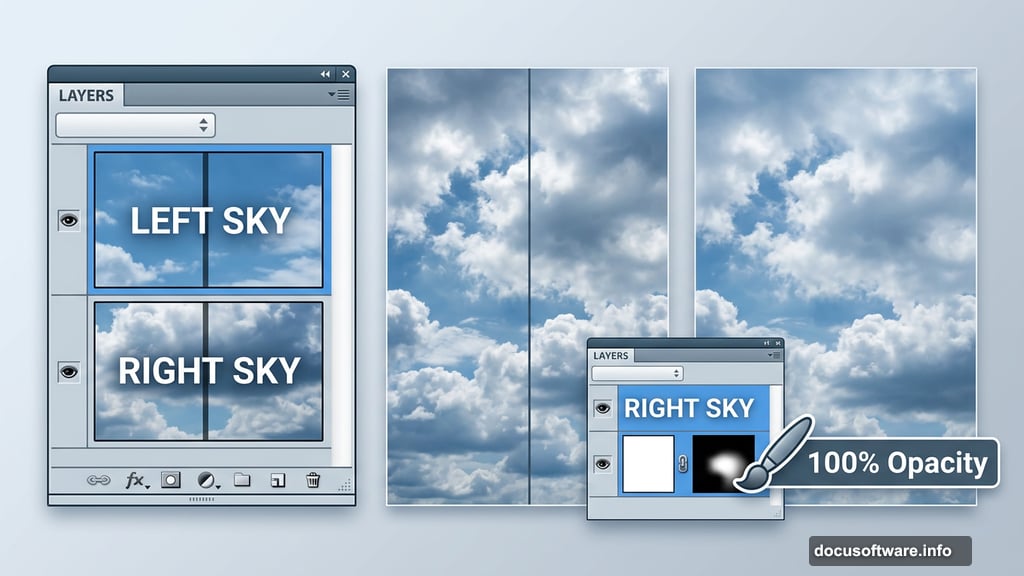
Open Photoshop and create a new document. Drag your first sky photo onto the canvas, position it in the top left corner, and name the layer LEFT SKY.
Next, duplicate that layer. Right-click on LEFT SKY in your Layers palette and choose Duplicate Layer. Name the copy RIGHT SKY, then drag it to the top right corner of your canvas. You should now have sky coverage across the entire width of your composition.
But right now, the seam between the two sky halves looks obvious. That’s the next thing to fix.
Add a layer mask to RIGHT SKY. You’ll find the Add Layer Mask button at the bottom of your Layers palette. If you can’t see the palette, press F7 on your keyboard and it’ll appear immediately.
Now grab the Brush Tool (B), set your color to black, and dial Opacity up to 100%. Click directly on the layer mask thumbnail to make sure it’s active, not the layer itself. Then paint along the left edge of RIGHT SKY to blend the two sky layers together smoothly.
One quick tip here: always use layer masks instead of the Eraser Tool when blending. Both methods look the same on screen, but layer masks are non-destructive. That means you can always go back and repaint if something doesn’t look right. With the Eraser Tool, those pixels are gone for good. Once you’re juggling 50+ layers in a complex composition, you’ll really appreciate having that safety net.
Bringing the Ground Into the Scene
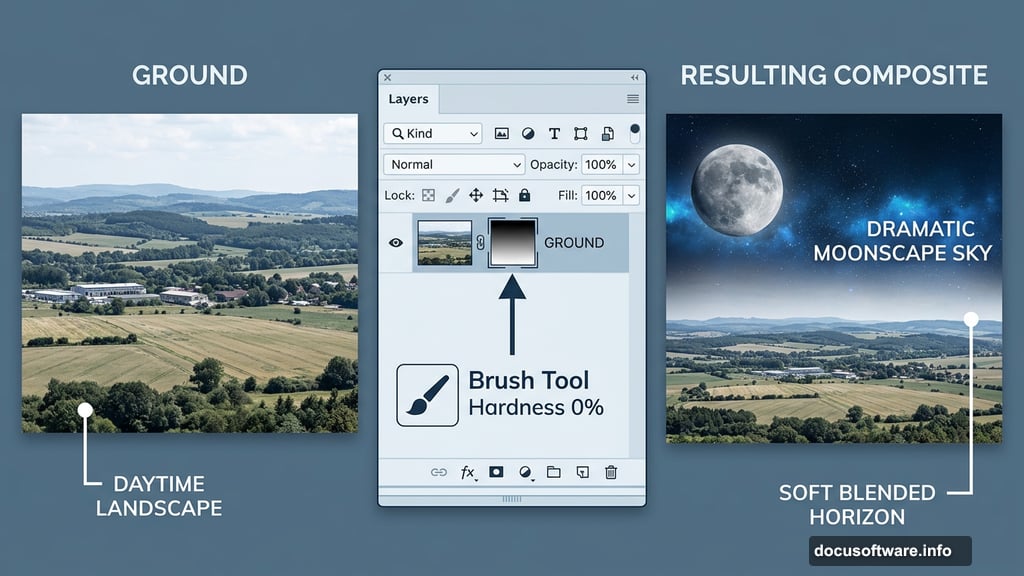
Drag your ground photo onto the canvas and position it at the top of your layer stack. Name this layer GROUND and resize it as needed to fit your composition.
At this point, your sky work from the previous step has completely disappeared. The ground photo is covering everything. Don’t worry — this is exactly where layer masks come to the rescue again.
Add a layer mask to GROUND the same way you did before. Then grab the Brush Tool (B) again. This time, set Hardness to 0% and keep Opacity at 100% with black as your color.
![Close-up of Photoshop layer mask technique showing the ground and sky blending process for a moonscape photo manipulation]
Paint over the upper portion of the ground layer — everywhere you want the sky to show through. A soft brush with 0% hardness creates a natural, gradual fade between ground and sky. That transition is what makes the composite feel believable rather than obviously pasted together.
Why Layer Naming Matters More Than You Think
This is a good moment to talk about organization. The tutorial recommends naming every single layer, and that advice is absolutely worth following. It might feel unnecessary when you’re only working with two or three layers. But photo manipulations like this one grow fast. Before long you’ll have sky layers, ground layers, fog layers, light effect layers, color grading layers, and adjustment layers all stacked on top of each other.
Finding the right layer in an unnamed stack of 50 is genuinely painful. Naming as you go takes two seconds and saves minutes of frustration every time you need to make an adjustment.
Adding Depth With Light Sources
The real magic in a convincing moonscape comes from lighting. A scene with a single flat light source looks like a daytime photo with a color filter slapped on. Multiple light sources — a cool moonlight from above, a warm glow from the horizon, subtle rim lighting on your subject — create genuine depth and atmosphere.
As you continue building your composite, think about where each light source lives and how it would realistically affect the elements in your scene. Your ground should catch some moonlight from above. Your subject should have directional shadows. The sky should graduate from darker near the horizon to slightly lighter overhead.
These lighting decisions are what separate a compelling moonscape from something that just looks like a filter was applied.
Working With Fog and Atmospheric Effects
Fog brushes are one of the most powerful tools for adding believable atmosphere to fantasy composites. The fog brush set included in the resources lets you paint wispy layers of mist between foreground and background elements.
The trick is subtlety. Add fog in multiple thin passes rather than one heavy application. Build it up gradually until the depth feels natural. Fog that sits low to the ground and fades as it rises looks far more realistic than a uniform haze across the entire image.
Use it to push background elements further away visually. The more distant something is, the more atmospheric haze sits between you and it. This simple trick creates convincing depth even when your source photos were all shot at similar distances.
Final Color Grading for That Moonscape Feel
Once all your elements are in place, color grading ties everything together. A moonscape typically leans toward cool blues and desaturated tones, with the exception of any warm practical light sources you’ve added to the scene.
Use adjustment layers — Color Balance, Hue/Saturation, and Curves are your best friends here — to unify the color palette across all your different source photos. Each photo you’ve used was shot under different lighting conditions, so without color grading they’ll look slightly off next to each other.
Stack your adjustment layers at the very top of your layer stack so they affect everything beneath them. A gentle cool color grade across the whole image, followed by subtle contrast boosts in the Curves layer, can make the entire scene feel like it was captured in a single moonlit moment.
Photo manipulation isn’t cheating — it’s a distinct creative skill that deserves recognition on its own terms. Combining multiple photographs into one cohesive, emotionally resonant image takes real craft, creative vision, and technical knowledge. The end result is an original piece of art, full stop.