Most Photoshop effects bury you in adjustment layers and complicated masks. This urban ink technique uses just two layers and clever blending options instead.
The best part? You can transform a photo into stylized ink artwork in under ten minutes. Plus, it works surprisingly well on portraits with simple backgrounds.
Let me walk you through exactly how it’s done.
Why This Effect Works So Well
Traditional photo manipulation requires careful masking and multiple adjustment layers. That takes time and skill.
Instead, this technique uses Photoshop’s blending options to do the heavy lifting. You control which parts of the image show through based on brightness values. So the background naturally disappears while preserving your subject’s shadows and highlights.
The result looks like hand-painted ink art. But you’re not actually painting anything yet. The blending modes handle most of the work automatically.
Start With the Right Photo
Not every image works for this effect. You need two specific elements for best results.
First, choose a photo with a simple, light-colored background. White or light gray backgrounds work perfectly. Busy or dark backgrounds make the effect harder to control.
Second, pick a subject with clear shadows and defined edges. Portraits work great. So do dancers, athletes, or any figure with strong contrast against the background.
For this tutorial, I used a high-resolution dancer photo. But you can achieve similar results with lower resolution images too.
Create Your Base Threshold Layer
Open your chosen image in Photoshop. Press Ctrl+J to duplicate the background layer.
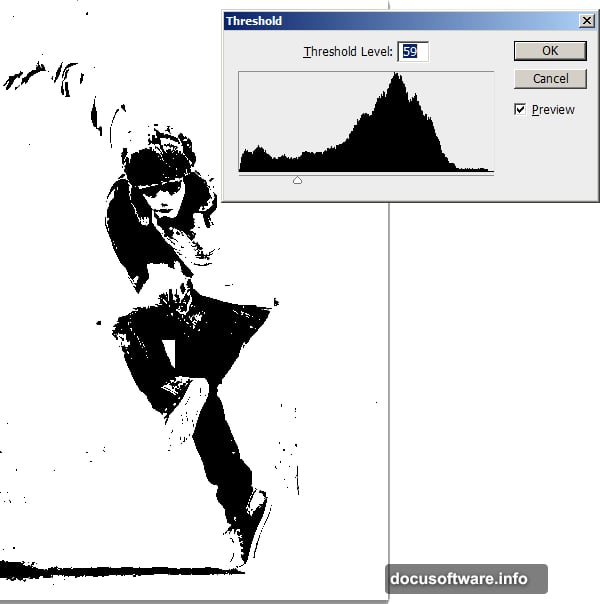
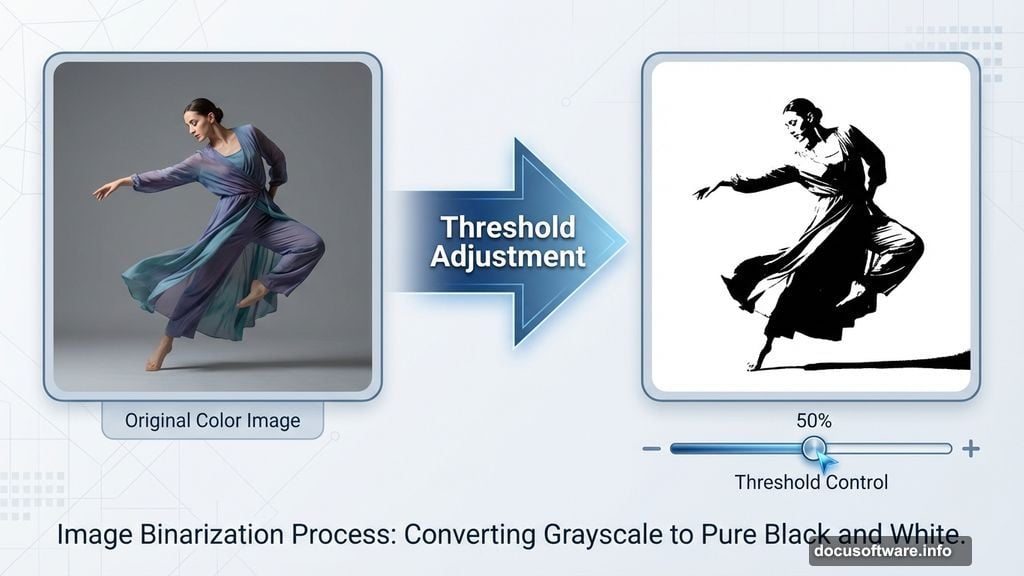
Now comes the key step. Choose Image > Adjustments > Threshold from the menu. A dialog box appears with a single slider.
Drag that slider until most of your background turns white. Only the darkest shadows of your subject should remain black. Don’t worry if it looks rough right now. The next step fixes that.
Click OK to apply the threshold adjustment.
Make the Background Disappear
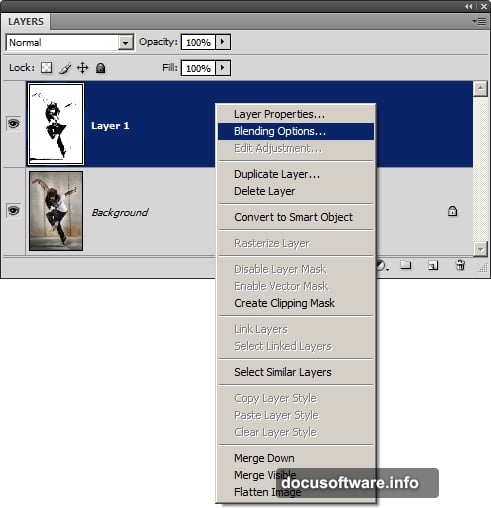
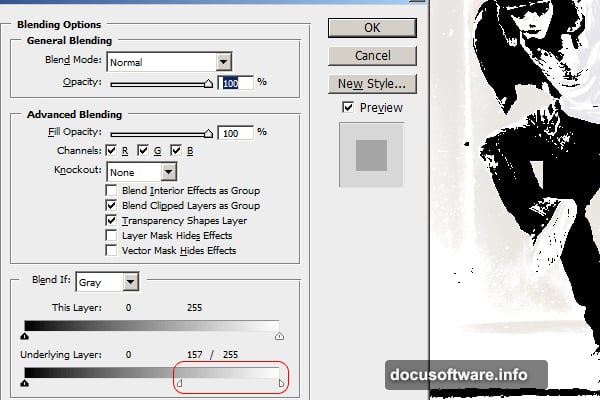
Right-click on your threshold layer and choose Blending Options. Scroll down to the Underlying Layer section at the bottom of the dialog.
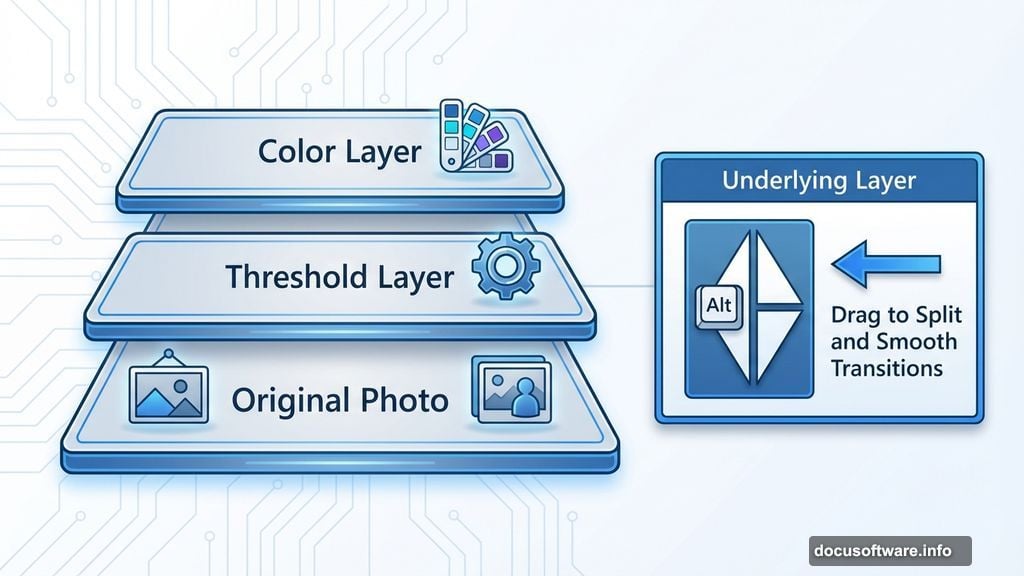
Here’s the trick. Hold down the Alt key and drag the white triangle under “Underlying Layer” toward the left. Split it into two triangles by holding Alt.
This creates a smooth transition between visible and invisible areas. The background fades away completely while your subject’s details remain sharp.
Click OK when you’re satisfied with the preview.
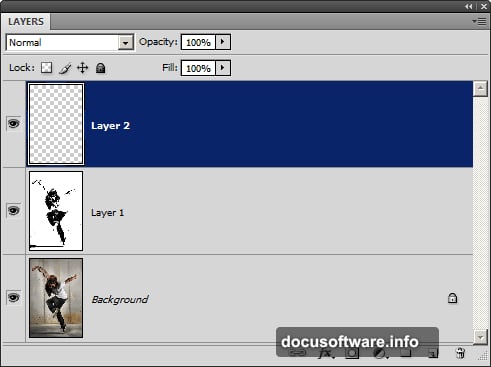
Add Your Color Layer
Click the New Layer button in your Layers palette. Right-click this fresh layer and open Blending Options again.
Repeat the same Alt+drag technique on the white triangle under Underlying Layer. Move it left until you can see your subject showing through clearly.
Nothing appears yet because the layer is empty. But you’ve set up the blending so colors will interact perfectly with the layers beneath.
Paint Your Ink Effect
Now for the fun part. Select a large, soft brush with 0% hardness. Choose any color you like.
Paint broad strokes across your new layer. The blending options you set up automatically show your colors only where they should appear. The background stays clean while colors blend naturally with your subject.
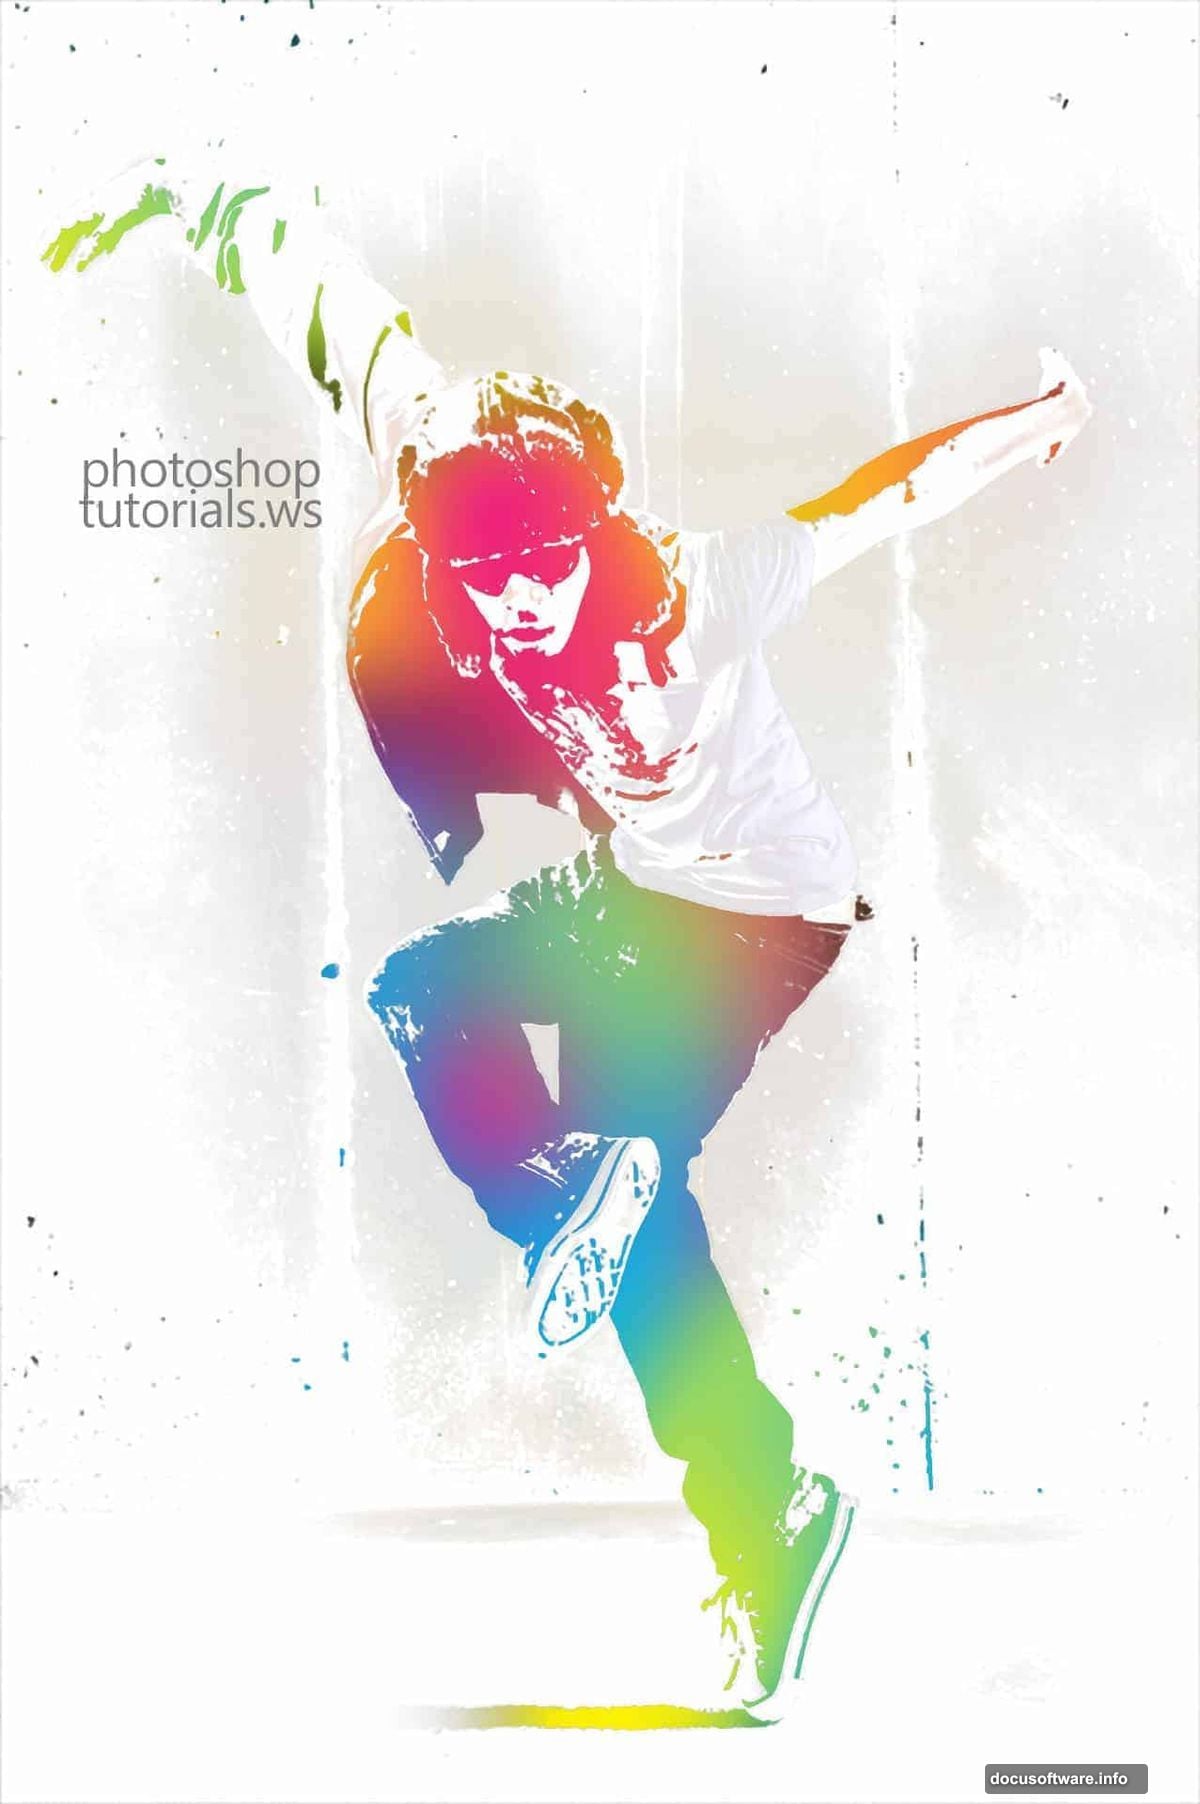
I used cyan, magenta, and yellow for a vibrant ink splash look. But you can experiment with any color scheme. Try neon colors for an electric effect. Or stick with blacks and grays for classic ink artwork.
The beauty of this technique is you can repaint the color layer as many times as you want. Just fill the layer with white and start over if you don’t like your first attempt.
Refine the Shadow Details
Select your threshold layer again. Use a soft white brush to paint over any harsh shadows you want to soften.
For example, I painted the bottom shadow with white to make it fade gradually into the background. This adds depth and prevents the effect from looking too flat.
You can also paint with black on this layer to add more shadow details if needed. Experiment until you achieve the look you want.
Why Blending Beats Masking
Layer masks give you precise control. But they take forever to create and adjust.
Blending options work differently. They automatically show or hide pixels based on brightness values. So you get clean results without tedious masking work.
Plus, blending options remain editable. You can reopen the dialog and tweak the sliders anytime. Try that with a rasterized layer mask.
The tradeoff? Blending options work best on images with clear contrast. Complex backgrounds or subtle lighting need traditional masking techniques instead.
Make It Your Own
This basic technique opens up countless variations. Try different threshold settings for more or less detail. Adjust the blending options for softer or harder edges.
Experiment with color combinations too. Complementary colors create bold contrast. Analogous colors produce harmonious blends. Or go monochrome for a classic ink drawing aesthetic.
You can even add texture overlays on top for extra depth. The two-layer foundation stays the same. Everything else is up to your creative vision.
When Simple Techniques Win
Photoshop offers hundreds of advanced features. But sometimes the simplest approach produces the best results.
This urban ink effect proves that point. Two layers, basic blending options, and a splash of color. That’s all you need to transform ordinary photos into striking artwork.
So skip the complicated tutorials. Master this technique instead. Then spend your time experimenting with creative variations rather than fighting with layer masks.