Cyborgs blend human and machine perfectly. But creating that effect in Photoshop? Most tutorials overcomplicate it.
This guide walks through building a neon cyborg scene from scratch. We’ll combine urban backgrounds, robot elements, and lighting effects. Plus, I’ll show you the exact steps that produce professional results without endless tweaking.
No fancy plugins needed. Just Photoshop’s core tools and smart layering techniques.
Set Up Your Canvas Right
First things first. Create a new document with proper dimensions for high-quality output.
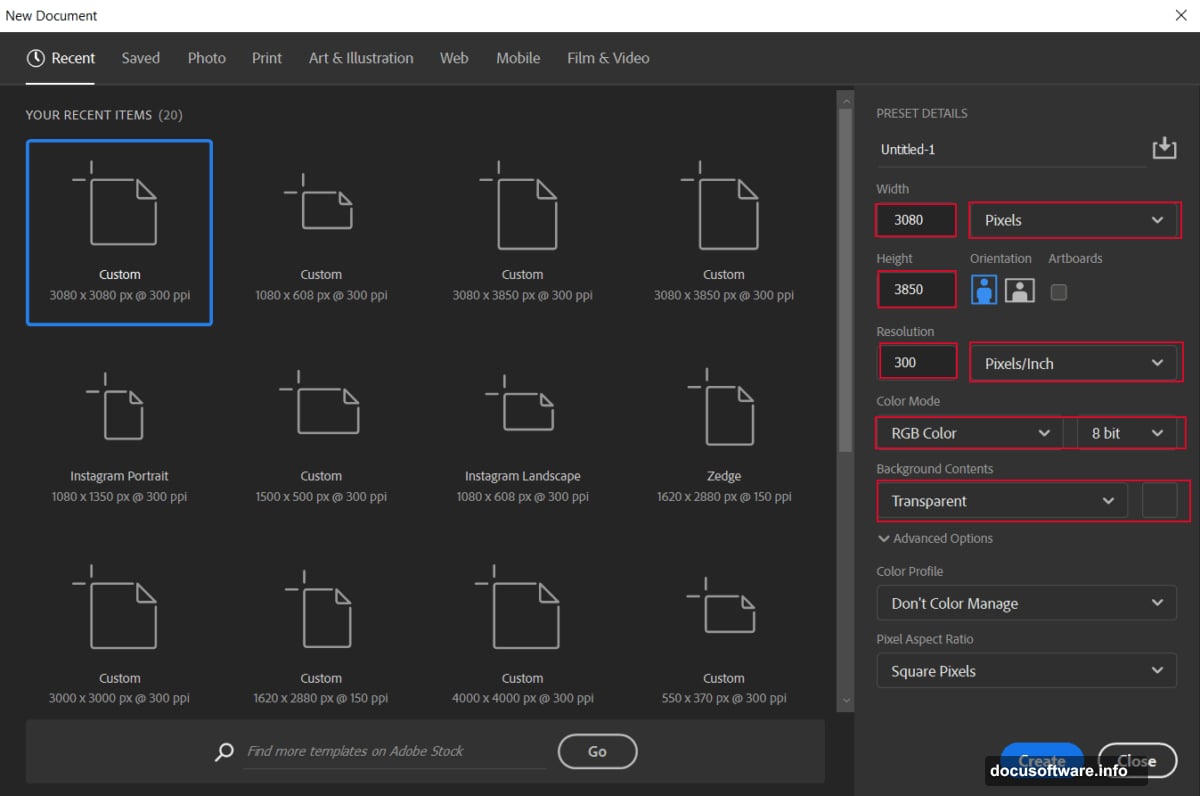
Go to File > New and input these settings:
- Width: 3080px
- Height: 3850px
- Resolution: 300px
- Color Mode: RGB Color 8-bit
- Background: Transparent
Why these dimensions? They give you enough resolution for print while keeping file sizes manageable. Plus, the aspect ratio works great for social media formats.
Build Your Foundation With Urban Atmosphere
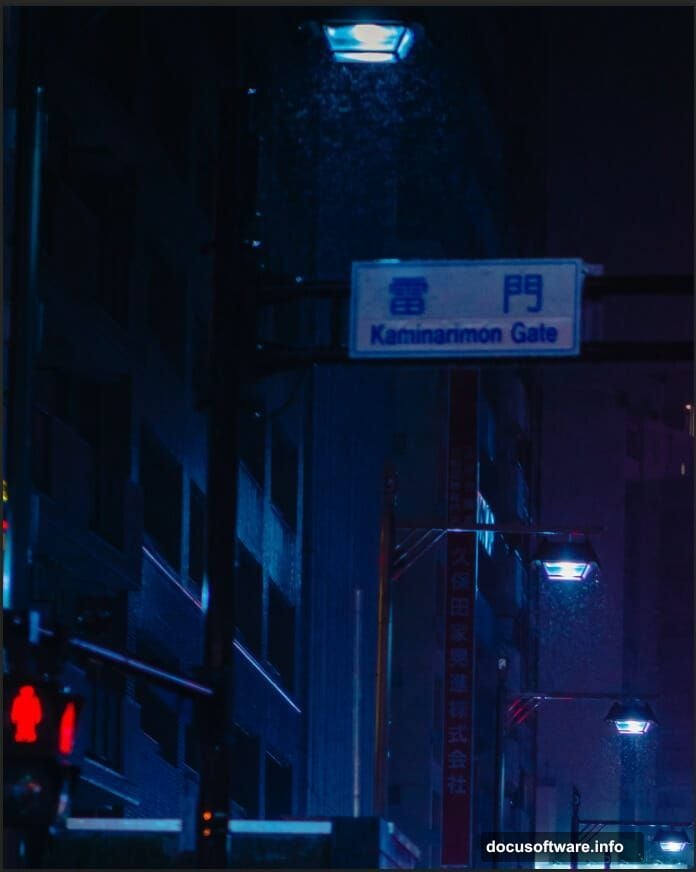
Start by placing your city background. Navigate to File > Place and select your urban scene image.
Position it with the Transform tool (Ctrl/Cmd + T). Hold Alt + Shift while dragging corners to maintain proportions. In Photoshop CC, just hold Alt to scale evenly from the center.
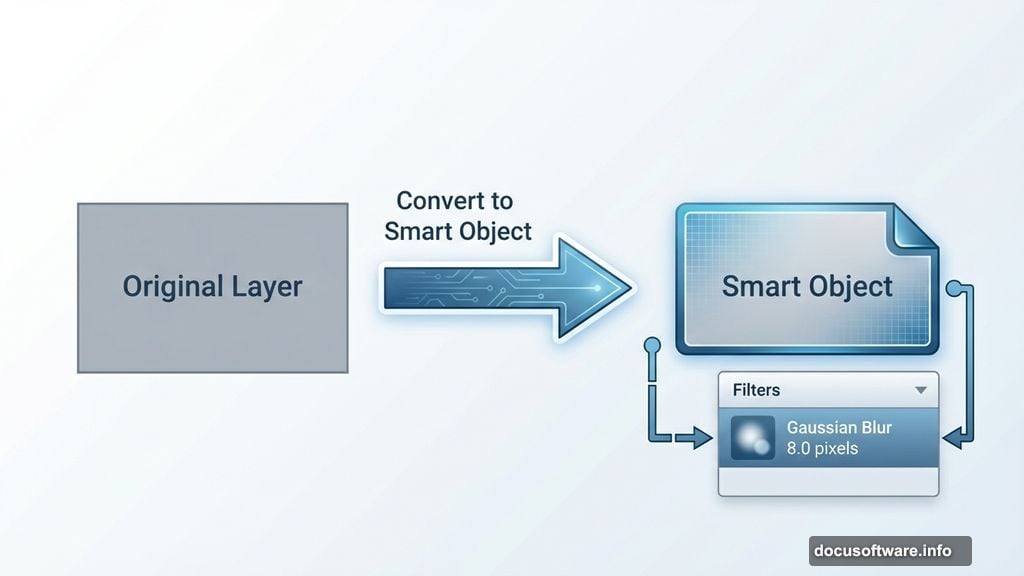
Right-click and select Convert to Smart Object. This keeps your original image data intact for non-destructive edits later.
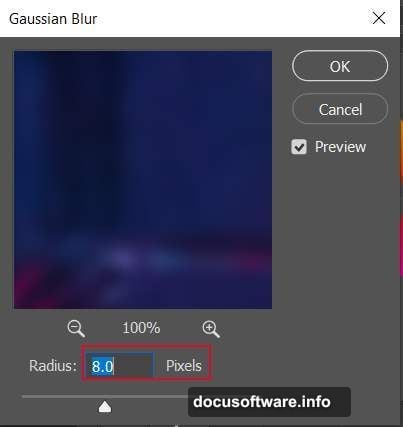
Now add depth. Go to Filter > Blur > Gaussian Blur and set radius to 8.0 pixels. This creates atmospheric perspective that makes your cyborg pop against the background.
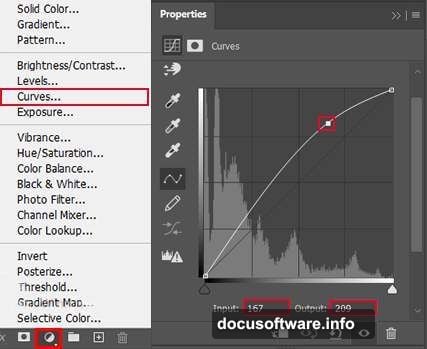
Shape Light and Shadow With Curves
Here’s where most people rush. But proper lighting makes or breaks the cyborg effect.
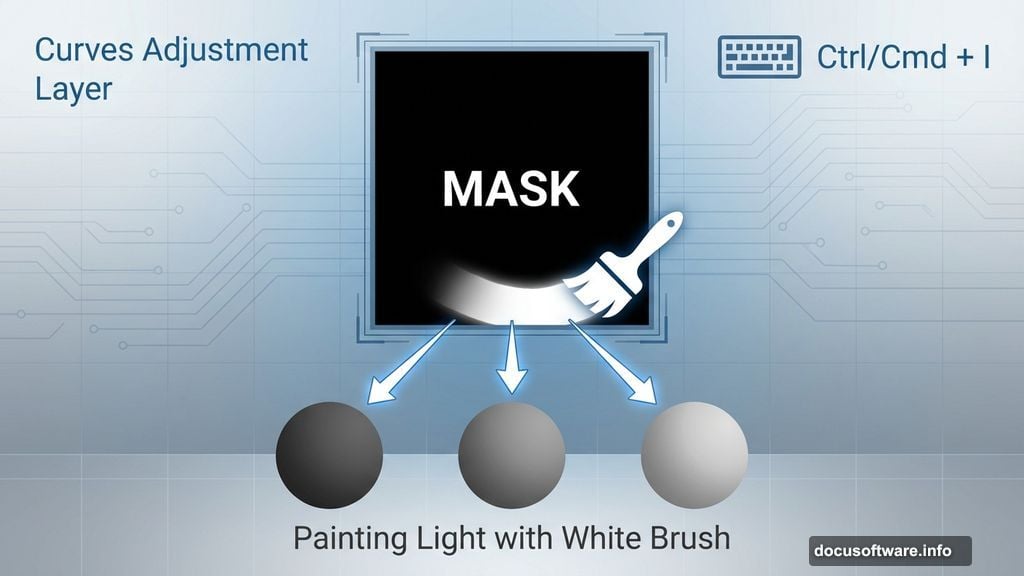
Add a Curves adjustment layer. Press Ctrl/Cmd + I to invert the mask to black. Select the Brush Tool (B) with a soft round brush. Paint with white over highlight areas where light would naturally hit.
This technique gives you surgical control over brightness. You’re literally painting light into your scene.
Next, add another Curves layer for shadows. Again, invert the mask with Ctrl/Cmd + I. Paint with white over areas that should be darker. This pushes depth and dimension into the composition.
The secret? Build up light gradually with low opacity strokes. Better to make five subtle passes than one heavy-handed adjustment.
Boost Overall Contrast
Add a Brightness/Contrast adjustment layer now. Don’t touch the sliders yet.
Sometimes the defaults work perfectly after your previous curve adjustments. Other times you’ll need minor tweaks. Let your eyes guide you here.
The key is balancing punch without losing detail in highlights or shadows.
Add Glowing Light Rays
Create a new layer and change the blend mode to Linear Dodge (Add). This blend mode makes colors brighter and more vibrant.
Set your foreground color to blue (#2367c1). Use a soft brush to paint streaks where you want light rays. Start from a central light source and radiate outward.
Why blue? It contrasts beautifully with warm skin tones and creates that cyberpunk aesthetic everyone loves. Plus, blue light implies technology and energy.
Paint multiple layers of rays at different opacities. This builds realistic light scatter rather than flat streaks.
Insert Your Cyborg Element
Open your robot or cyborg image. Select the Lasso Tool (L) and carefully trace around the parts you want.
Copy the selection (Ctrl/Cmd + C) and paste it into your main document (Ctrl/Cmd + V). Position with Transform (Ctrl/Cmd + T), holding Alt + Shift to scale proportionally.
The placement matters more than you think. Position your cyborg where light rays naturally intersect. This sells the integration between character and environment.
Blend the Cyborg Naturally
Add a Brightness/Contrast adjustment layer clipped to your cyborg layer. This ensures adjustments only affect the robot, not the entire image.
Match the cyborg’s lighting to your background. If the background is dark and moody, pull down brightness. If light rays hit the cyborg directly, increase contrast in those areas.
The goal? Make it look like the cyborg actually exists in that environment, not pasted on top.
Layer Textures for Depth
Import your texture images. Butterfly patterns work great for adding organic complexity to mechanical surfaces.
Place textures over your cyborg using blend modes like Overlay or Soft Light. These modes let underlying details show through while adding surface interest.
Lower the opacity until textures enhance rather than overpower. Usually 30-50% opacity hits the sweet spot.
Don’t cover everything uniformly. Apply textures strategically to specific areas like armor plating or mechanical joints.
Add Atmospheric Effects
Use ray brushes to paint additional light beams throughout the scene. Vary the angles and intensities to create dynamic energy flow.
Create a new layer for rain effects if you want that cyberpunk mood. Use thin white lines at various angles with motion blur applied. Set the layer to Screen or Linear Dodge blend mode.
Rain adds movement and atmosphere. But don’t overdo it. Subtle rain sells better than heavy downpour in most cases.
Final Polish With Camera Raw
Here’s the finishing touch that elevates everything. Go to Filter > Camera Raw Filter.
Adjust these sliders to taste:
- Exposure: Fine-tune overall brightness
- Contrast: Add final punch
- Highlights/Shadows: Recover detail if needed
- Vibrance: Boost color intensity subtly
- Clarity: Enhance mid-tone contrast
The Camera Raw filter lets you make global adjustments without destroying your layer structure. Plus, you can always revisit and tweak settings later since you converted layers to Smart Objects earlier.
Color Grading Makes It Pop
In Camera Raw, switch to the Color Mixer panel. Shift blues toward cyan for that neon tech feel. Adjust magentas and purples to complement your color scheme.
Don’t ignore the orange and yellow channels. These affect skin tones if your cyborg has human elements. Keep those natural looking unless you’re going full synthetic.
Split toning adds professional polish. Add cool tones to shadows and warm tones to highlights. This creates color separation that feels cinematic.
What Actually Makes This Work
Most cyborg tutorials fail because they focus on individual elements instead of cohesion. The real magic happens when lighting, color, and composition work together.
Your light rays should originate from logical sources. Textures should enhance rather than distract. Every adjustment layer should serve the overall mood you’re creating.
Think about the story. Is this cyborg emerging from rain-soaked streets? Standing in harsh neon light? The narrative informs every technical decision.
Start with strong foundations. Nail your lighting first. Then layer effects gradually. Rush any step and the final image feels disconnected.
Practice this technique with different source images. You’ll develop intuition for what works. Soon you’ll create cyborg scenes that make people wonder “How did they do that?”