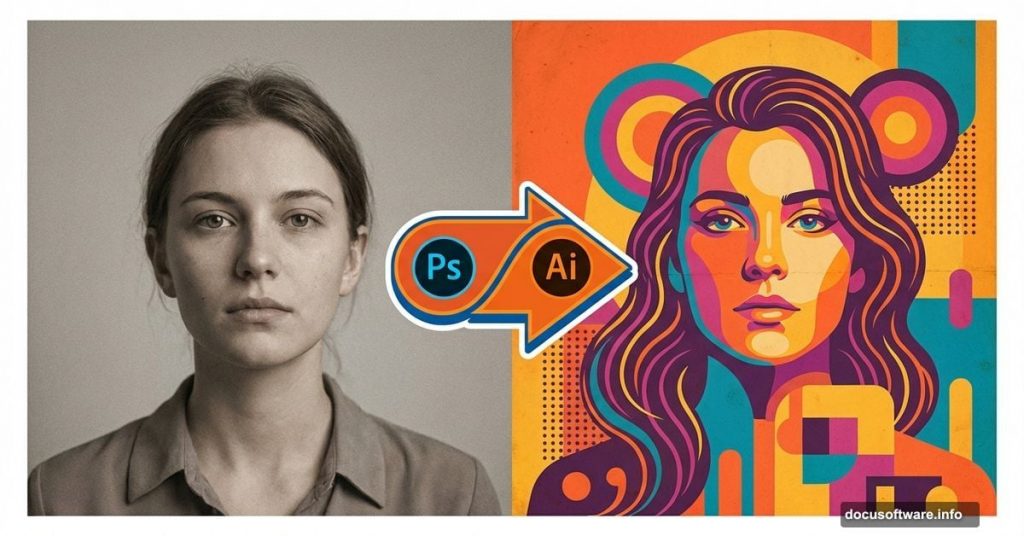
Photoshop and Illustrator work together to create eye-catching vintage artwork. This technique transforms ordinary portraits into colorful retro-style posters that pop off the screen.
Most designers assume you need dozens of stock images and hours of tedious work. Not true. This tutorial shows you how to build impressive retro posters using just a few photos and some creative layer blending.
You’ll need basic Illustrator experience to follow along. But don’t worry—each step breaks down the process clearly.
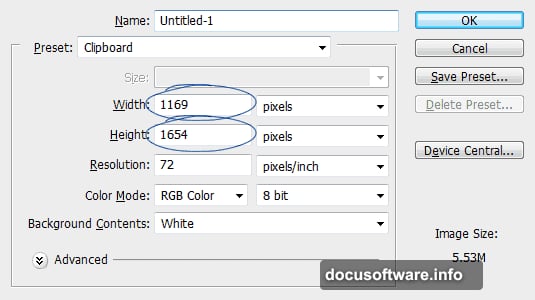
Set Up Your Canvas
Start with a clean workspace. The finished design measures 1169×1654 pixels. You can adjust this size based on your needs.
Replace Photoshop’s default white background with something more neutral. Create a new layer above the background and fill it with #e0ddd8. This soft beige tone gives you better contrast for the colorful elements coming later.
Choose the Right Portrait
Your subject photo matters more than you think. Look for portraits with soft lighting and minimal harsh shadows. The model should have a clear expression—worried, thoughtful, or contemplative works great for retro designs.
Avoid photos with busy backgrounds or complex lighting. You’ll spend less time on cleanup and more time on creative work.
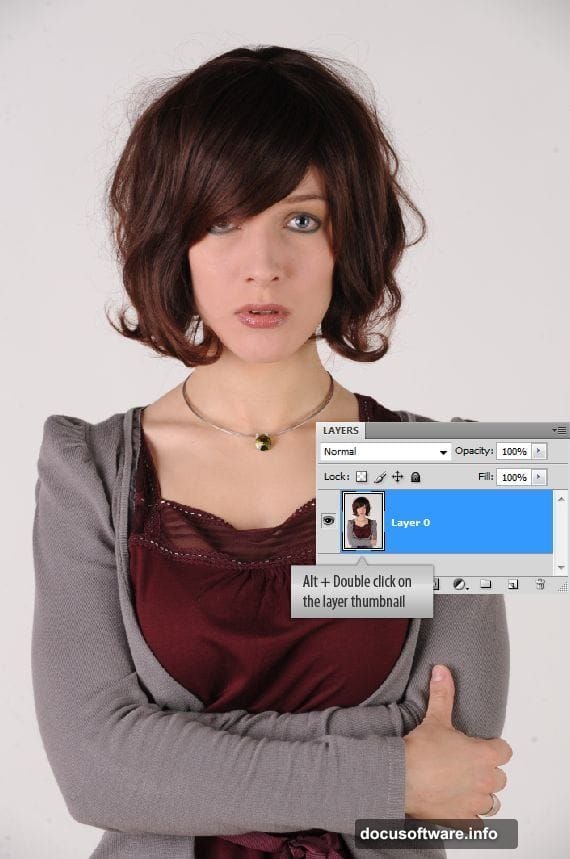
Isolate Your Subject Cleanly
The Color Range command makes background removal painless. Navigate to Select > Color Range and sample the background color using the eyedropper.
The preview thumbnail shows your selection in white. Grey areas indicate partial selections that need refinement. But Color Range handles most of the heavy lifting automatically.
After clicking OK, invert your selection with Ctrl + Shift + I. Now you’ve selected the model instead of the background.
Polish Your Selection Edges
Refine Edge transforms rough selections into professional cutouts. Press Ctrl + Alt + R to open this powerful tool.
Switch the preview to “On Black” so you can see exactly how clean your edges are. Then adjust these settings:
- Smooth the selection slightly to eliminate jagged pixels
- Contract the edge by 1-2 pixels to avoid background color bleeding
- Feather minimally—just enough to prevent hard edges
The trick is subtlety. Over-smoothing creates an obvious cutout look.
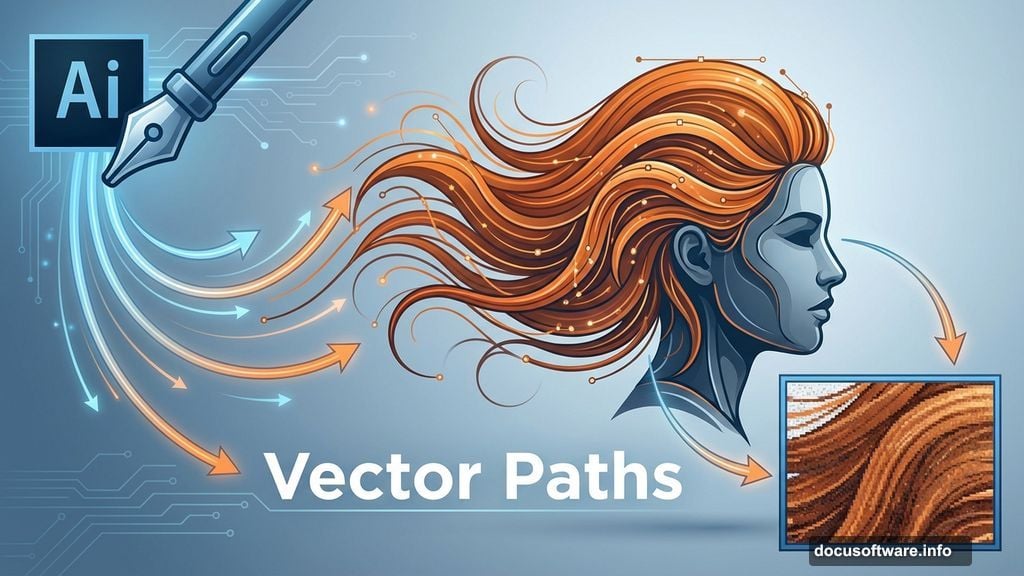
Create Vector Hair Strands in Illustrator

Here’s where Illustrator enters the workflow. Copy your cutout subject into Illustrator as a placed image.
Use the Pen Tool to trace flowing hair strands as smooth vector paths. Don’t worry about perfection—retro posters embrace stylized shapes over photorealism.
The Live Trace feature can jumpstart this process. But manual path creation gives you more artistic control over the final look.
Build Colorful Background Elements
Retro posters thrive on bold geometric shapes and vibrant gradients. Layer circles, rectangles, and abstract blobs behind your subject.
Pick a cohesive color palette—think sunset oranges, electric blues, and hot pinks. Use the Gradient Tool to blend colors smoothly across shapes.
Overlap elements intentionally. The depth created by layering simple shapes adds visual interest without cluttering the composition.
Add Texture for Authentic Vintage Feel
Smooth digital artwork looks too clean for genuine retro vibes. Layer in some grunge textures to age your poster naturally.
Galaxy textures work particularly well. Set blend modes to Multiply or Overlay and reduce opacity until the texture enhances rather than dominates.
Paper textures add another dimension. Look for scanned vintage paper with visible grain and slight discoloration. These subtle imperfections sell the retro aesthetic.
Balance Vector Precision With Photoshop Flexibility
The beauty of this workflow is combining Illustrator’s clean vectors with Photoshop’s texture capabilities. Illustrator handles the geometric shapes and traced elements. Photoshop manages the photo elements, textures, and final color grading.
Copy vector elements from Illustrator and paste them into Photoshop as smart objects. This preserves their crispness while giving you Photoshop’s adjustment layers and blend modes.
Smart objects let you scale and transform vectors without quality loss. Plus, you can still edit the original Illustrator file if needed.
Fine-Tune Colors and Contrast
Adjustment layers are your best friend for that final polish. Curves adjustments boost contrast in specific color channels. Hue/Saturation layers shift overall color temperature.
Play with Vibrance to make colors pop without oversaturating skin tones. Add a subtle Color Lookup adjustment with a vintage film preset for instant retro color grading.
Layer these adjustments above everything else. This way they affect the entire composition uniformly.
Master the Blend Mode Game
Blend modes transform how layers interact. Screen mode brightens underlying layers—perfect for adding light effects. Multiply darkens—great for shadows and depth.
Overlay splits the difference, boosting contrast while preserving midtones. Color mode applies the hue of your layer while keeping the luminosity of layers beneath.
Experiment fearlessly. Blend modes cost nothing and can create happy accidents that elevate your design unexpectedly.
Add Final Decorative Touches
Small details separate good designs from great ones. Add decorative corner elements, vintage frames, or flowing ribbons to fill negative space.
Typography completes retro posters. Choose bold sans-serif fonts for headlines and add subtle grain or texture to the text. Position type thoughtfully—it should complement your composition, not compete with it.
Consider adding lens flares, light leaks, or sunburst patterns. These classic retro elements feel nostalgic without being cliché when used sparingly.
Save Your Work Strategically
Keep your Photoshop file layered and organized. Name your layers descriptively so you can find elements quickly during revisions.
Save a high-resolution master file at 300 DPI for print purposes. Export web-optimized versions at 72 DPI for digital use.
If you plan to create similar posters, save your color swatches and layer styles. This builds a reusable template for future projects.
The techniques in this tutorial adapt easily to different subjects and styles. Once you master the basic workflow, you’ll find yourself creating retro posters faster and with more creative confidence.
Plus, combining Photoshop and Illustrator this way opens up countless design possibilities beyond just posters. The same principles apply to album covers, book designs, and digital illustrations.