Want to create a dramatic fantasy wolf with glowing effects? This tutorial walks you through building an intense photo manipulation from scratch.
We’ll blend multiple images, add atmospheric lighting, and create that signature glowing mouth effect. Plus, I’ll show you how to finish with fire particles and camera adjustments that make everything pop.
The whole process takes about an hour once you know the steps. Let’s jump in.
Set Up Your Canvas
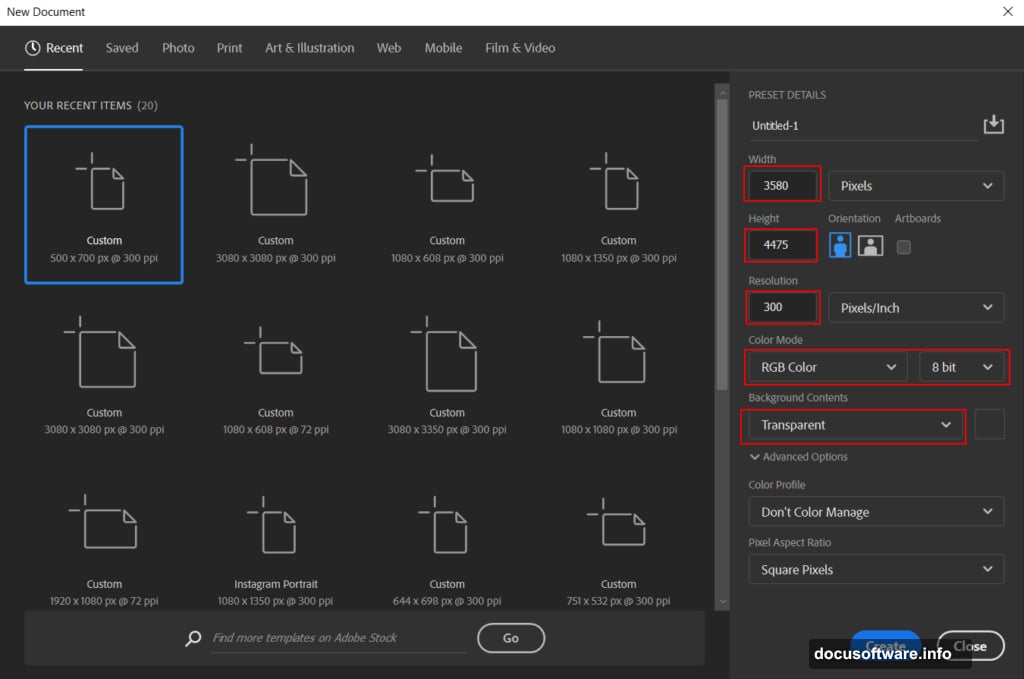
First, create a new document in Photoshop. Go to File > New and punch in these settings:
- Width: 3580px
- Height: 4475px
- Resolution: 300
- Color Mode: RGB Color 8 bit
- Background: Black
These dimensions give you plenty of room to work. Plus, the high resolution means your final image stays sharp even when printed.
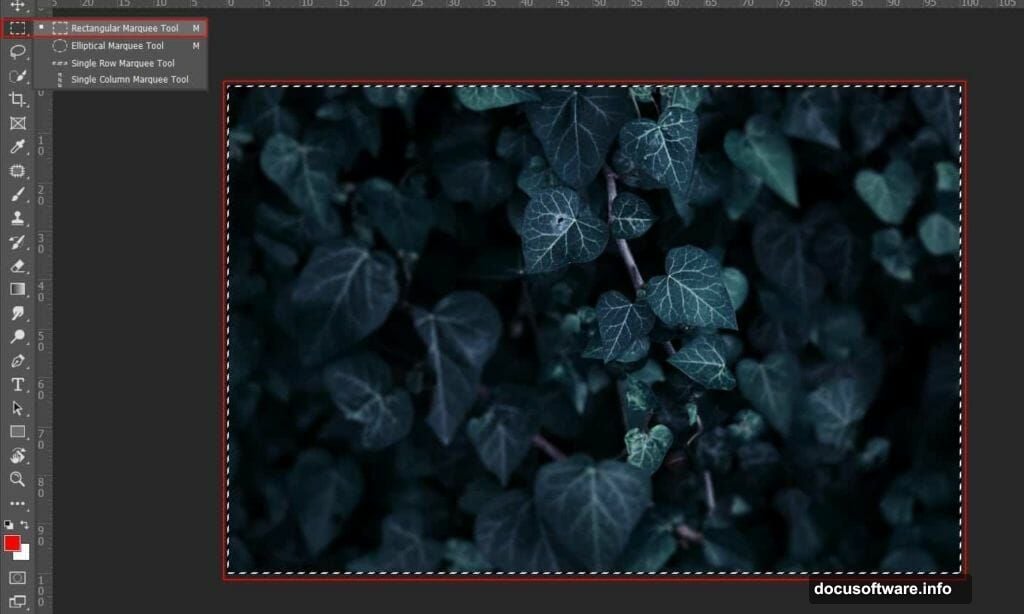
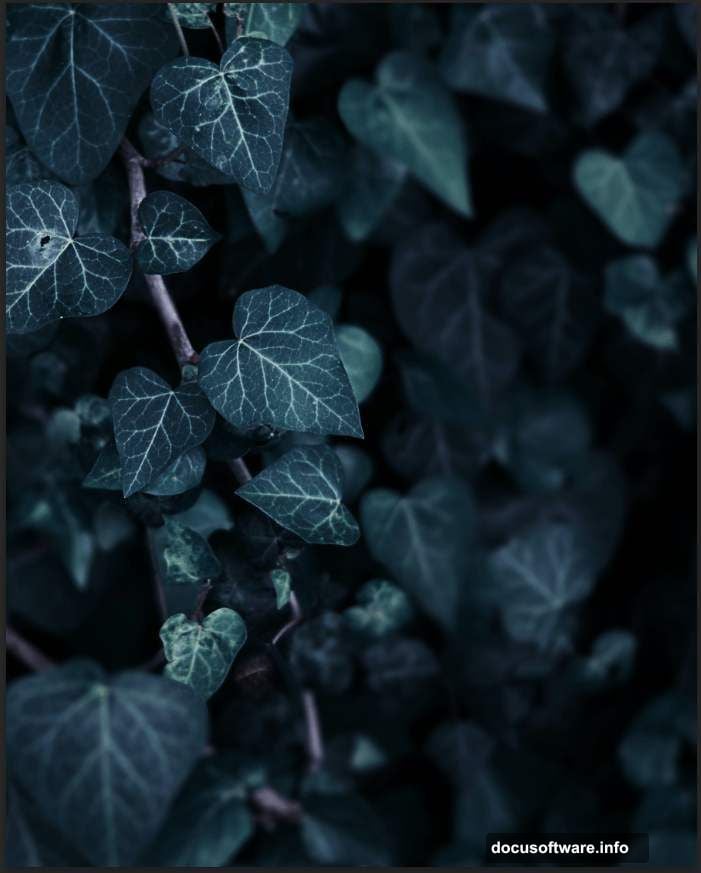
Build Your Background Layer
Open your background photo and grab the Rectangular Marquee Tool (M). Select the area you want, then copy (Ctrl/Cmd + C) and paste (Ctrl/Cmd + V) into your canvas.
Hit Ctrl/Cmd + T to transform. Hold Alt + Shift while dragging corners to resize proportionally. In Photoshop CC, just hold Alt to scale all sides together.
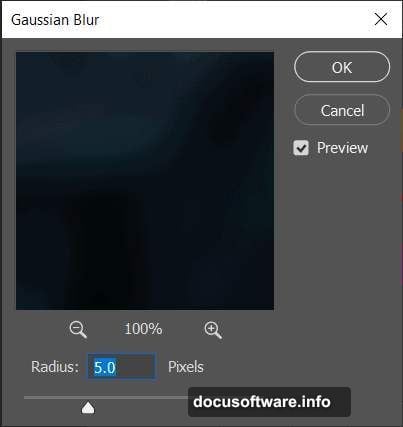
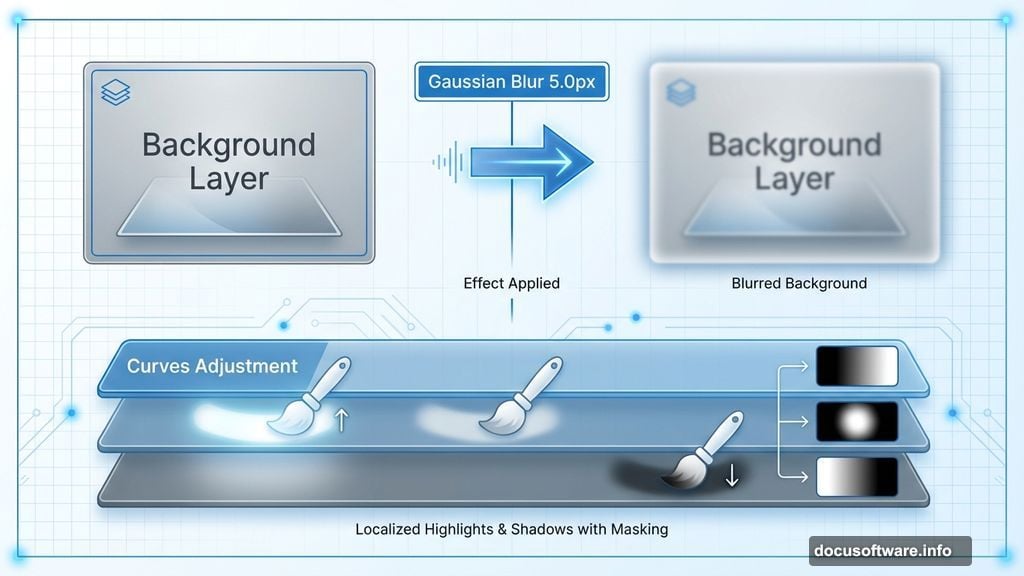
Right-click your layer and choose “Convert to Smart Object”. This keeps everything editable. Then go to Filter > Blur > Gaussian Blur and set the radius to 5.0px. That subtle blur helps your wolf stand out later.
Adjust Background Lighting
Now we’ll shape the mood with adjustment layers. Add a Levels adjustment layer first. This sets your baseline contrast.
Next, add a Curves adjustment layer. Press Ctrl/Cmd + I to invert the mask to black. Grab your Brush Tool (B) with a soft round brush, set foreground to white, and paint over highlight areas. This brings back brightness where you want it.
Add another Curves layer. Invert the mask again. But this time, paint over dark areas to deepen shadows. You’re basically dodging and burning selectively.
Finally, add one more Curves layer for highlights. Same process – invert mask, paint with white brush on areas that should glow or catch light.
These adjustments give you complete control over atmosphere. Don’t rush this part.
Add Your Wolf Subject
Open your wolf image. Use the Quick Selection Tool (W) to select the animal. Take your time getting clean edges around the fur.
Copy and paste the wolf into your main canvas. Position it with the transform tool (Ctrl/Cmd + T). Scale it down while holding Alt + Shift to keep proportions locked.
The wolf should dominate your composition but leave room for effects. I usually place it slightly off-center for better visual balance.
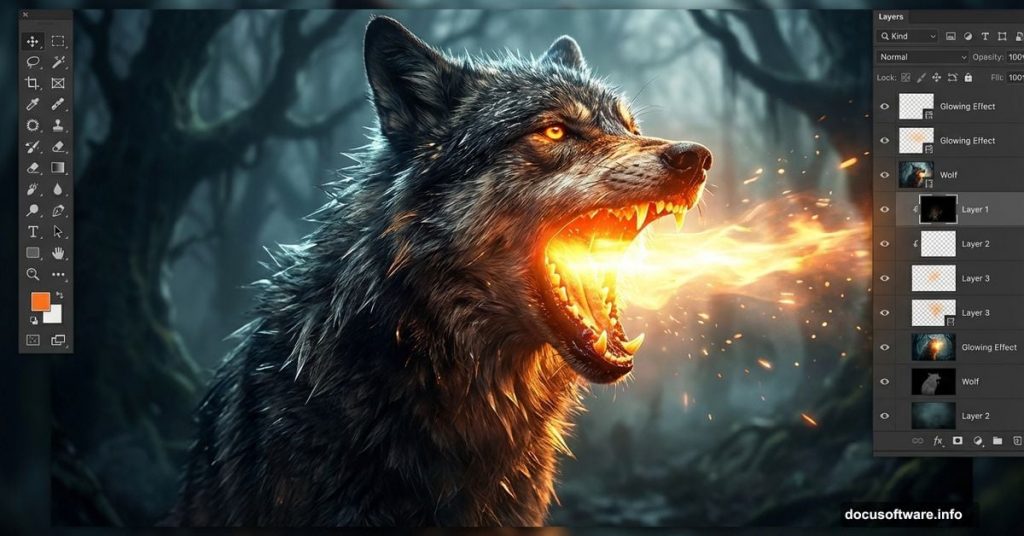
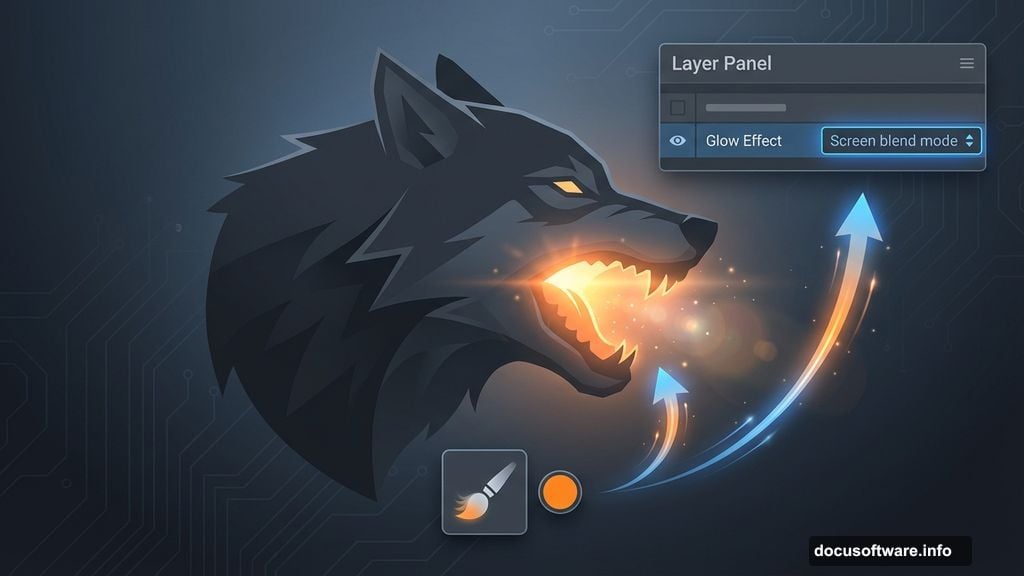
Create the Glowing Mouth Effect
Here’s where things get interesting. You’ll need to isolate the mouth area and add light that feels supernatural.
Select the wolf layer. Create a new layer above it. Use a soft brush with bright orange or yellow color. Set the blend mode to Screen or Add. Paint gently inside the mouth area.
Then duplicate that glow layer. Apply a Gaussian Blur (around 10-15px). This creates the soft diffusion effect. Lower the opacity slightly so it doesn’t overpower.
Add another layer set to Overlay mode. Paint with even brighter colors – whites and yellows. Focus on the teeth and tongue for maximum impact. The layering technique makes the glow feel three-dimensional.
Add Atmospheric Elements
Time to bring in supporting elements. Open your ivy images. Extract them using Quick Selection or Pen Tool for cleaner results. Position ivy around your composition for that overgrown forest feel.
Do the same with butterfly images. Place them strategically – maybe near the wolf’s head or in negative space. Scale them appropriately so they don’t distract from your main subject.
For both elements, adjust their colors to match your overall palette. Use Hue/Saturation or Color Balance adjustment layers clipped to each element.
Integrate Fire Particles
Open your fire particle images. Copy individual particles or groups that work well. Paste them around your wolf, especially near the glowing mouth.
Set these layers to Screen blend mode. This makes the black areas disappear while keeping the bright particles visible. Adjust opacity as needed – subtle often works better than overwhelming.
You can duplicate particles and transform them (flip, rotate, scale) to create variety. Just don’t go overboard. A few well-placed particles beat dozens of random ones.
Apply Camera Raw Filter
Almost done. Flatten a copy of all your layers (Ctrl/Cmd + Alt/Opt + Shift + E). Convert this merged layer to a Smart Object.
Go to Filter > Camera Raw Filter. This opens Adobe’s powerful adjustment panel. Here’s what to tweak:
Increase Clarity to add midtone contrast. Boost Vibrance for richer colors without oversaturating. Adjust Temperature slightly warmer if you want a more dramatic feel.
Play with the Tone Curve for final contrast adjustments. The Camera Raw filter gives you more control than basic adjustment layers. Plus, it’s non-destructive on a Smart Object.
Final Color Grading
Add a Color Lookup adjustment layer at the top of your stack. Browse through the presets to find one that enhances your mood. I often use cinematic LUTs for fantasy work.
Then add a Gradient Map set to Soft Light or Overlay at low opacity (10-20%). Choose colors that unify your palette – maybe dark blue to orange for that fire-and-ice contrast.
Finally, add a Curves adjustment for any last-minute brightness tweaks. Sometimes I add a subtle vignette using a Curves layer with a radial gradient mask.
Why This Technique Works
This layered approach gives you massive flexibility. Every element stays editable. You can adjust the glow intensity, change particle placement, or rework colors without starting over.
The key is building gradually. Don’t try to create everything on one layer. Instead, stack effects and adjust each component until they work together.
Also, blend modes are your best friend here. Screen for glows, Overlay for color adjustments, Multiply for shadows. Understanding when to use each mode saves hours of manual painting.
Common Mistakes to Avoid
Don’t make the glow too bright. Your eyes should adjust to it naturally, not be blinded. Start subtle and build up.
Watch your color palette. Too many competing colors create chaos. Stick to two or three dominant hues with accent colors sparingly used.
Also, pay attention to light direction. If your glow comes from the mouth, other elements should receive some of that light. Add subtle color casts on nearby fur or foliage.
Finally, don’t skip the Camera Raw step. It ties everything together and can save a mediocre composition. Spend time experimenting with those sliders.
Worth the Effort
This technique demands patience. You’re not clicking a few filters and calling it done. But the results look professional because you controlled every detail.
I use variations of this process for all my fantasy composites. The same principles work whether you’re creating glowing eyes, magical auras, or supernatural creatures. Master these fundamentals and you’ll have serious creative power.
Plus, there’s something satisfying about transforming separate images into one cohesive piece of art. That’s the real magic of photo manipulation – not the glowing effects, but the skill to make it all feel real.