Ever wanted to create one of those unsettling, industrial-nightmare scenes you see in sci-fi concept art? The kind that feels like it belongs in a dystopian film set? This tutorial walks you through exactly that — a perspective 3D room packed with chains, pipes, wires, and gritty metal textures, all built inside Photoshop.
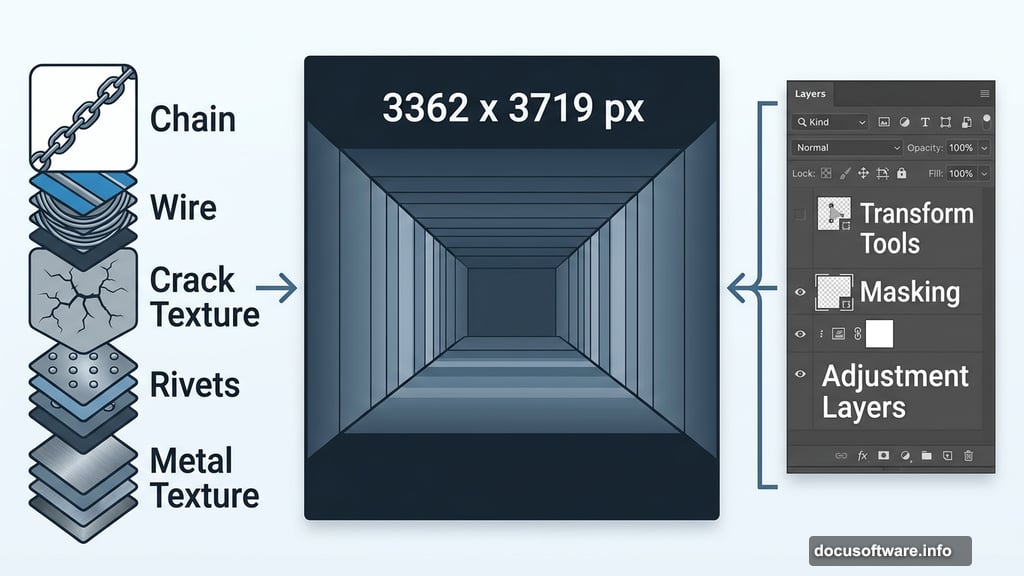
The best part? You don’t need advanced skills to pull this off. Photoshop’s built-in transform tools, masking features, and adjustment layers do most of the heavy lifting.
What You’ll Build
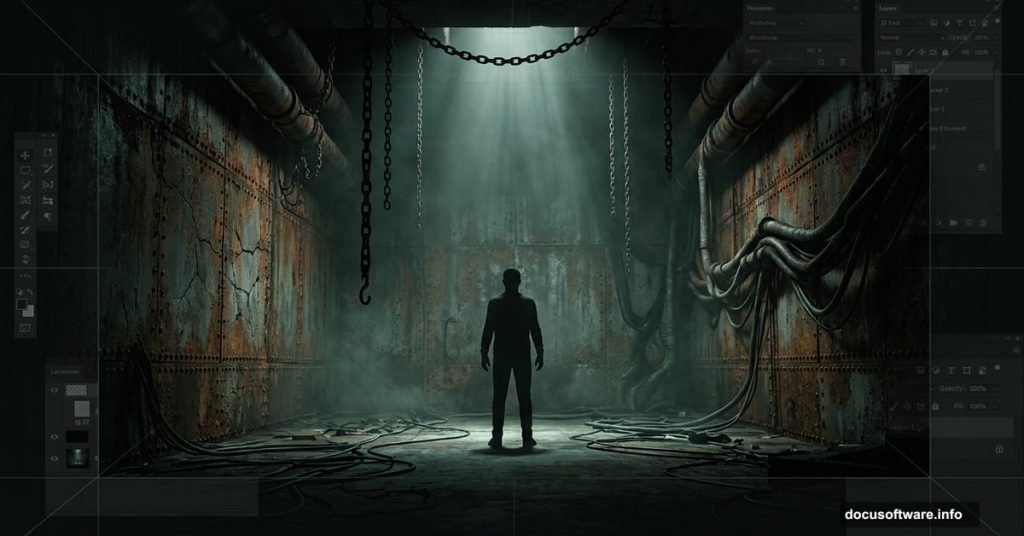
The final scene centers on a human figure trapped inside a dark, industrial-style room. Think rusted metal walls, dramatic depth, and atmospheric details that make the whole thing feel genuinely unnerving.

Here’s a quick overview of the creative journey. First, you’ll construct a perspective background to anchor the 3D illusion. Then you’ll layer in environmental details — chains, pipes, wires, and cracks. Finally, you’ll pull everything together with textures and lighting adjustments that sell the whole mood.
You’ll need Photoshop CS5 or newer to follow along.
Stock Resources You’ll Need
Before jumping in, gather these assets:
- Man figure — Shutterstock
- Metal Texture — Markpiet
- Vault — Kiyoi-Stock (alternative version available)
- Sci-Fi Prop — Inadesign-Stock
- Steam Stock — Random-Acts-Stock
- Chain — Lemurianwanderer
- Wire — Enframed
- Crack Texture — Obsidian-Fox-Stock
- Metal Texture 2 — Mercurycode
- Rivets — Enframed
- Barcode — SXC.hu
- Stain Texture — Kizistock
Got everything? Great. Let’s build something strange.
Step 1: Extract the Figure From Its Background
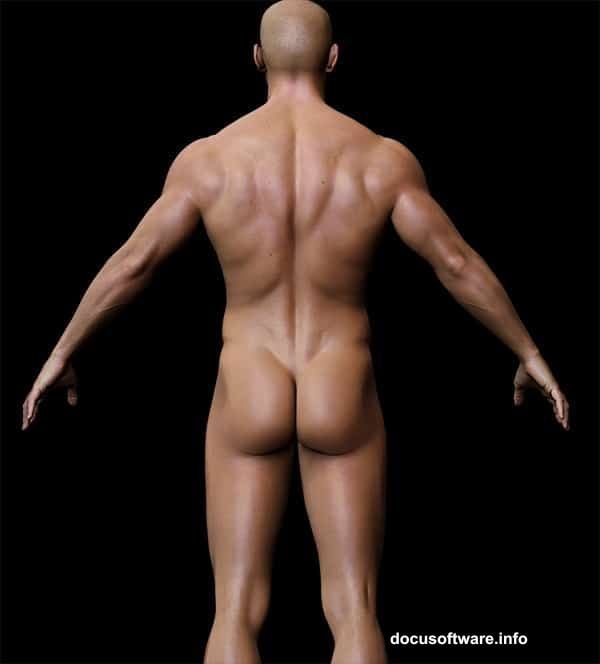
Open the Man image first. Before doing anything else, double-click the Background layer in the Layers panel to unlock it. Locked background layers can’t be edited freely, so this step matters.
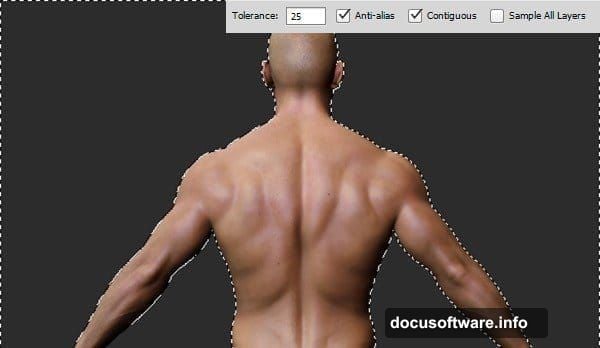
Now grab the Magic Wand Tool (W) from the toolbar. This tool works brilliantly on images with consistent background tones and colors — exactly what you’ve got here. Set the Tolerance to 25 in the Options bar, then click the background area. You’ll get a rough selection, which is completely normal at this stage.
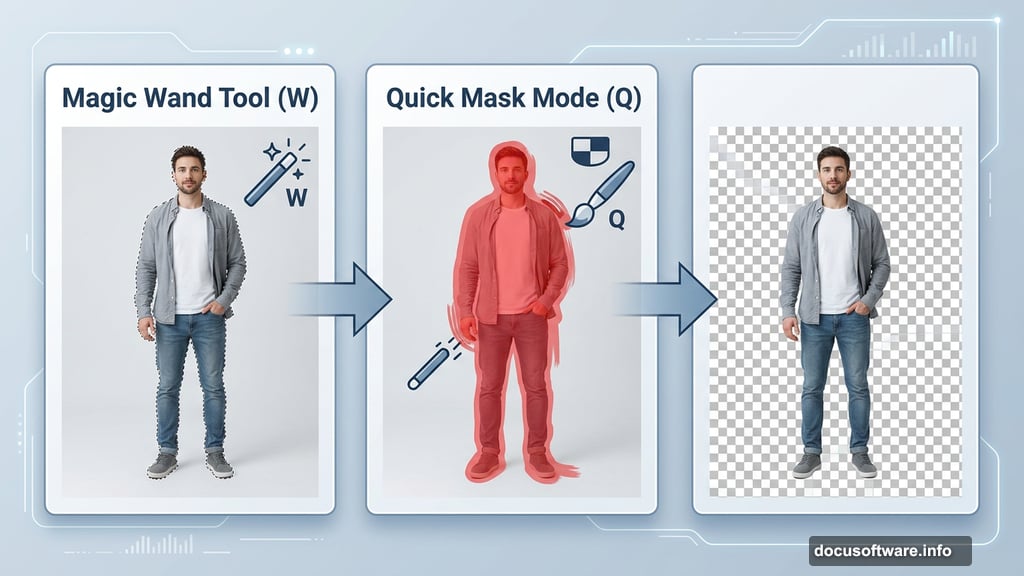
Here’s where Quick Mask Mode saves you. Press Q on your keyboard to enter it. You’ll see a red overlay appear — that red area shows what isn’t selected. Switch to the Brush Tool (B) and paint with a hard-edged brush to refine the edges around the figure. Work carefully around the outline until you’re happy with the line.
Press Q again to exit Quick Mask Mode. Then hit Delete to remove the background. Your man should now be floating cleanly on a transparent layer.
Step 2: Set Up Your Canvas and Base Layer
With the figure isolated, go to Image > Canvas Size. Uncheck the Relative option and enter 3362 x 3719 pixels. Photoshop will warn you that clipping will occur — click Proceed and move on.
Nudge the Man figure down slightly so his head sits in the upper portion of the canvas. Next, hold Ctrl and click the New Layer icon at the bottom of the Layers panel. This adds a fresh layer directly below the Man layer.
With that new layer selected, go to Edit > Fill and choose Black from the Contents dropdown. This gives you a solid dark foundation to build the room around.
Step 3: Build Your Perspective Guide
This is where the 3D magic starts. Creating a perspective guide first makes everything else easier and more convincing.
Add another new layer below the Man layer. Use the Rectangular Marquee Tool (M) to draw a rectangle in the canvas center — something around 1952 x 2432 pixels works well. Keep the selection active, then go to Edit > Fill again, but this time choose 50% Grey.
This grey rectangle becomes your perspective anchor. Every wall, floor, and ceiling element you add later will align to this guide. Think of it as drawing your floor plan before building the house — it keeps proportions consistent and the illusion believable as layers stack up.
From here, the tutorial continues across several more steps covering shadow placement, adding the industrial props, applying metal textures, and finishing with atmospheric effects. Each stage builds directly on this perspective foundation you’ve just established.
The approach Ariga Yada uses throughout is refreshingly practical. Rather than relying on any single complex technique, the whole scene comes together through combinations of basic Photoshop tools used thoughtfully. Transform, mask, blend, adjust — repeat until it looks like a place you’d genuinely never want to visit.
That’s honestly what makes this kind of project worth attempting. The skills you practice here — masking cleanly, building perspective manually, layering textures convincingly — show up in nearly every other complex Photoshop composition you’ll ever tackle. Master them in a weird, surreal dungeon scene and they’ll feel easy everywhere else.