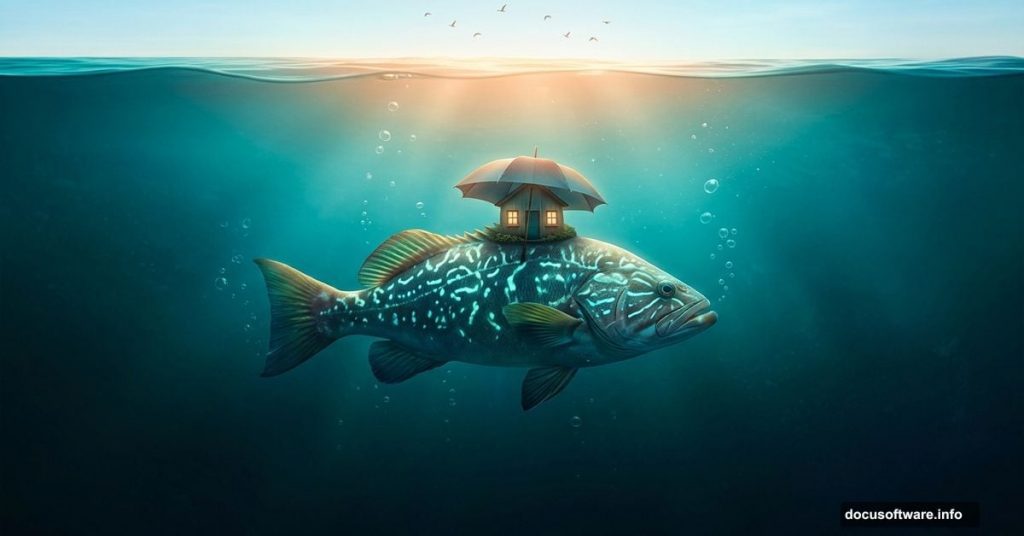
Some of the most captivating digital art looks impossible. A giant fish floating through murky water, carrying a little house built from an umbrella. Birds drifting past smoke from a chimney. Bubbles rising toward a light-filled surface above.
That’s exactly what this Photoshop photo manipulation tutorial helps you build. And honestly, it’s more approachable than it sounds. You’ll work with real-world techniques that professional artists use every day, like layer masking, adjustment layers, and blending modes. Let’s walk through how it all comes together.
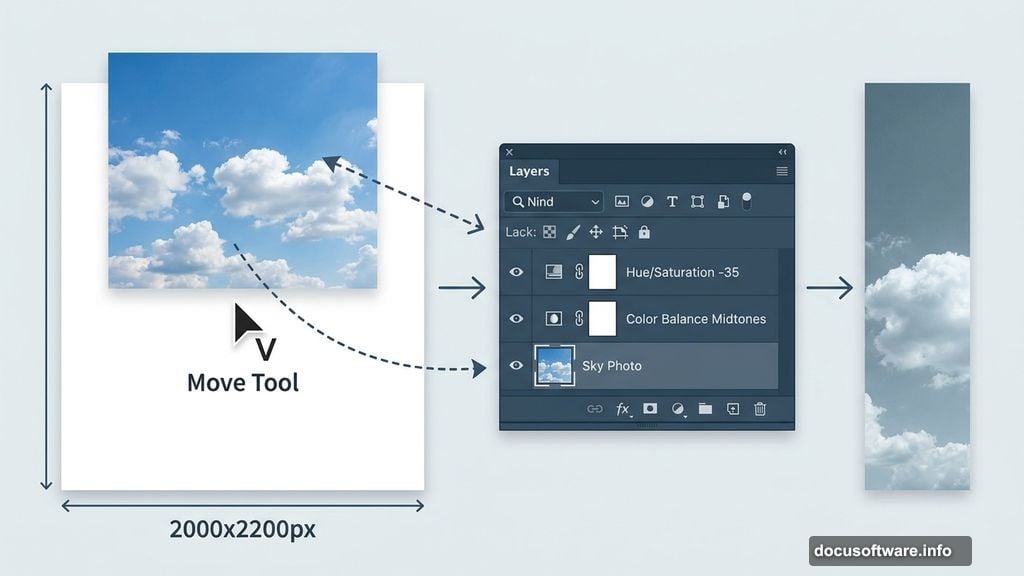
Start with a 2000×2200 Canvas and Sky Base
First things first. Create a new document in Photoshop set to 2000×2200 pixels and fill it with white.
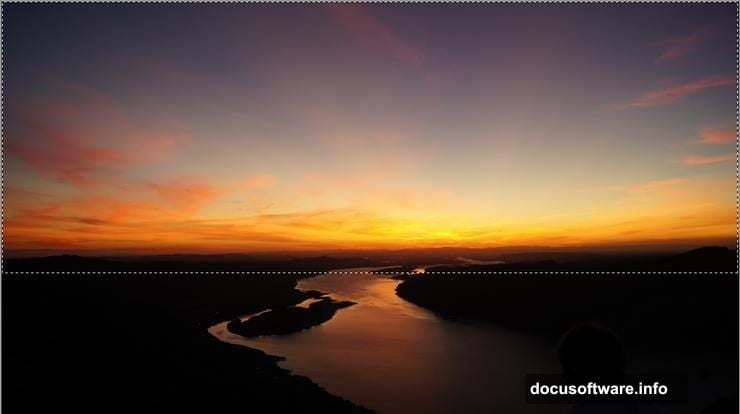
Next, open your sky image. Use the Rectangular Marquee Tool (shortcut: M) to select just the sky portion. Then grab the Move Tool (V) and drag that selection onto the top of your white canvas.
This sky layer becomes your above-water environment. It sets the mood for everything that follows.
Hue/Saturation and Color Balance Fine-Tune the Sky
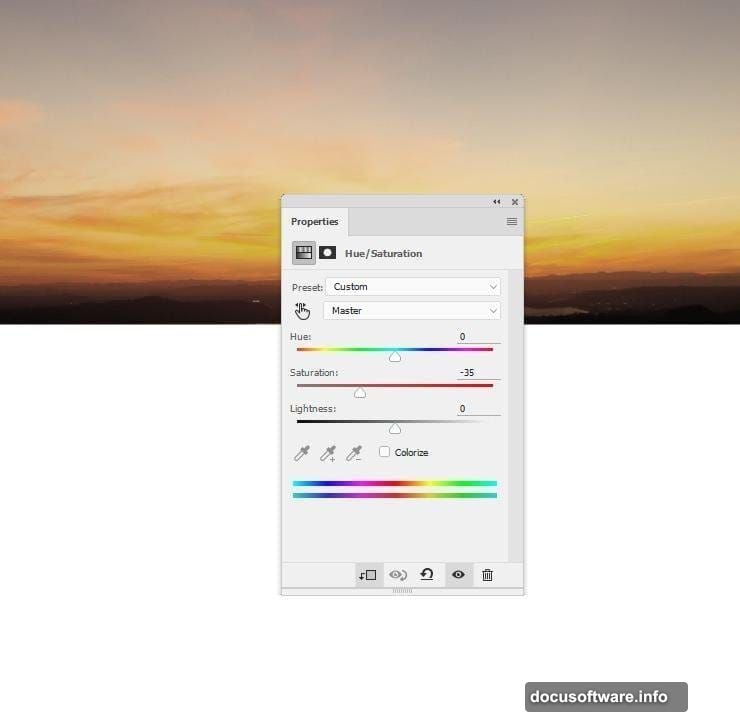
Right now, that sky probably looks a bit too vivid and warm. So let’s cool it down with two adjustment layers.
First, go to Layer > New Adjustment Layer > Hue/Saturation. Set it as a Clipping Mask so it only affects the sky. Reduce the Saturation to -35. This pulls the color back slightly, giving the sky a calmer, more atmospheric feel.
Then add a Color Balance adjustment layer, also as a Clipping Mask. Adjust the Midtones settings to shift the color temperature. Together, these two layers give the sky a subdued, slightly otherworldly quality that works beautifully with the surreal scene below.
Build the Underwater Color with a Fill Layer
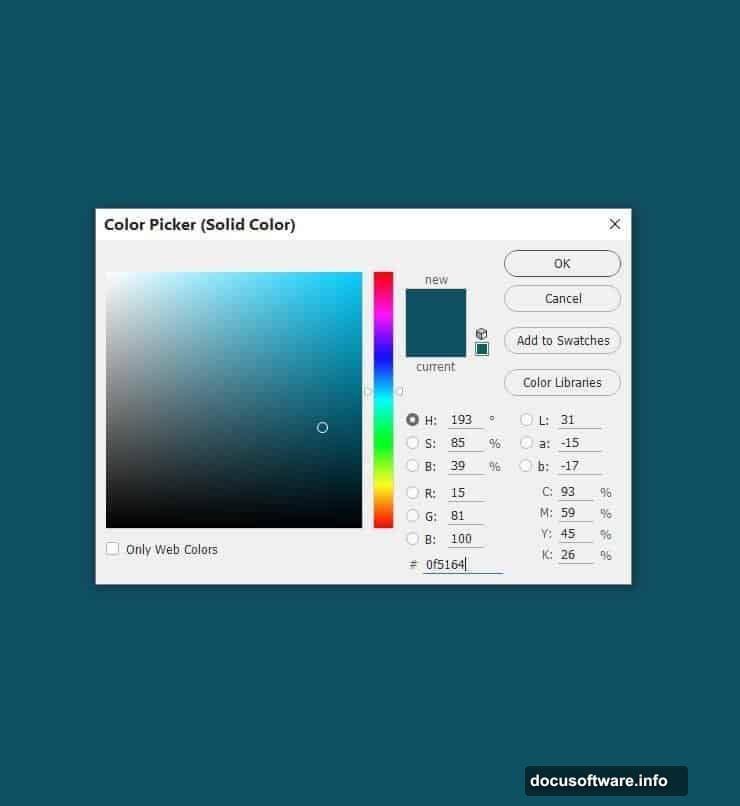
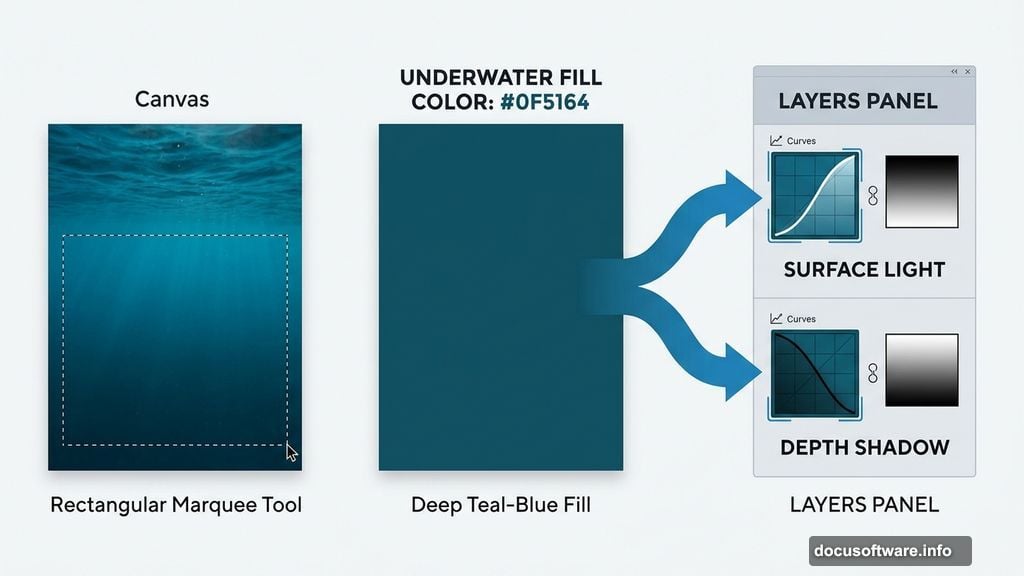
Now for the fun part. The underwater environment starts with a solid Color Fill layer using the hex color #0f5164. That’s a rich, deep teal-blue that immediately reads as water.
Use the Rectangular Marquee Tool to draw a selection covering the lower portion of your canvas. With that selection active, click the mask icon at the bottom of the Layers panel. Your fill layer now sits only in the lower section, creating a clear visual divide between sky and water.
The result looks like a horizon. Sky above, deep ocean below.
Shape the Underwater Light with Curves Layers
Flat color isn’t enough. Real water catches light from above and grows darker toward the depths. So you need at least two Curves adjustment layers to sell the effect.
The first Curves layer brightens the upper portion of the underwater area. This simulates light filtering down from the surface. On the layer mask for this adjustment, activate the Brush Tool (B) and choose a soft round brush set to black. Paint over the bottom of the mask to protect those darker shadow areas and keep the light source feeling natural at the top.
The second Curves layer does the opposite. It darkens the underwater section overall, adding weight and depth to the lower portion of the scene.
Add Texture with the Noise Layer in Screen Mode
Underwater scenes need texture. Still, flat color looks sterile. That’s where a starry or noise texture comes in.
Open your noise texture image and place it over the underwater area. Change the layer blending mode to Screen at 100% opacity. Screen mode makes dark pixels invisible and lets light pixels show through, so the noise reads as natural floating particles and light scatter in the water.
Add a layer mask to this texture layer. Then use a soft black brush to gently reduce the visibility of the noise in certain areas, keeping it subtle. The goal is texture that feels like it belongs in water, not like a pattern layered on top.
Desaturate the Noise for Believable Underwater Color
Here’s a small step that makes a big difference. That noise texture likely has color in it. But underwater scatter is mostly colorless, just varying brightness.
Add a Hue/Saturation adjustment layer directly above the noise layer and set it as a Clipping Mask. Drag the Saturation slider all the way down. Now the texture is pure luminance, no competing color tones. It blends into the water environment much more convincingly.
Isolate and Place the Giant Fish

This is the centerpiece of the whole composition. Isolate the fish from its background using whichever selection method you prefer. The Pen Tool gives the cleanest edges, but Quick Selection works well too for organic shapes.
Once isolated, place the fish in the middle of the underwater area. Scale it up. Big. The whole point of this scene is the surreal scale contrast between a massive fish and the tiny house perched on top of it.
Take your time with the masking here. Clean edges on the fish are what separate a polished manipulation from something that looks rushed.
Blend the Fish with a Color Fill Clipping Mask
Even with careful cutting, a fish pulled from a stock photo will probably look slightly out of place. Its original colors might be too warm or too saturated for the cool teal environment.
Create a Color Fill layer set to the color #125e72 and make it a Clipping Mask over the fish layer. Then lower that fill layer’s opacity to around 50%. This tints the fish with the ambient underwater color, helping it feel like it actually belongs in this environment rather than being pasted on top.
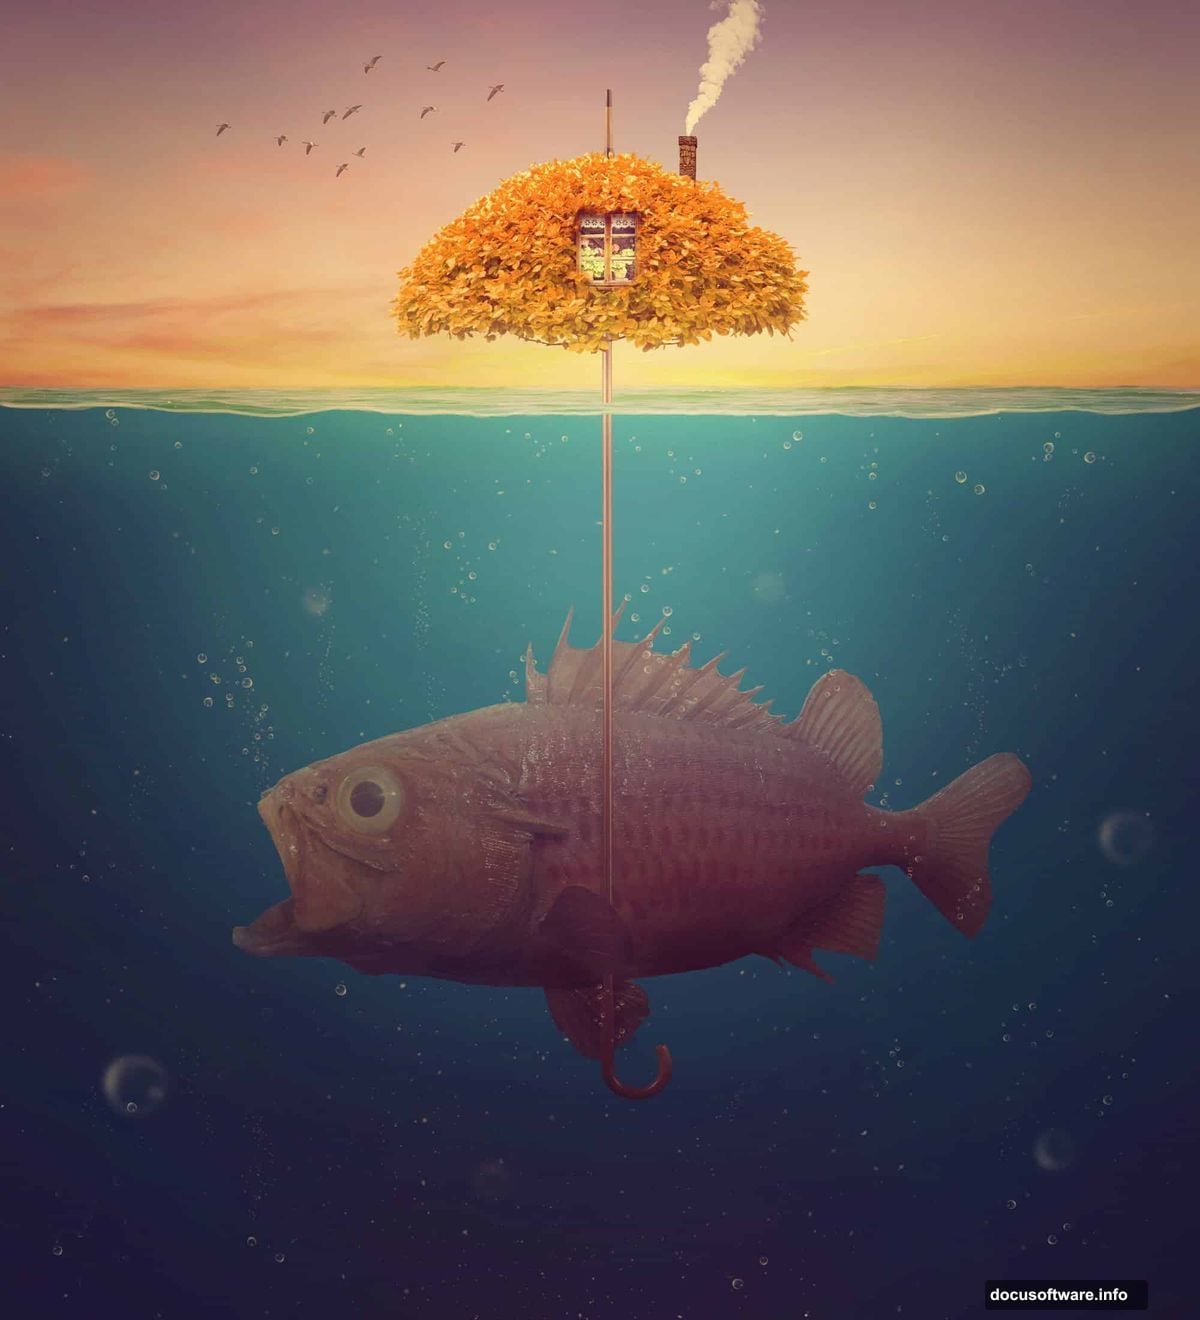
Layer In the Umbrella House, Bubbles, and Details
With the base environment and fish in place, the remaining elements build the story. The umbrella becomes a house structure perched on top of the fish. Add it with careful masking and position it so it reads as a believable (if fantastical) dwelling.
From there, layer in the window, chimney, smoke, tree, leaves, and birds one at a time. Each element needs its own adjustment layers and masking to match the underwater color palette. Birds near the surface can be brighter and less tinted. Elements deeper in the scene pick up more of that cool blue-green cast.
Bubbles are especially fun. Place them throughout the scene at varying sizes. Use soft brushes on their layer masks to make some bubbles fade toward the edges, giving them a natural translucent quality.
The smoke rising from the chimney adds one of the most charming details. Use a soft brush and low-opacity smudging to make the smoke drift and dissipate naturally into the surrounding water.
Final Adjustment Layers Pull Everything Together
Once all elements are in place, the last step is a series of global adjustment layers sitting at the very top of your layer stack. These affect everything beneath them and unify the whole composition.
Think of these as your color grade. Use Curves, Color Balance, and Hue/Saturation to push the overall image toward your intended mood. Maybe deepen the shadows at the bottom edges. Maybe add a slight warm highlight near the center where the main light source lives. Small tweaks at this stage make a huge difference to how cohesive the final piece feels.
Step back, zoom out, and look at the whole image. If one element jumps out as disconnected, add a Curves clipping mask to it and pull it back into the scene. The goal is one unified world, not a collection of separate cutouts.
This kind of photo manipulation is genuinely one of the most enjoyable things you can do in Photoshop. There’s no wrong answer once the fundamentals are solid. You pick the mood, you pick the scale, you decide how strange or how peaceful that underwater world feels. The techniques here, masking, blending modes, clipping masks, and curves, are the same toolkit professionals use for everything from movie posters to editorial covers. Master them on a project like this and they become second nature fast.