Matte painting sounds intimidating. But at its core, it’s just clever photo combining — and Photoshop makes it surprisingly approachable.
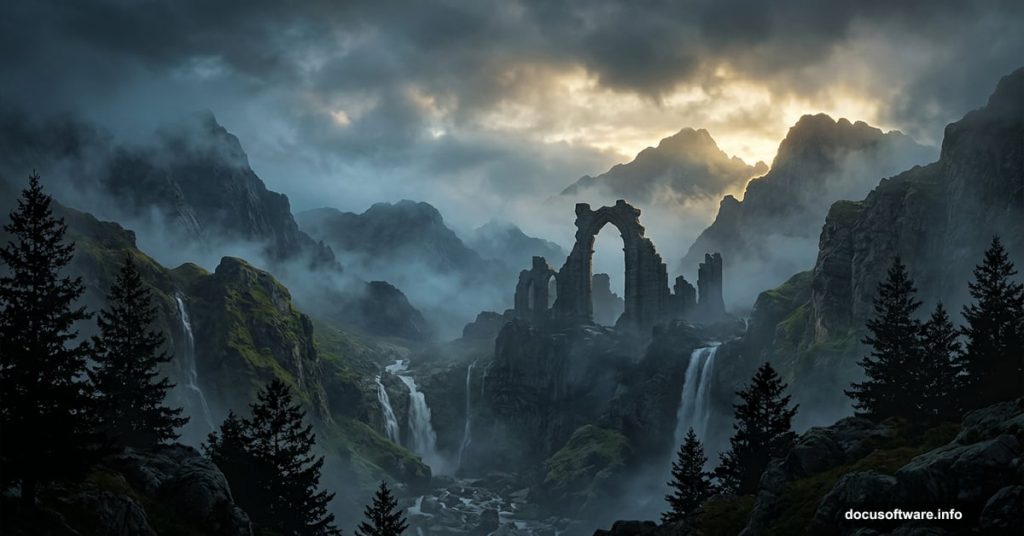
This tutorial walks you through building a full mountainous landscape scene by blending multiple stock photos together. You’ll combine sky, rocky terrain, waterfalls, mist, and ancient ruins into one cohesive image. Plus, you’ll learn the core techniques that professional photo manipulators use every single day: layer masks, adjustment layers, and smart blending.
Ready to build something that looks genuinely cinematic? Let’s go.
Stock Photos You’ll Need First
Before opening Photoshop, gather your source images. Here’s the full list:
- Sky — sxc.hu
- Background mountain — Stockfreeimages
- Left rock, Right rock, Mid rocks — Pixabay
- Trees 1 — sxc.hu
- Tree 2, Tree 3 — Morguefile
- Tree 4 — Stockfreeimages
- Bottom right rock — Stockfreeimages
- Waterfall 1 — Pixabay
- Waterfall 2 — Morguefile
- Arch 1 — Morguefile
- Arch 2 — Stockfreeimages
- Ruin 1, Ruin 3 — sxc.hu
- Ruin 2 — Morguefile
- Mist brushes — Ideasplayer
All sources are free. Download everything before you start so you’re not hunting for assets mid-project.
Step 1: Set Up Your Canvas and Drop In the Sky
Create a new document at 1300×900 pixels. Fill it with white or any bright, light color — this gives you a clean base to work from.
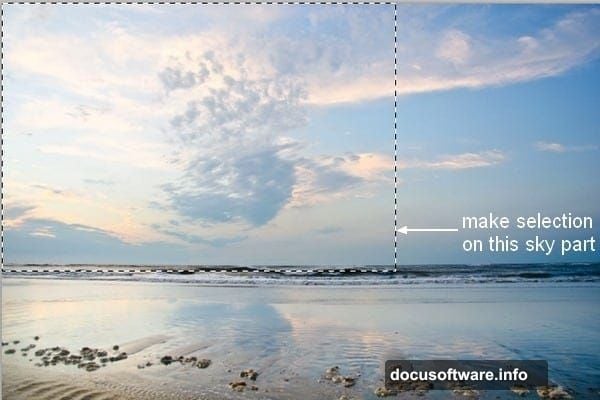
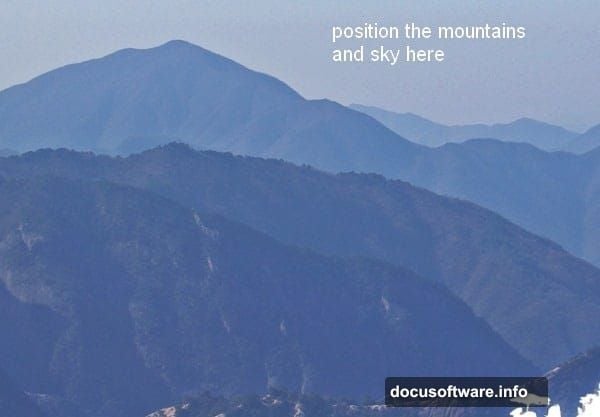
Open your sky stock photo next. Grab the Rectangular Marquee Tool (M) and draw a selection around the sky portion you want. Then switch to the Move Tool (V) and drag that selection straight onto your white canvas.
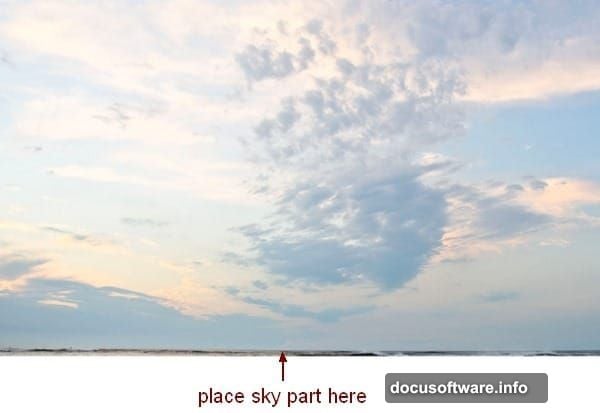
Position it toward the top. This becomes your background foundation that everything else builds on.
Step 2: Add the Misty Mountain Background
Open your background mountain stock. Place the misty mountain section at the sky layer, and don’t resize it yet — keep the original scale for now.
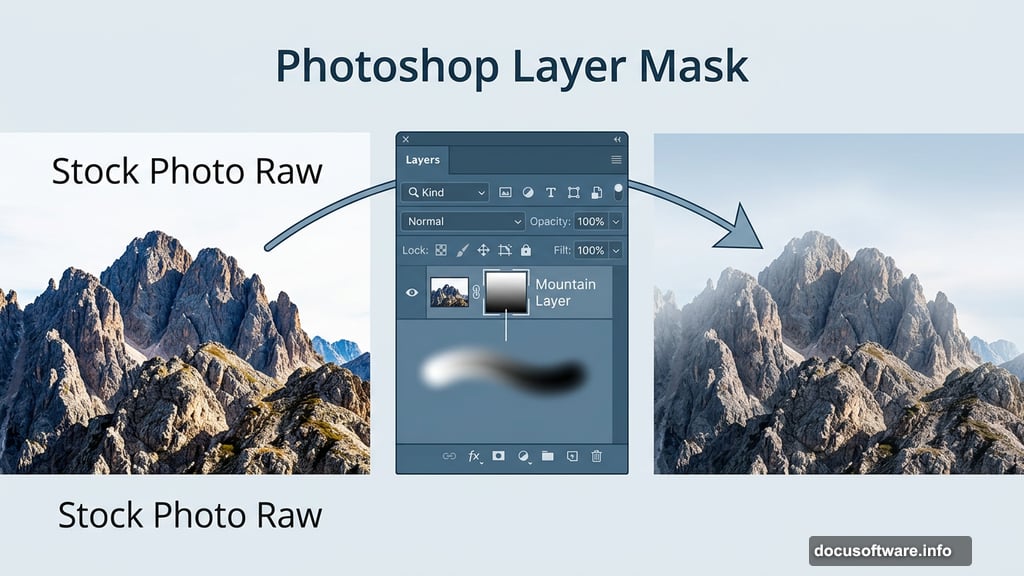
Here’s where layer masks earn their reputation. Click the second button at the bottom of the Layer Panel to add a mask to this mountain layer. Then grab a soft black brush at around 250-260 pixels and paint over the top of the mountains. This reveals the sky you placed in Step 1, creating a natural fade between the two images.
Soft brushes make this blend feel organic rather than harsh. Take your time here — this transition sets the tone for the whole painting.
Step 3: Match the Mountain Colors to Your Sky
Raw stock photos rarely match each other straight out of the box. The mountains might look too saturated or too dark compared to your sky. Adjustment layers with Clipping Masks solve this beautifully.
With your background mountain layer selected, go to New Layer > New Adjustment Layer > Hue/Saturation. Pull the saturation down slightly. Then add a Curves adjustment layer and brighten the midtones. Clip both layers to the mountain layer so they only affect that specific element.
This is one of the most useful habits in photo manipulation. Clipped adjustment layers mean you can tweak individual elements without accidentally changing everything else.
Step 4: Place and Shape the Mid Rocks
Open your mid rocks stock and extract the rocks from their background. Place them in the middle section of your composition.
Right-click the layer and choose Convert to Smart Object. Then hit Cmd/Ctrl+T to resize and position them where they feel natural. Converting to Smart Object first means you can resize without permanently losing image quality — always worth doing before you transform anything.
Now add a layer mask to this layer. Use the Polygonal Lasso Tool (L) to select the left corner and the rock on the right side that you want to remove. On the layer mask, paint those selected areas with a black brush to hide them. The rocks you want disappear cleanly, leaving only the shapes that serve your composition.
Step 5: Color Correct and Darken the Rocks
Stock photos of rocks tend to look flat. A few stacked adjustment layers fix that fast.
Add a Hue/Saturation layer to shift the color temperature slightly. Follow that with a Curves layer to deepen the shadows. Then add a Color Balance layer to push the tones toward cooler blues and greens — this helps the rocks feel like they belong in a misty mountain environment.
One more detail that makes a real difference: use a soft black brush at about 40% opacity and paint on the Curves mask at the very top of the rocks. This softens the darkening effect there, since rocks naturally catch more light from the sky above. Subtle, but it reads as realistic.
Step 6: Deepen the Rock Shadows in Front
Create a new layer set as a Clipping Mask above the rocks. Grab a soft brush loaded with color #7a7e7e and paint over the front-facing surfaces of the rocks. Avoid the top and middle sections where light would hit naturally.
Then change this layer’s blending mode to Multiply at 80% opacity. The gray paint in Multiply mode darkens the rocks convincingly, pushing them forward visually and adding depth to the whole scene.
This technique works on almost any element in matte painting. A clipped Multiply layer gives you precise shadow control without permanently altering the original image underneath.
Why These Techniques Matter Beyond This Project
Layer masks, adjustment layers, and Smart Objects aren’t just tools for this one painting. They’re the foundation of non-destructive editing — meaning you can change your mind at any point without destroying work you’ve already done.
Every professional photo manipulation workflow builds on these same concepts. Once you’re comfortable with them, more complex projects stop feeling overwhelming and start feeling like the same familiar toolkit applied at larger scale.
The matte painting technique specifically is worth practicing if you have any interest in concept art, film production design, or game environment work. Studios still use Photoshop-based matte painting heavily, and the ability to blend multiple photographic sources convincingly is a genuinely marketable skill.
Keep following the remaining steps to add waterfalls, mist, trees, arches, and ruins. Each element uses variations of the same core techniques introduced here. By the end, you’ll have a full cinematic landscape and a toolkit you can apply to your own original compositions.