
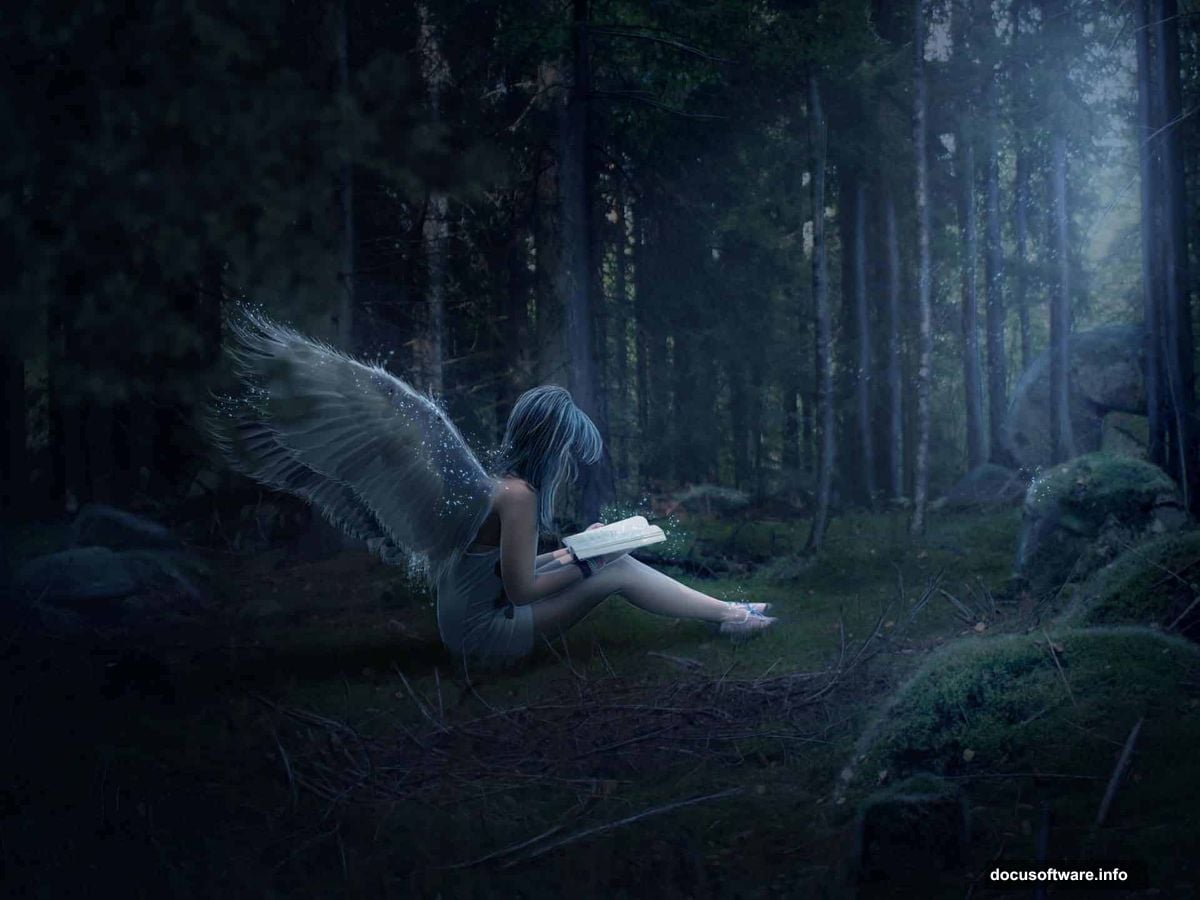
Fantasy photo manipulation is one of the most rewarding things you can do in Photoshop. You start with a plain forest photo, and by the end, you’ve got a glowing, atmospheric night scene with an angel reading a book under shafts of ethereal light.
This tutorial walks you through exactly how to pull that off. You’ll learn how to turn a daylight forest into a moody night scene, build convincing shadow layers, composite a model with beautiful wings, and finish with color grading that ties everything together. Let’s get into it.
Setting Up Your Canvas and Importing the Dark Forest
First things first. Create a new file at 1600×1200 pixels. This gives you plenty of room to work without things feeling cramped.
Place your dark forest stock image onto the canvas and position it so it fills the frame nicely. Don’t worry about perfection at this stage. You’ll be adjusting everything as you build up the scene layer by layer.
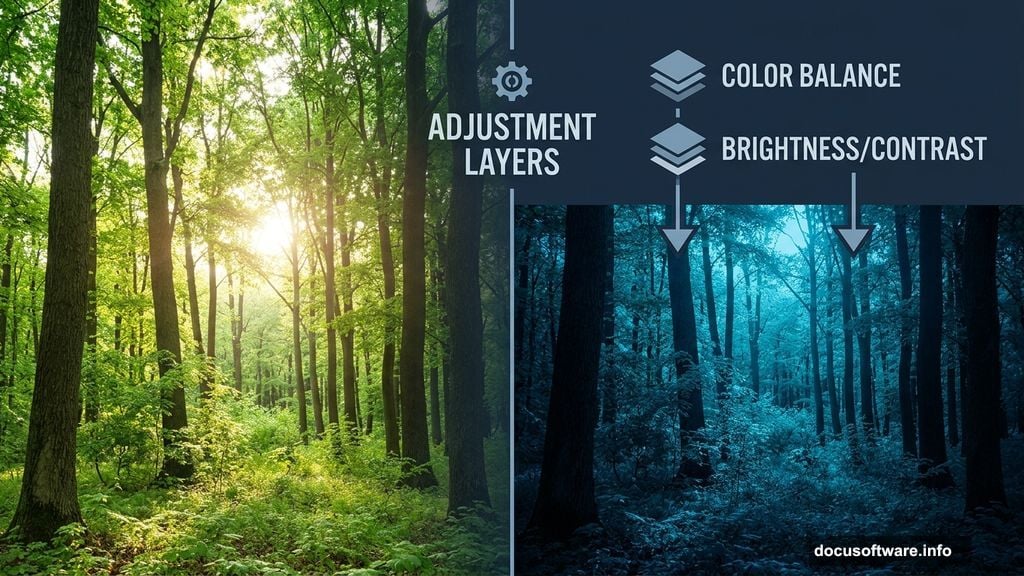
Turning Day Into Night With Adjustment Layers
Now comes the fun part: making it feel like night.
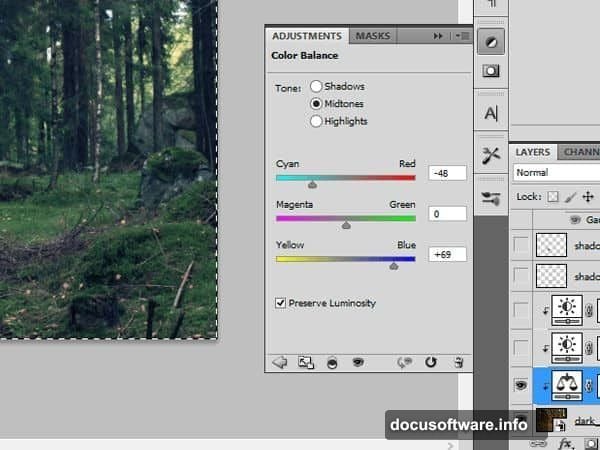
Add a Color Balance adjustment layer and dial in the settings to push the image toward cooler, darker tones. Blue and cyan shifts work really well here. They immediately start selling that nighttime mood.
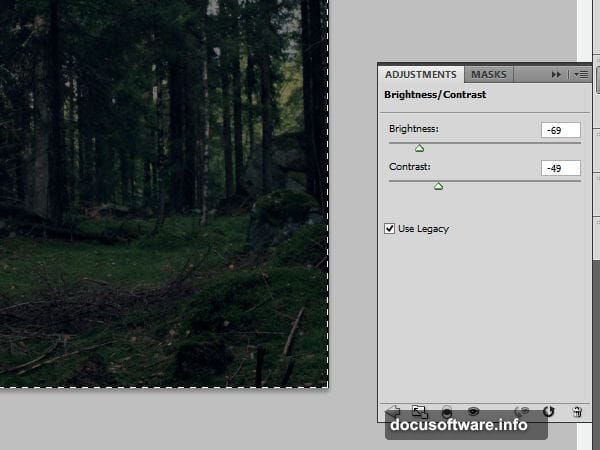
Next, add a Brightness/Contrast adjustment layer and pull the brightness down significantly. This starts building that deep, shadowy atmosphere that makes the whole scene feel mysterious.
Building Depth With Shadow Layers
This is where a lot of tutorials skip ahead too fast, so pay close attention.
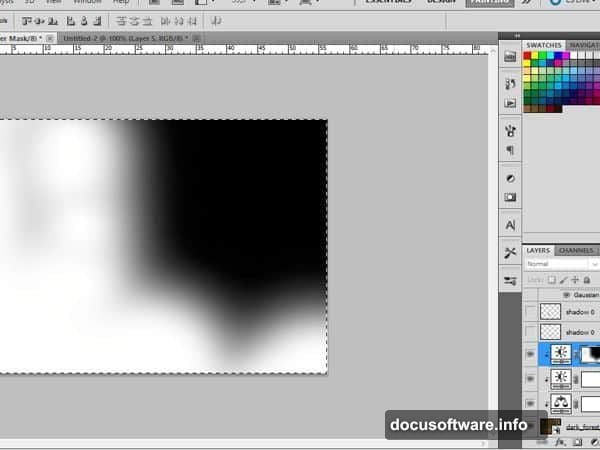
Add another Brightness/Contrast adjustment layer specifically for shadows. Then, on that layer’s mask, grab a soft brush and paint selectively. You’re darkening only certain areas of the forest, which adds depth and directs the viewer’s eye toward where the angel will sit.
Think of it like stage lighting. You’re deliberately controlling which parts of the scene stay dark and which parts will catch the light later.
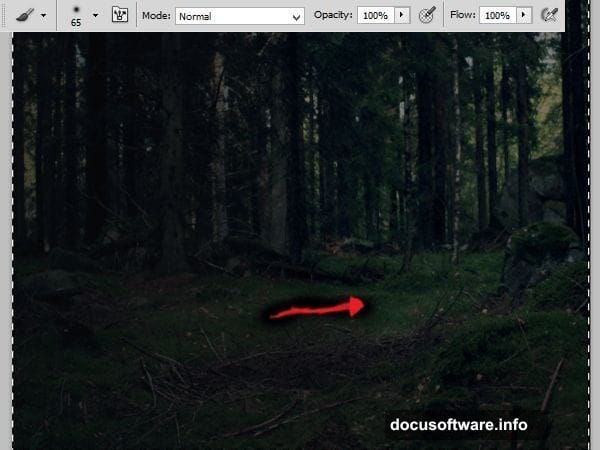
Creating Ground Shadows for the Angel
Before placing your model, you need to prep the ground so she looks like she actually belongs there. This multi-step shadow process is what separates convincing composites from obvious ones.
Start by adding a new layer and painting with a soft round brush at 65 pixels. Follow the shape of where her body will sit. Then apply a Gaussian Blur of about 37 pixels to soften the edge completely. Change the blending mode to Multiply and drop the opacity to 60%.
Add another new layer. Use your soft round brush in a dark gray (#373737) at 123 pixels for a large base shadow dot. Then switch to a smaller brush at 23 pixels in a lighter gray (#898989) and add detail. Blur this layer with Gaussian Blur at about 9.7 pixels.
Keep going with the same technique. Add one more layer for the area beneath where the wings will land. Soft round brush, 65 pixels, 60% opacity, then blur it. Yes, there are several shadow layers. But each one adds a different quality of shadow depth that you simply cannot fake with one layer alone.
Masking the Model Into the Scene
Now place your model in the center of the composition. This is where Photoshop masking skills really matter.
For the body outline, use a hard brush to get clean, sharp edges. Switch to a soft brush for the hair, where edges naturally blend and feather. Don’t stress about the grass at the bottom of the image yet. That gets handled in later steps.
Good masking is patient work. Zoom in, take your time, and check edges against the background as you go.
Adding Shadows and Color Grading to the Model
A freshly masked model will always look pasted in without proper color grading. She needs to match the environment.
Add a Brightness/Contrast adjustment layer clipped to the model and darken her down. The light in this scene comes from the upper right corner, so everything else should fall into shadow. Use a soft brush on the mask to reveal that shadow effect naturally across her body.
Then add a Color Balance adjustment layer. Shift her tones toward the cool blues and teals that dominate the forest. This is what makes her feel like she’s actually standing in that night scene rather than dropped onto it from a different photo.
Follow that with one more Brightness/Contrast layer for finer control. Getting the model’s luminosity to match the background is the single most important thing for a convincing composite.
Placing the Wings and Blending Them In
Place your wing stock onto the canvas and start experimenting with positioning. Try different combinations and flip or transform the wings until they sit naturally behind the model’s shoulders.
Wings from stock photography often need quite a bit of work to blend properly. Use masking to hide hard edges, and pay attention to where light would naturally catch the feathers. If your scene has light coming from the upper right, the top edges of the wings should catch that light while the undersides stay in shadow.
This experimentation stage is genuinely enjoyable. There’s no single correct answer here. Play with scale, rotation, and positioning until it clicks.
Final Color Grading and Light Effects
With all elements in place, it’s time to bring the whole image together with final color grading and those gorgeous light shafts that make the scene magical.

Light shafts in Photoshop typically come from painting soft white or pale yellow strokes on a new layer set to Screen blending mode. Position them coming from the upper portion of the frame, angled down through the trees. Keep the opacity low and layer multiple strokes to build a convincing beam of light.
Add a final Color Balance adjustment layer over everything and push the overall image toward that cohesive cool, blue-tinted night palette. Then use Brightness/Contrast to finalize the contrast so your angel figure pops against the darker forest background.
Corner leaf overlays add a finishing touch to frame the composition. Place them in the corners and blend with Multiply or Overlay modes at reduced opacity.
Step back and look at the whole piece. The forest feels like night. The shadows anchor the figure to the ground. The wings have depth and dimension. And those light shafts make the whole scene feel genuinely magical.
Photo manipulation like this takes practice, but each technique here builds directly on the last. Master the shadow layering approach, and you’ll use it in every composite you ever make.