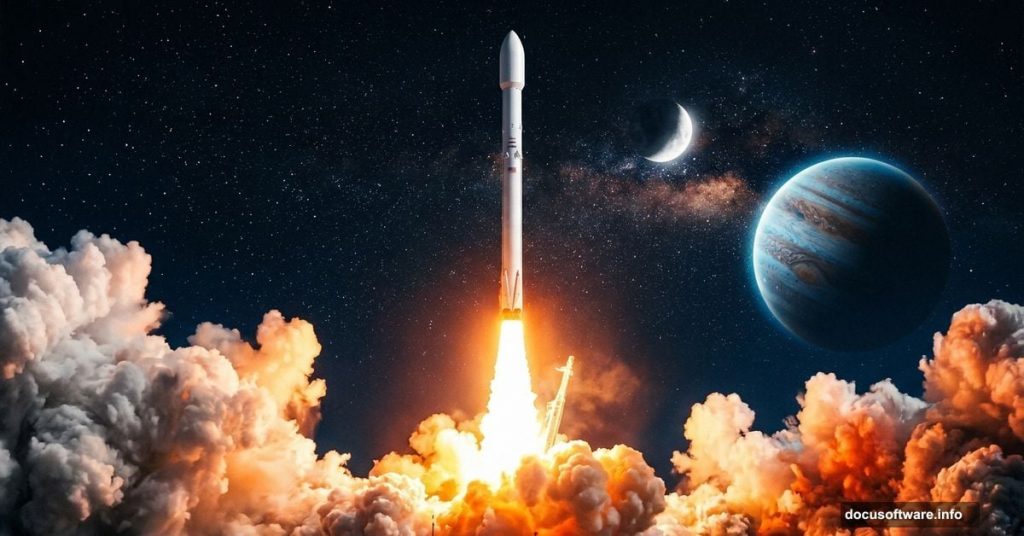
There’s something magnetic about a rocket launch. That explosive moment of fire, smoke, and pure human ambition breaking free from gravity — it’s one of the most visually dramatic scenes you can recreate in Photoshop. And the good news? You don’t need to be a photo manipulation wizard to pull it off.
This tutorial walks you through building a realistic rocket launch composite step by step. You’ll combine a model, sky, planet, moon, stars, clouds, and atmospheric effects into one cohesive, cinematic scene. By the end, you’ll have a technique you can apply to all kinds of space-themed compositions.
Let’s get into it.
Setting Up Your Canvas
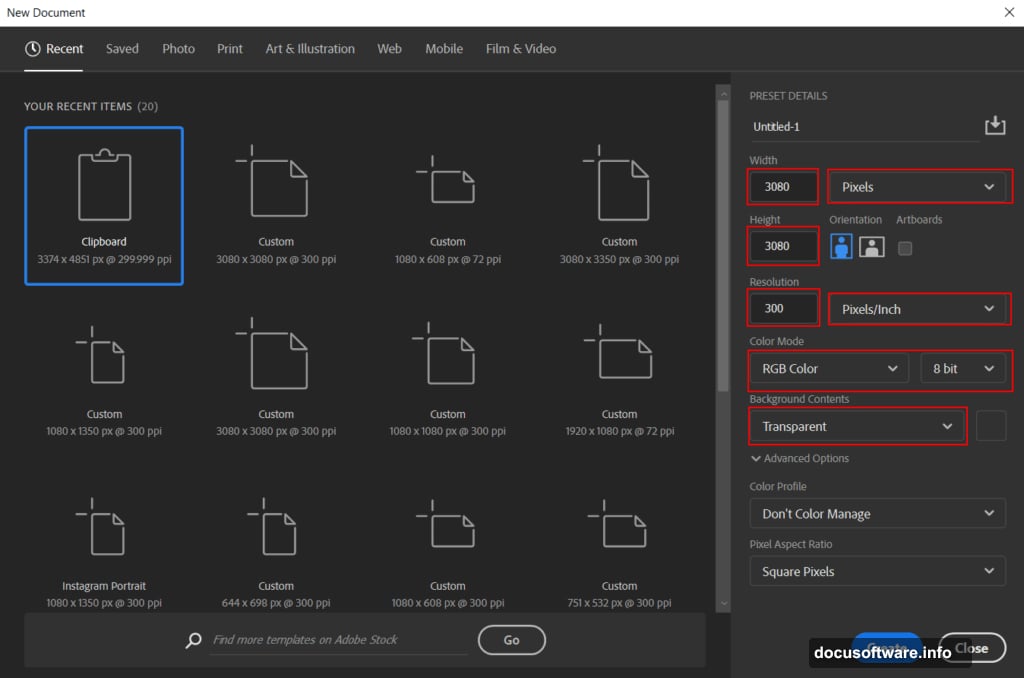
First things first — you need a workspace built for high-quality output. Open Photoshop and head to File > New.
Enter these settings:
- Preset: Custom
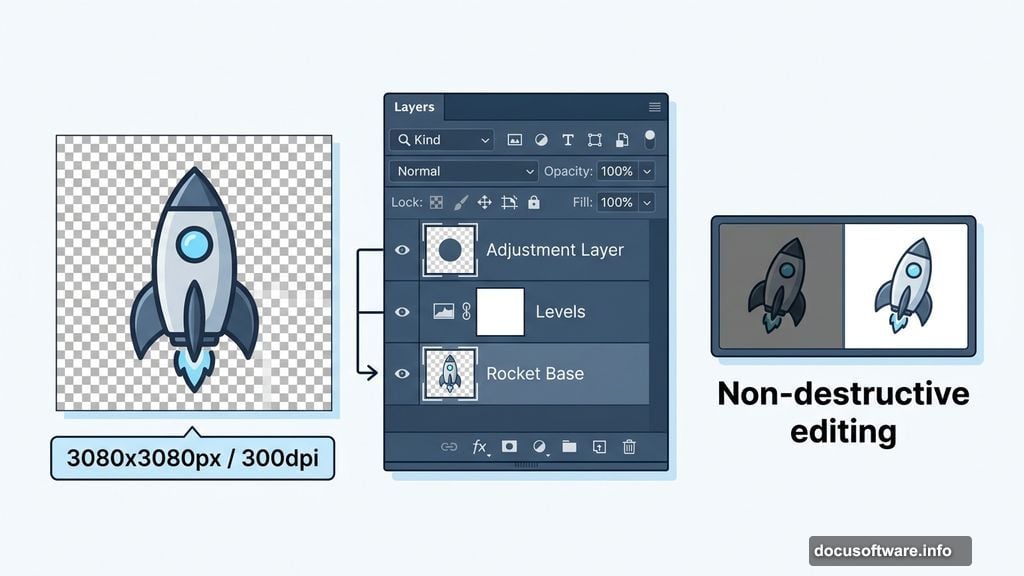
- Width: 3080px
- Height: 3080px
- Resolution: 300 dpi
- Color Mode: RGB Color, 8-bit
- Background Contents: Transparent
That 300 dpi resolution matters if you ever plan to print this piece. Plus, working large gives you flexibility to crop and adjust without losing quality.
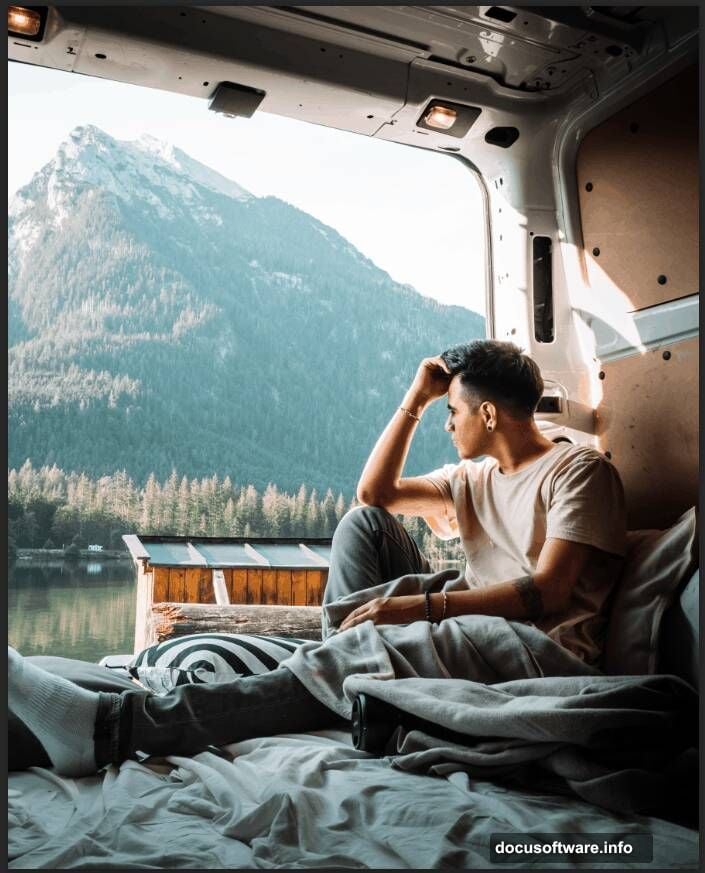
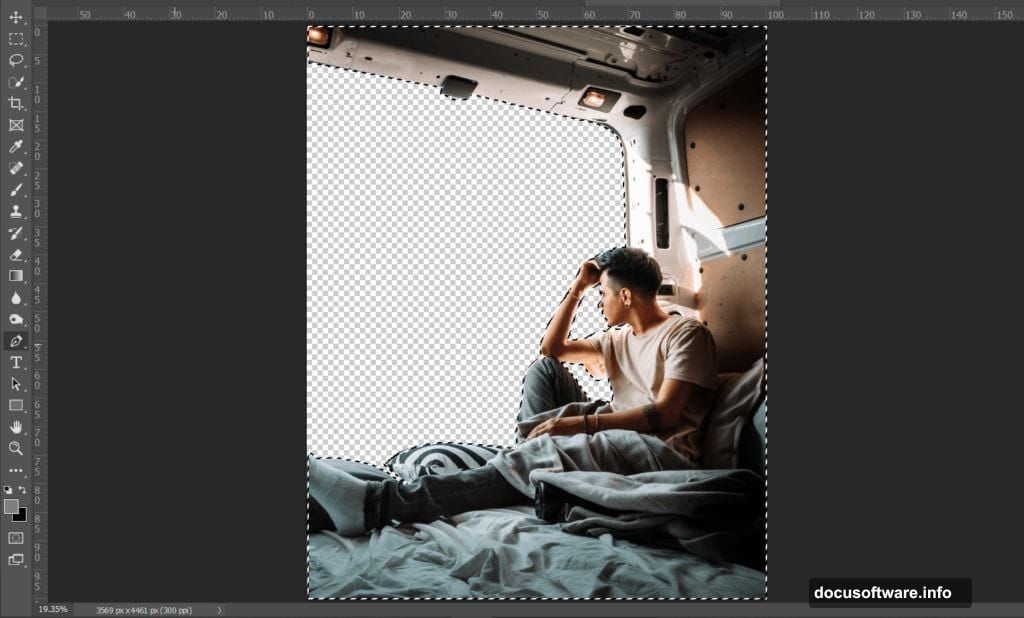
Cutting Out Your Rocket Model
Now it’s time to bring in your rocket. Go to File > Open and load your model image.
For a clean, professional cutout, the Pen Tool (P) is your best friend here. Yes, it takes patience. But no other selection method gives you this level of precision on hard-edged objects like rockets and machinery.
Here’s how to use it effectively:
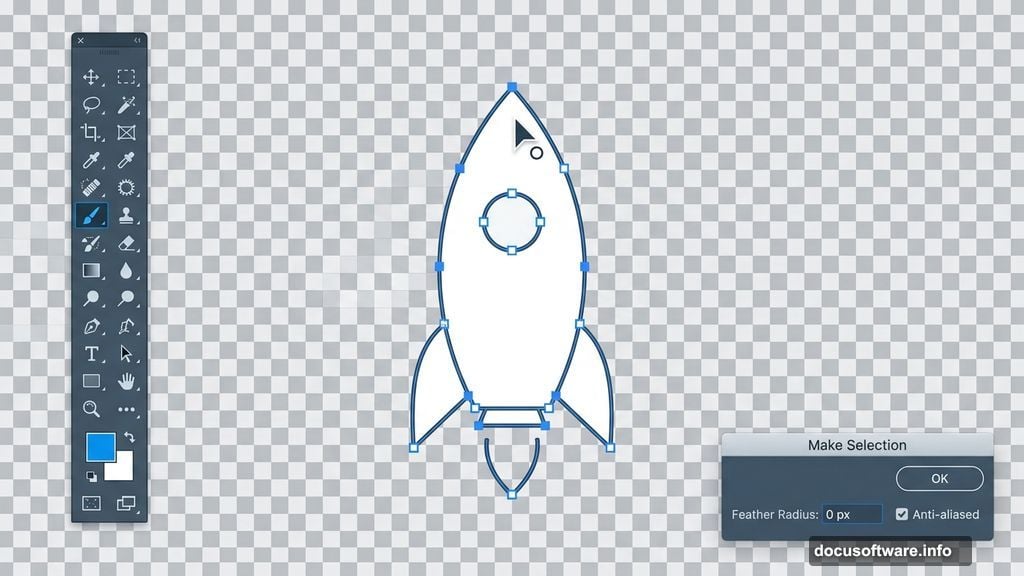
Click once to place your first anchor point at the edge of the rocket. Then click again along the edge to create your next point. Keep clicking around the entire outline, letting straight segments connect your anchor points. The active anchor point shows as a solid square, while completed ones turn hollow as you move along.
To close your path, hover back over that very first anchor point. You’ll see a small circle appear next to your cursor. Click to close the loop.
Once your path is complete, right-click and choose Make Selection. Set your Feather Radius to 0px and check Anti-aliased for clean edges.
Now copy (Ctrl/Cmd + C) and paste (Ctrl/Cmd + V) the rocket onto your working canvas. Use the Transform Tool (Ctrl/Cmd + T) to resize and position it. In older Photoshop versions, hold Alt + Shift to scale proportionally. In Photoshop CC, just hold Alt and all sides scale together.
Sculpting Light and Shadow With Adjustment Layers
This is where your rocket starts looking like it actually belongs in the scene rather than being pasted on top of it. Adjustment layers are non-destructive, so you can always go back and tweak.
Step 3 — Levels: Add a Levels adjustment layer clipped to your rocket layer. This gives you control over the overall brightness and contrast range. Drag the shadow and highlight sliders inward until the tonal range feels punchy and natural.
Step 4 — Highlights Curve: Add a Curves adjustment layer, then press Ctrl/Cmd + I to invert the mask to black. This hides the effect everywhere. Now grab a soft, round Brush (B) with white as your foreground color and paint over the areas where light should hit — typically the upper and side surfaces facing your light source. The effect only appears where you paint, giving you precise control.
Step 5 — Shadow Curve: Add another Curves adjustment layer and invert the mask the same way. This time, paint white over the darker recessed areas of the rocket. Pull the curve down slightly to deepen shadows. Together, these two curve layers create a convincing sense of three-dimensional form.
Step 6 — Color Balance: Add a Color Balance adjustment layer. Shift the tones toward cooler blues and cyans in the shadows, and warmer oranges in the highlights. This helps unify the rocket with the space environment you’re about to build around it.
Dropping In the Sky and Background
With your rocket looking solid, it’s time to build the world behind it.
Go to File > Place and bring in your sky photo. Here’s the key move: drag this layer below your rocket layer in the Layers panel. You want the sky to sit behind everything else.
Use the Transform Tool (Ctrl/Cmd + T) to scale and position the sky so it fills the canvas. In Photoshop CC, hold Alt while transforming to scale from all sides simultaneously.
Next, place your planet and moon images using the same method. Position them where they feel compositionally balanced — often slightly off-center creates more visual interest than dead center. Scale the planet large enough to feel imposing but not so large it dominates the entire frame.
For your stars, either place a stars photo or use your stars brush set to scatter them realistically across the upper portions of the sky. Real star fields aren’t uniform, so vary your brush size slightly as you paint.
Blending Everything With Atmosphere
Right now your layers probably look like separate pieces. That’s normal. This next stage is where the magic happens.
Add clouds using your cloud brushes around the base of the rocket. Real launches produce enormous billowing smoke clouds that catch the light dramatically. Paint these on a new layer below the rocket but above the sky. Use a large, soft brush at lower opacity and build up the volume gradually rather than laying it all down at once.
Next, add fog layers. Create a new layer and use a soft round brush with a very low opacity — around 10 to 15 percent — to paint atmospheric haze. This is especially effective near the horizon line and around the edges of the planet. Atmosphere makes distant objects look slightly washed out, and that subtle effect sells the realism.
Gradient maps add another layer of cohesion. Add a Gradient Map adjustment layer at the top of your stack set to a warm orange-to-deep-blue gradient. Set the blend mode to Soft Light and drop the opacity to around 20 to 30 percent. This tints the entire composition with a unified color temperature that ties all your separate elements together.
The Final Polish With Camera Raw
For your last finishing touch, flatten your layers or merge them into a single smart object, then go to Filter > Camera Raw Filter.
Inside Camera Raw, you have cinematic control at your fingertips. Boost the clarity slightly to add crispness to the rocket details. Increase vibrance rather than saturation for richer colors that don’t blow out. Add a subtle vignette in the Effects panel to draw the eye toward the center of the scene.
Play with the HSL sliders to push your blues deeper and your oranges warmer. A slight curve S-shape adds contrast without making shadows muddy. Finally, add a touch of grain in the Effects panel — it sounds counterintuitive, but a small amount of film grain makes digital composites look considerably more organic and less artificially smooth.
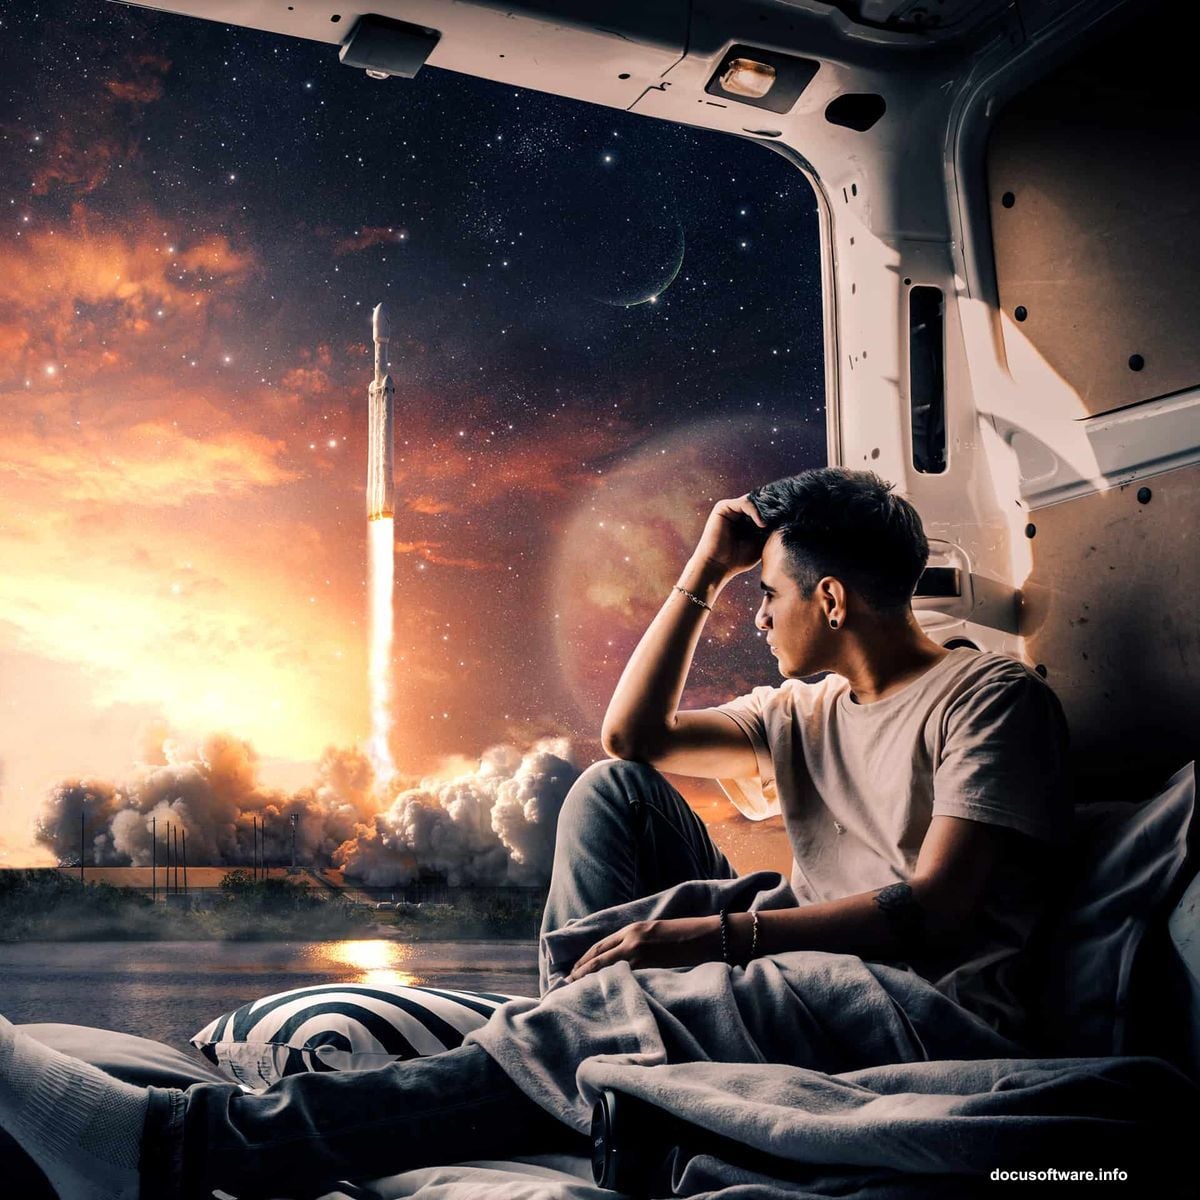
Bringing It All Together
Rocket launch composites reward patience. Each individual step — the careful pen tool selection, the hand-painted light and shadow, the layered atmosphere — contributes something subtle that you might not notice in isolation. But together, they create a scene that feels genuinely believable.
The technique you’ve built here transfers directly to other space composites. Astronauts, spacecraft, alien landscapes, re-entry scenes — all of them follow the same core logic of careful cutouts, sculpted lighting, and atmospheric layering.
Save your PSD with all layers intact. You’ll want to come back and adjust the planet size, shift the color balance, or experiment with different sky backgrounds. The non-destructive workflow means nothing is ever truly locked in, and that creative flexibility is what makes Photoshop compositing so addictive.