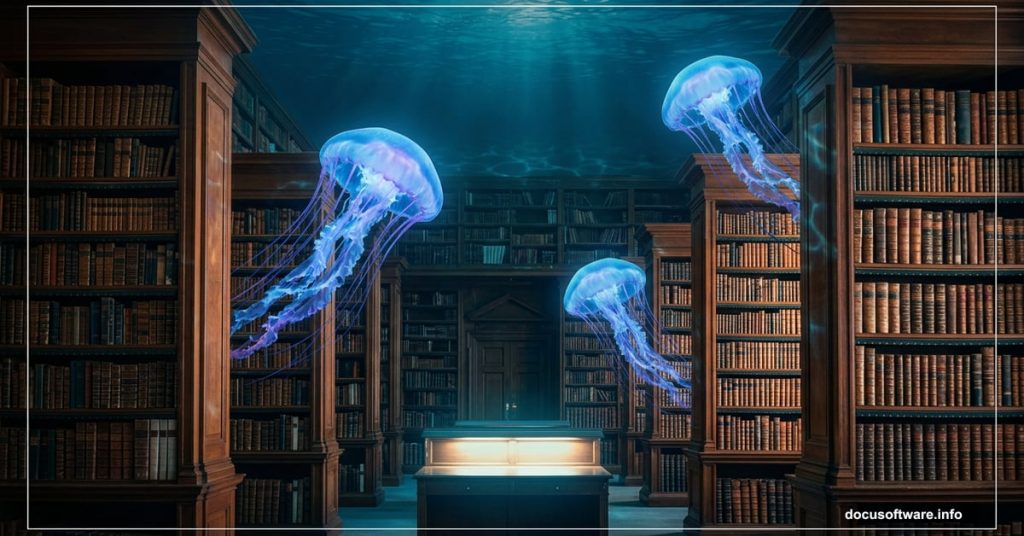
There’s something magical about combining two worlds that have no business being together. A grand library. An underwater aquarium. Jellyfish drifting past bookshelves.
This tutorial walks you through building exactly that kind of surreal photo manipulation from scratch. You’ll learn how to blend a library interior with water elements, add jellyfish and fish, then polish everything with light effects and a Camera Raw filter finish.
Setting Up Your Canvas
First things first. Open Photoshop and create a new document.
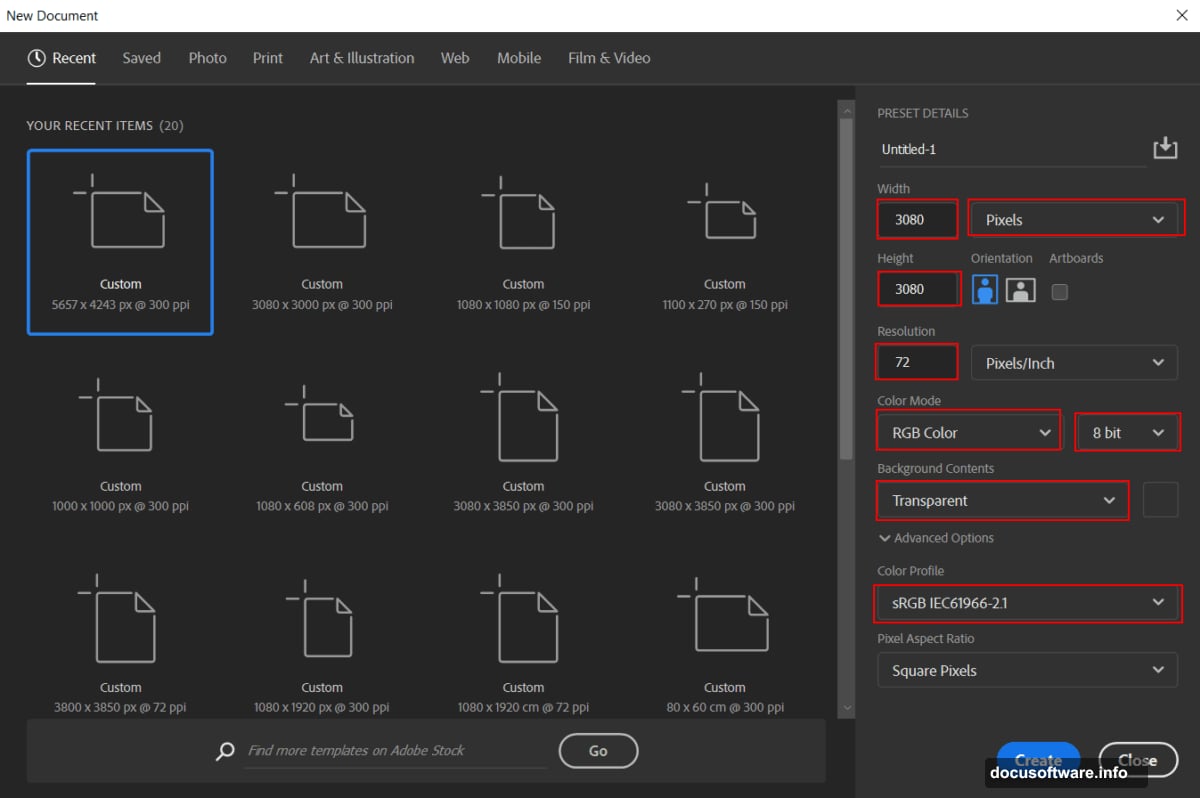
Go to File > New and enter these settings:
- Preset: Custom
- Width: 3080px
- Height: 3080px
- Resolution: 72px
- Color Mode: RGB Color, 8 bit
- Background Contents: Transparent
That square canvas gives you plenty of room to work. Plus, the transparent background keeps your options open as you build up layers.
Placing the Library and Masking the Roof
Next, bring in your library image. Go to File > Place and select your library photo. Position it on the canvas using the Transform tool (Ctrl/Cmd + T).
Hold Alt + Shift to resize from the center while keeping proportions intact. If you’re on Photoshop CC, just hold Alt and all sides scale together automatically.
Now comes the masking part. This is where you isolate the library’s roof area so water can sit naturally on top of it.
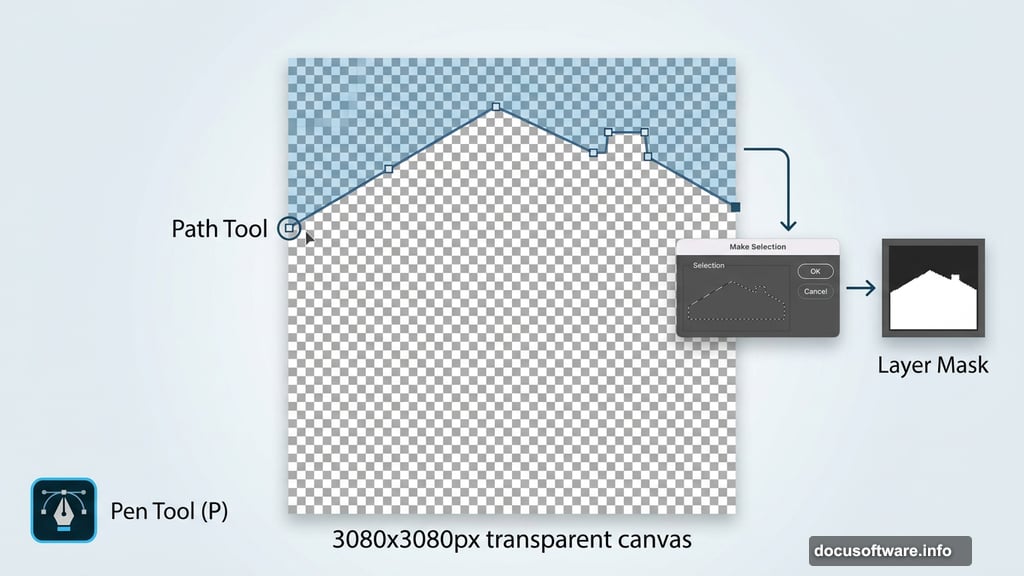
Grab the Pen Tool (P). This tool draws precise paths using anchor points, which makes it perfect for clean architectural edges like a roofline.
Here’s how to use it:
To draw straight lines with the Pen Tool:
- Click once to place your first anchor point where the roof begins
- Click again at the next corner to set the second point
- Keep clicking to trace along the roof edge
- The most recently placed point always shows as a solid square. Older points appear hollow
- To close the path, hover back over your starting point until a small circle appears beside the cursor, then click
- To leave the path open instead, hold Ctrl (Windows) or Command (Mac) and click anywhere away from the path
Once your path traces the roof cleanly, right-click and choose Make Selection. Then add a Layer Mask to hide everything outside that selection.
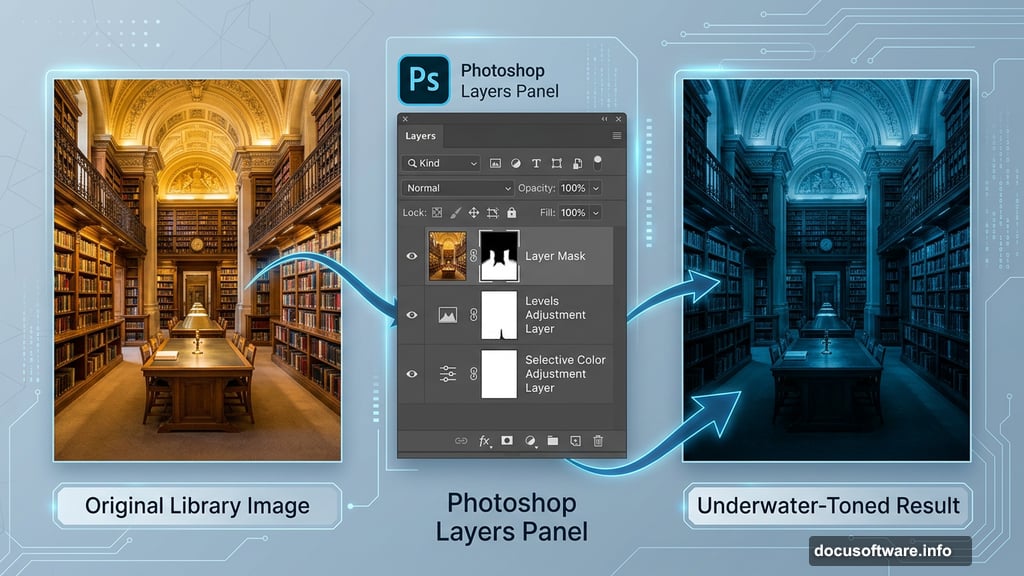
Adding Adjustment Layers for Mood
This is where the library starts feeling like it’s underwater. Adjustment layers stack on top of your image and shift color, contrast, and tone without permanently changing pixels.
Step 3 – Levels
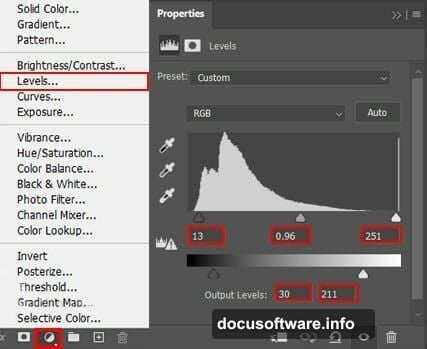
Add an Adjustment Layer for Levels. This controls the overall brightness range of your image. Pull the shadow and midtone sliders to darken the scene and give it that deep, dim aquarium feel.
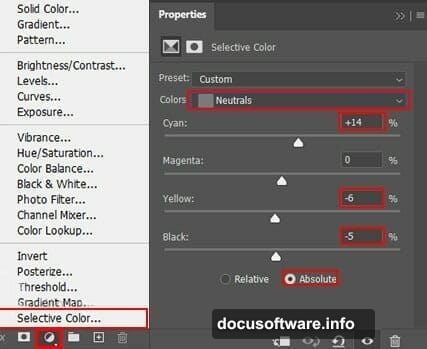
Step 4 – Selective Color
Add a Selective Color adjustment layer. Use this to push cooler tones into the shadows and neutralize warm yellows. Libraries typically have warm light, so you need to counteract that for a convincing underwater look.
Step 5 – Curves with Brush Masking
Add a Curves adjustment layer and pull the curve down to darken things further. Then select the mask on this layer, pick a Soft Round brush with black as your foreground color, and paint over the upper and middle sections of the library.
Why paint on the mask? Because painting black hides the adjustment in those areas. So you control exactly where the darkening hits.
Step 6 – Color Fill Layer
Repeat a similar process with a Solid Color Fill layer set to black. With your brush set to a soft round tip, Flow at 10%, paint gradually over the upper and middle portions of the library. The low flow setting builds up density slowly, giving you smooth, natural-looking shadows.
Painting in Highlights and Deep Shadows
Now you refine the light so the scene feels three-dimensional.
Step 7 – Highlights
Add another Curves adjustment layer. Press Ctrl/Cmd + I to invert the mask, turning it completely black. This hides the adjustment everywhere by default.
Switch to a Soft Round brush with white as your foreground color. Paint over the areas where light would naturally bounce, window frames, shelf edges, architectural details. White reveals the adjustment only where you paint, so your highlights stay targeted and controlled.
Step 8 – Deep Shadows
Add one more Curves adjustment layer and invert the mask again. This time, paint with white over the darkest recesses of the scene. Corners, the space behind shelves, anywhere that should feel submerged in murky depth.
The combination of Steps 7 and 8 gives your image dimensional lighting that sells the aquarium illusion long before you add a single fish.
What Comes Next
You’ve built the foundation. The library is darkened, color-shifted, and lit like something sitting at the bottom of a tank.
The next stages bring in the water roof element, layer in the fish and jellyfish assets, scatter bubbles through the scene, and add the final Camera Raw filter to unify everything with color grading and atmospheric haze.
Take your time with the masking in these early steps. Clean edges on the roof selection make every water and creature element look like it genuinely belongs inside the space.
The adjustment layer approach also means nothing is destructive. You can revisit any layer and tweak until the mood feels exactly right.
Photo manipulation like this works because you’re not just pasting images together. You’re building a consistent light story that makes the viewer’s brain accept something impossible as completely real. That’s the whole fun of it.